Case 1. TV

Quick Setup Guide


Guide de configuration rapide


Guía de configuración rápida


SMART Signage TV

Step1 ~ 4

Step2 Stand Installation

Installation du support / Instalación del soporte


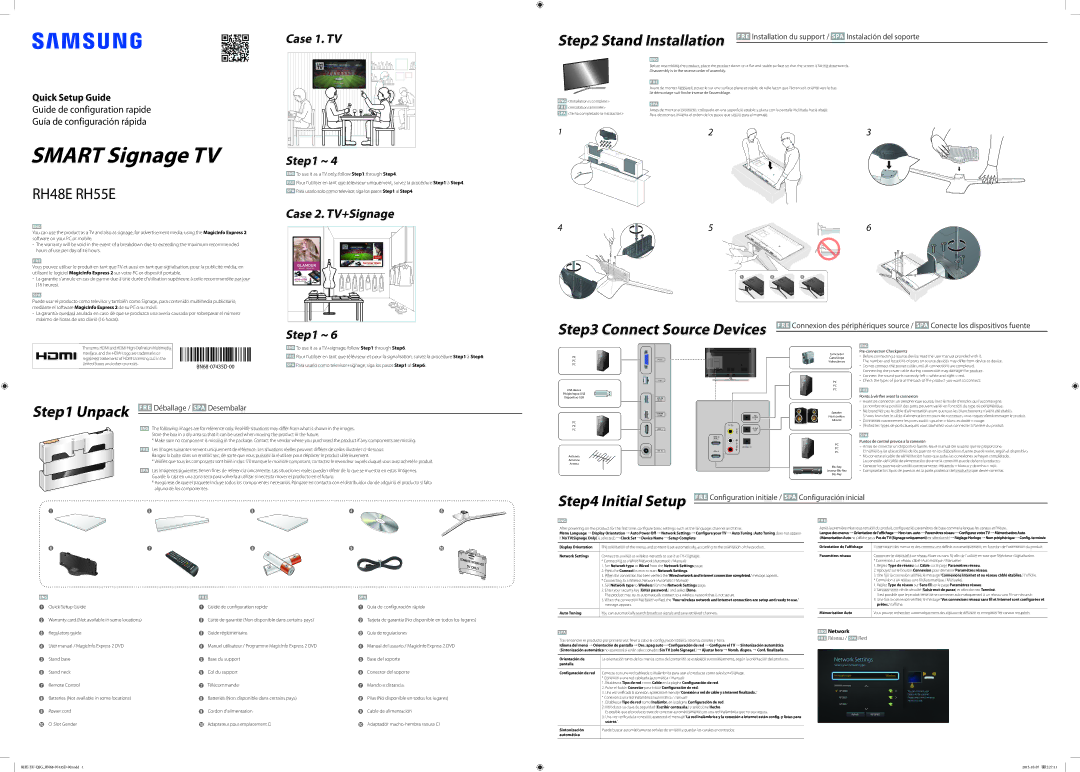
Before assembling the product, place the product down on a flat and stable surface so that the screen is facing downwards.

Disassembly is in the reverse order of assembly.

Avant de monter l'appareil, posez-le sur une surface plane et stable, de telle façon que l'écran soit orienté vers le bas.

Le démontage suit l’ordre inverse de l’assemblage.


<Installation is complete>


<Installation terminée>

Antes de montar el producto, colóquelo en una superficie estable y plana con la pantalla inclinada hacia abajo.


<Se ha completado la instalación>


Para desmontar, invierta el orden de los pasos que siguió para el montaje.


1


2

3

RH48E RH55E

You can use the product as a TV and also as signage, for advertisement media, using the MagicInfo Express 2 software on your PC or mobile.

-The warranty will be void in the event of a breakdown due to exceeding the maximum recommended hours of use per day of 16 hours.

Vous pouvez utiliser le produit en tant que TV et aussi en tant que signalisation, pour la publicité média, en utilisant le logiciel MagicInfo Express 2 sur votre PC or dispositif portable.

-La garantie s'annule en cas de panne due à une durée d'utilisation supérieure à celle recommandée par jour (16 heures).

Puede usar el producto como televisor y también como Signage, para contenido multimedia publicitario, mediante el software MagicInfo Express 2 de su PC o su móvil.

-La garantía quedará anulada en caso de que se produzca una avería causada por sobrepasar el número máximo de horas de uso diario (16 horas).

To use it as a TV only, follow Step1 through Step4.

Pour l’utiliser en tant que téléviseur uniquement, suivez la procédure Step1 à Step4.

Para usarlo solo como televisor, siga los pasos Step1 al Step4.

Case 2. TV+Signage

4

5

6

Connexion des périphériques source / Conecte los dispositivos fuente


Step1 ~ 6


To use it as a TV+signage, follow Step1 through Step6.


The terms HDMI and HDMI High-Definition Multimedia


Interface, and the HDMI Logo are trademarks or


Pour l’utiliser en tant que téléviseur et pour la signalisation, suivez la procédure Step1 à Step6.


registered trademarks of HDMI Licensing LLC in the


United States and other countries.


BN68-07435D-00


Para usarlo como televisor+signage, siga los pasos Step1 al Step6.


Step1 Unpack

Déballage / Desembalar


The following images are for reference only. Real-life situations may differ from what is shown in the images. Store the box in a dry area so that it can be used when moving the product in the future.

* Make sure no component is missing in the package. Contact the vendor where you purchased the product if any components are missing.

Les images suivantes servent uniquement de référence. Les situations réelles peuvent différer de celles illustrées ci-dessous. Rangez la boîte dans un endroit sec, de sorte que vous puissiez la réutiliser pour déplacer le produit ultérieurement.

* Vérifiez que tous les composants sont bien inclus. S'il manque le moindre composant, contactez le revendeur auprès duquel vous avez acheté le produit.

Las imágenes siguientes tienen fines de referencia únicamente. Las situaciones reales pueden diferir de lo que se muestra en estas imágenes. Guarde la caja en una zona seca para volverla a utilizar si necesita mover el producto en el futuro.

*Asegúrese de que el paquete incluye todos los componentes necesarios. Póngase en contacto con el distribuidor donde adquirió el producto si falta alguno de los componentes.

Step3 Connect Source Devices

PC

PC

PC IN


PC


LAN


USB device


Périphérique USB


Dispositivo USB

USB


(0.5A)


USB


(1.0A)


PC


AUDIO


IN

PC


AV IN


PC


AUDIO

PC

HDMI 1

VIDEO

OUT


HDMI 2


(ARC)


L


AUDIO

RS232C IN


ANT IN

R


HDMI 3


Antenna


Antenne


Antena


Camcorder

Pre-connection Checkpoints

-

Before connecting a source device, read the user manual provided with it.

Caméscope


The number and locations of ports on source devices may differ from device to device.

Videocámara


-Do not connect the power cable until all connections are completed. Connecting the power cable during connection may damage the product.

-Connect the sound ports correctly: left = white and right = red.

PC

-

Check the types of ports at the back of the product you want to connect.


PC


PC


Points à vérifier avant la connexion


-

Avant de connecter un périphérique source, lisez le mode d'emploi qui l'accompagne.


Le nombre et la position des ports peuvent varier en fonction du type de périphérique.

Speaker

-

Ne branchez pas le câble d'alimentation avant que tous les branchements n'aient été établis.


Si vous branchez le câble d'alimentation en cours de connexion, vous risquez d'endommager le produit.

Haut-parleur


Altavoz

-

Connectez correctement les ports audio : gauche = blanc et droite = rouge.


-

Vérifiez les types de ports auxquels vous souhaitez vous connecter à l'arrière du produit.


PC

Puntos de control previos a la conexión

-

Antes de conectar un dispositivo fuente, lea el manual del usuario que se proporcione.

PC


El número y las ubicaciones de los puertos en los dispositivos fuente puede variar, según el dispositivo.

PC


-

No conecte el cable de alimentación hasta que todas las conexiones se hayan completado.


La conexión del cable de alimentación durante la conexión puede dañar el producto.

Blu-Ray

-

Conecte los puertos de sonido correctamente: izquierda = blanco y derecha = rojo.

Lecteur Blu-Ray

-

Compruebe los tipos de puertos en la parte posterior del producto que desee conectar.

Blu-Ray


1

2

3

4

5

Step4 Initial Setup

Configuration initiale / Configuración inicial


6

7

8

9

0

1

Quick Setup Guide

1

Guide de configuration rapide

1

Guía de configuración rápida

2

Warranty card (Not available in some locations)

2

Carte de garantie (Non disponible dans certains pays)

2

Tarjeta de garantía (No disponible en todos los lugares)

3

Regulatory guide

3

Guide réglementaire

3

Guía de regulaciones

4

User manual / MagicInfo Express 2 DVD

4

Manuel utilisateur / Programme MagicInfo Express 2 DVD

4

Manual del usuario / MagicInfo Express 2 DVD

5

Stand base

5

Base du support

5

Base del soporte

6

Stand neck

6

Col du support

6

Conector del soporte

7

Remote Control

7

Télécommande

7

Mando a distancia

8

Batteries (Not available in some locations)

8

Batteries (Non disponible dans certains pays)

8

Pilas (No disponible en todos los lugares)

9

Power cord

9

Cordon d'alimentation

9

Cable de alimentación

0

CI Slot Gender

0

Adaptateur pour emplacement CI

0

Adaptador macho-hembra ranura CI

After powering on the product for the first time, configure basic settings such as the language, channel and time.

Menu Language Display Orientation Auto Power Off Network Settings Configure your TV Auto Tuning (Auto Tuning does not appear if No TV(Signage Only) is selected.) → Clock Set Device Name Setup Complete

Display Orientation

The orientation of the menus and content is set automatically, according to the orientation of the product.

Network Settings

Connect to a wired or wireless network to use it as TV+Signage.


* Connecting to a Wired Network (Automatic / Manual)


1.

Set Network type to Wired from the Network Settings page.


2.

Press the Connect button to start Network Settings.


3.

When the connection has been verified, the“Wired network and Internet connection completed.” message appears.


* Connecting to a Wireless Network (Automatic / Manual)


1.

Set Network type to Wireless from the Network Settings page.


2.

Enter your security key (Enter password.) and select Done.


The product may try to automatically connect to a wireless network that is not secure.


3. When the connection has been verified, the “Your wireless network and Internet connection are setup and ready to use.


message appears.

Auto Tuning

You can automatically search broadcast signals and save retrieved channels.

Tras encender el producto por primera vez, lleve a cabo la configuración básica: idioma, canales y hora.

Idioma del menú Orientación de pantalla Des. apag auto Configuración de red Configure el TV Sintonización automática (Sintonización automática no aparecerá si están seleccionados Sin TV (solo Signage).) → Ajustar hora Nomb. dispos. Conf. finalizada

Orientación de

La orientación tanto de los menús como del contenido se establece automáticamente, según la orientación del producto.

pantalla


Configuración de red Conecte con una red cableada o inalámbrica para usar el producto como televisor+Signage. * Conexión a una red cableada (automática / manual)

1.Establezca Tipo de red como Cable en la página Configuración de red.

2.Pulse el botón Conectar para iniciar Configuración de red.

3.Una vez verificada la conexión, aparecerá el mensaje“Conexión a red de cable y a Internet finalizada.”.

* Conexión a una red inalámbrica (automática / manual)

1.Establezca Tipo de red como Inalámbr. en la página Configuración de red.

2.Introduzca su clave de seguridad (Escribir contrasña.) y seleccione Hecho.

Es posible que el producto trate de conectar automáticamente con una red inalámbrica que no sea segura.

3.Una vez verificada la conexión, aparecerá el mensaje “La red inalámbrica y la conexión a Internet están config. y listas para usarse.”.

Après la première mise sous tension du produit, configurez les paramètres de base comme la langue, les canaux et l'heure.

Langue des menus Orientation de l'affichage Hors ten. auto Paramètres réseau Configurer votreTV Mémorisation Auto

(Mémorisation Auto ne s'affiche pas si Pas deTV (Signage uniquement) est sélectionné.) →Réglage Horloge Nom périphérique Config. terminée

Orientation de l'affichage

L'orientation des menus et des contenus est définie automatiquement, en fonction de l'orientation du produit.

Paramètres réseau

Connectez le dispositif à un réseau filaire ou sans fil, afin de l’utiliser en tant que Téléviseur+Signalisation.


* Connexion à un réseau câblé (Automatique / Manuelle)


1. Réglez Type de réseau sur Câble sur la page Paramètres réseau.


2. Appuyez sur le bouton Connexion pour démarrer Paramètres réseau.


3.

Une fois la connexion vérifiée, le message “Connexions Internet et au réseau câblé établies.” s'affiche.


* Connexion à un réseau sans fil (Automatique / Manuelle)


1.

Réglez Type de réseau sur Sans fil sur la page Paramètres réseau.


2.

Saisissez votre clé de sécurité (Saisir mot de passe) et sélectionnez Terminé.


Il est possible que le produit tente de se connecter automatiquement à un réseau sans fil non sécurisé.


3.

Une fois la connexion vérifiée, le message “Vos connexions réseau sans fil et Internet sont configurées et


prêtes.” s'affiche.

Mémorisation Auto

Vous pouvez rechercher automatiquement des signaux de diffusion et enregistrer les canaux récupérés.

Network

Réseau / Red

Sintonización

Puede buscar automáticamente señales de emisión y guardar los canales encontrados.

automática


RHE-EU-QSG_BN68-07435D-00.indd 1

2015-10-07 ￿￿ 2:27:11

Page 1
Image 1
Samsung LH55RHEELGW/EN manual Set Network type to Wired from the Network Settings, Auto Tuning, Orientación de

LH55RHEELGW/XE, LH55RHEELGW/EN, LH48RHEELGW/EN specifications

The Samsung LH55RHEELGW/XE is a cutting-edge LED display designed for commercial use, boasting a range of impressive features and technologies that cater to a variety of business needs. With its 55-inch screen, this display offers a large canvas for visuals, making it ideal for retail spaces, corporate environments, and event venues.

One of the standout features of the LH55RHEELGW/XE is its high resolution. The display presents sharp and vivid images with a Full HD resolution of 1920 x 1080 pixels. This ensures that content is crystal clear, making it particularly effective for showcasing promotional materials and important information. The ultra-narrow bezels contribute to a seamless viewing experience, allowing for the creation of video walls that can enhance any environment without distracting from the content being displayed.

Samsung has integrated advanced technologies to further enhance the performance of the LH55RHEELGW/XE. The display is equipped with HDR (High Dynamic Range) capabilities, which enhance color accuracy and contrast, resulting in images that pop with radiance and depth. Coupled with a wide color gamut, this technology allows for the reproduction of lifelike colors, making presentations and advertisements more engaging.

Durability is another key characteristic of this display. The Samsung LH55RHEELGW/XE is designed for continuous operation, making it suitable for 24/7 usage in environments that require constant display of content. It is also built to withstand the rigors of public usage, featuring a protective glass layer that shields the screen from accidental impacts and scratches.

For ease of use, the LH55RHEELGW/XE comes with a range of connectivity options. It supports HDMI, DisplayPort, and USB inputs, allowing for various sources to be connected seamlessly. Additionally, Samsung's MagicINFO software provides intuitive content management capabilities. Users can schedule and control their content remotely, ensuring that displays can be updated with minimal effort.

Overall, the Samsung LH55RHEELGW/XE is a versatile and high-performing display tailored for professional settings. Its crystal-clear resolution, vibrant colors, robust durability, and user-friendly management features make it an excellent choice for businesses looking to elevate their visual communication strategy.