Installation
Installation
STEP 4 Connect the water line (optional)
Connect the water line to the ice maker. For the ice maker to operate properly, a water pressure of
![]() CAUTION
CAUTION
Do not reuse an old hose set. Use the new hose sets supplied with your refrigerator only.
•The water line installation is not covered by the Warranty of this product. Read carefully through these instructions to protect your property and prevent possible damage.
•Banging pipes (water banging in the pipes) can cause damage to the refrigerator, and lead to water leakage or flooding. If you encounter this problem, contact a plumber for professional assistance.
•To prevent burns and product damage, do not connect the water line to a hot water source.
•Do not install the water line in areas where temperatures fall below the freezing point.
•When using any electrical device (such as a motorized drill) during installation, be sure the device is insulated and properly grounded to prevent electric shock.
•All installations must be in accordance with local plumbing code requirements.
•The water filter must be replaced as instructed by the manufacturer or the retailer.
•To purchase additional water filters, contact the manufacturer or the retailer of the filter.
![]() NOTE
NOTE
•You can purchase the water line installation kit from your retailer. We recommend using a kit that contains copper tubing and a 6 mm compression nut.
•In an area with low water pressure (below 20 psi), you can install a booster pump to compensate for the low pressure.
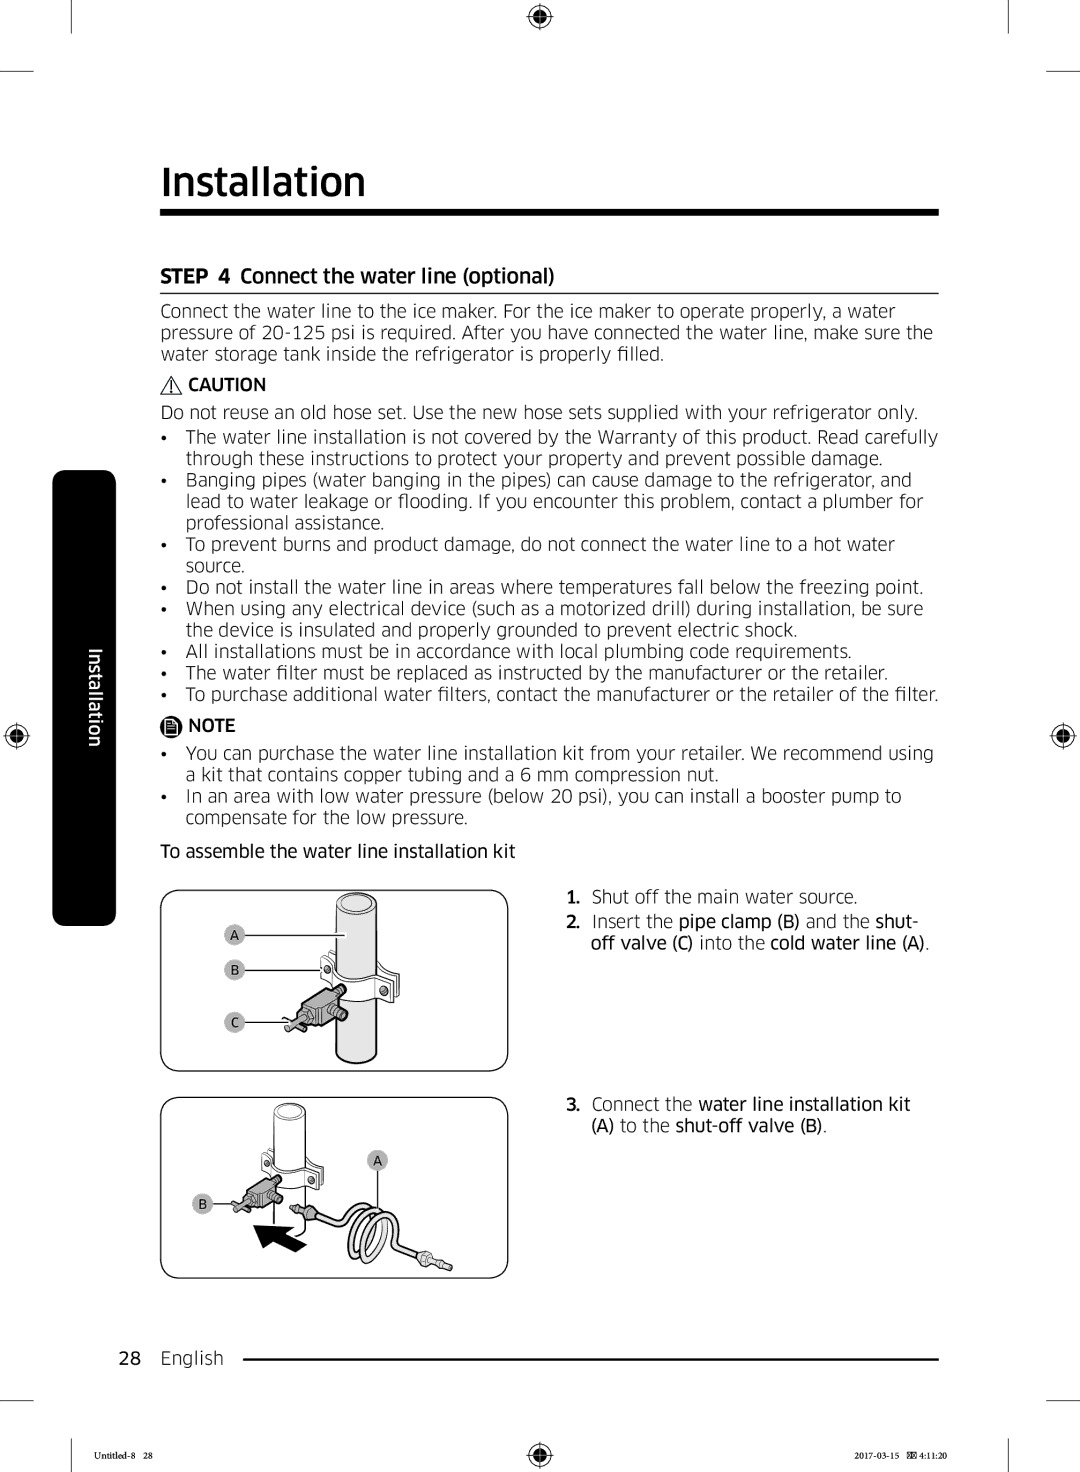
To assemble the water line installation kit
A![]()
![]()
B![]()
![]()
C![]()
![]()
![]()
![]()
![]()
1.Shut off the main water source.
2.Insert the pipe clamp (B) and the shut- off valve (C) into the cold water line (A).
3. Connect the water line installation kit
(A) to the
A
B ![]()
![]()
![]()
![]()
![]()
![]()
![]()
28 English