ENGLISH
Advanced Recording
● TV DISPLAY |
|
|
|
|
|
|
|
| ● TV DISPLAY | |||||
| ✤ The TV DISPLAY function works in CAMERA, PLAYER, M.REC | ✤ |
|
|
| |||||||||
| and M.PLAY modes. |
|
|
|
|
|
|
|
|
|
| |||
| ✤ You can select the output path of the OSD (On Screen Display). | ✤ |
|
|
| |||||||||
| ■ OFF: The OSD appears in the LCD screen only. |
|
|
|
|
|
| ■ | OFF | |||||
| ■ ON: The OSD appears in the LCD screen, VIEWFINDER and |
| ■ | ON | ||||||||||
| TV. |
|
|
|
|
|
| ■ |
|
|
| |||
| ■ Use the DISPLAY button located at the left side of the camcorder |
|
|
|
|
| ||||||||
| to turn ON/OFF all of the OSD displayed on the |
|
|
|
|
|
|
|
|
|
| |||
| LCD/VIEWFINDER/TV. |
|
|
|
|
|
|
|
|
|
| |||
|
|
|
|
|
|
|
|
|
|
|
| 1. | ||
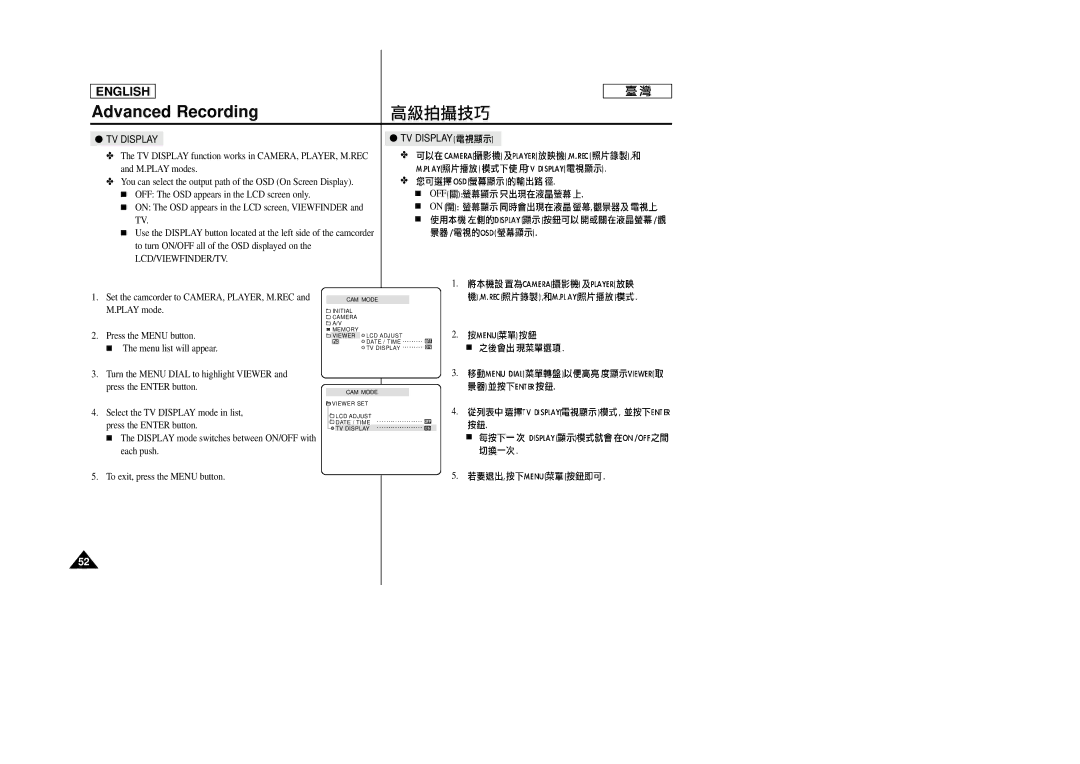
1. Set the camcorder to CAMERA, PLAYER, M.REC and |
|
|
|
|
|
|
|
|
|
| ||||
|
|
| CAM MODE |
|
|
|
|
| ||||||
| M.PLAY mode. |
|
| INITIAL |
|
|
|
|
| |||||
|
|
|
|
|
|
|
| |||||||
|
|
|
|
|
| CAMERA |
|
|
|
|
| |||
|
|
|
|
|
|
|
|
|
|
| ||||
|
|
|
|
|
| A/V |
|
|
|
|
| |||
|
|
|
|
|
|
|
|
|
|
| ||||
2. | Press the MENU button. |
| MEMORY |
|
| 2. | ||||||||
| VIEWER | LCD ADJUST | ||||||||||||
| ■ The menu list will appear. |
|
|
|
| DATE / TIME |
|
| ■ | |||||
|
|
|
|
| TV DISPLAY |
|
| |||||||
|
|
|
|
|
|
| ||||||||
3. Turn the MENU DIAL to highlight VIEWER and |
|
|
|
|
|
|
| 3. | ||||||
| press the ENTER button. |
|
|
|
|
|
|
|
|
|
| |||
|
|
|
| CAM MODE |
|
|
|
|
| |||||
|
|
|
|
|
|
|
|
|
|
|
|
| ||
|
|
|
|
|
| VIEWER SET |
|
| 4. | |||||
|
|
|
|
|
|
| ||||||||
4. | Select the TV DISPLAY mode in list, |
|
| LCD ADJUST |
|
| ||||||||
| press the ENTER button. |
|
| DATE / TIME |
|
|
|
|
| |||||
|
|
|
|
|
|
|
| |||||||
|
|
| TV DISPLAY |
|
|
|
|
| ||||||
| ■ The DISPLAY mode switches between ON/OFF with |
|
|
|
|
|
|
|
|
| ■ | |||
| each push. |
|
|
|
|
|
|
|
|
|
| |||
5. | To exit, press the MENU button. |
|
|
|
|
|
|
| 5. | |||||
52
