INITIAL SETTING : TIME ZONE, DATE AND TIME & OSD LANGUAGE
•Initial setting is available in all operating modes.
•To read the menus or messages in your desired language, set the OSD language.
•To store the date and time during recording, set the time zone and date/time.
Turning the power on and setting the date and time
Set the date and time when using the camcorder for the fi rst time.
If you do not set date and time, the date and time (time zone) screen appears every time you turn on your camcorder.
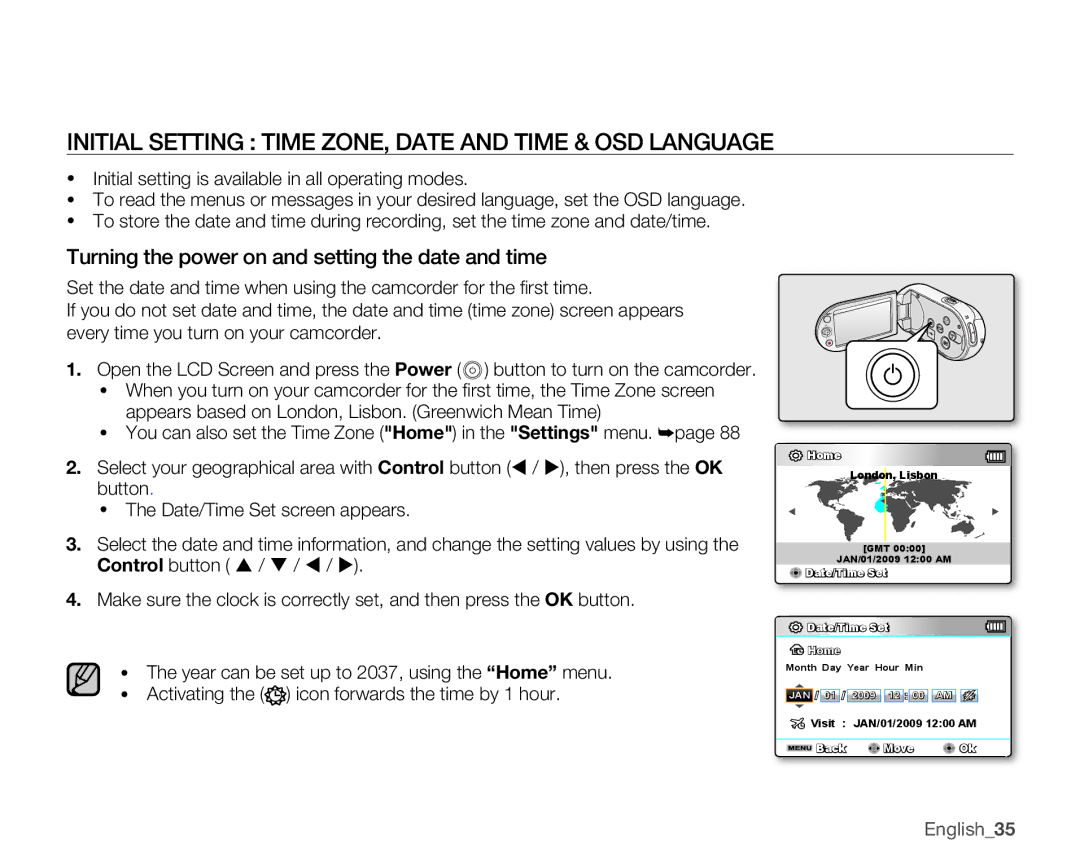
1.Open the LCD Screen and press the Power ( ![]() ) button to turn on the camcorder.
) button to turn on the camcorder.
•When you turn on your camcorder for the fi rst time, the Time Zone screen appears based on London, Lisbon. (Greenwich Mean Time)
•You can also set the Time Zone ("Home") in the "Settings" menu. ➥page 88
2.Select your geographical area with Control button ( / ), then press the OK button.
•The Date/Time Set screen appears.
3.Select the date and time information, and change the setting values by using the Control button ( / / / ).
4.Make sure the clock is correctly set, and then press the OK button.
•The year can be set up to 2037, using the “Home” menu.
•Activating the (![]() ) icon forwards the time by 1 hour.
) icon forwards the time by 1 hour.
~
{
![]() Home
Home
London, Lisbon
[GMT 00:00]
JAN/01/2009 12:00 AM
![]() Date/Time Set
Date/Time Set
![]() Date/Time Set
Date/Time Set
![]() Home
Home
Month Day Year Hour Min
JAN / 01 / 2009 ![]()
![]() 12 : 00
12 : 00 ![]()
![]() AM
AM ![]()
![]()
![]() Visit :
Visit :![]()
![]() JAN/01/2009 12:00 AM
JAN/01/2009 12:00 AM
![]() Back
Back ![]() Move
Move ![]() Ok
Ok