
SNH-1010N specifications
The Samsung SNH-1010N, also known as the Samsung SmartCam WiFi Home Security Camera, is an innovative device designed to enhance home security through advanced video surveillance features. This camera is ideal for those seeking a robust yet user-friendly solution for monitoring their homes.One of the standout features of the Samsung SmartCam SNH-1010N is its high-definition video quality. The camera provides 720p HD resolution, ensuring clear and detailed images, which can be crucial for identifying faces or other details. In addition to high-quality video, it comes equipped with a 130-degree wide-angle lens, allowing users to cover more area in a single frame.
Equipped with night vision capabilities, the Samsung SmartCam excels in low-light conditions. It utilizes infrared LED technology to provide visibility up to 15 feet in total darkness, ensuring that users can monitor their environments around the clock. This ensures that even in the absence of light, the camera continues to perform effectively.
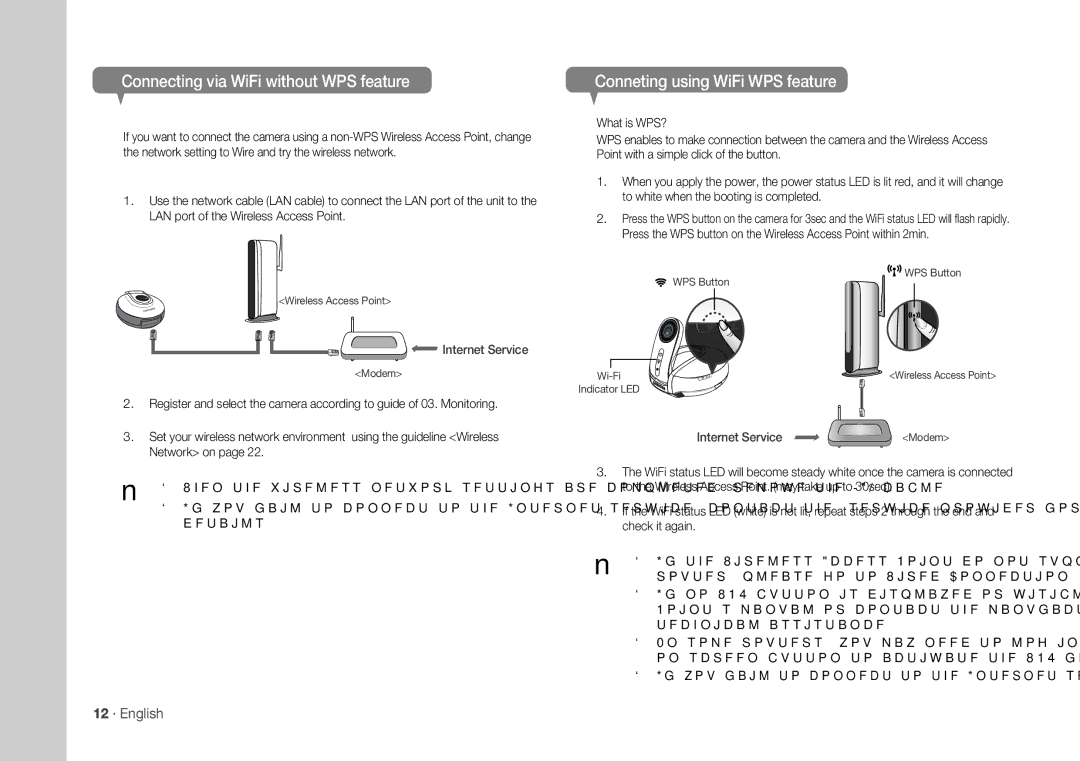
Connectivity is another crucial aspect of the SmartCam's design. It operates on secure WiFi networks, allowing users to access live video feeds remotely via a smartphone app. Compatible with both iOS and Android devices, this feature enables homeowners to monitor their properties from virtually anywhere. Real-time notifications and alerts for detected motion add an extra layer of security, keeping users informed about any unusual activity.
The Samsung SmartCam SNH-1010N also features two-way audio. This allows users to communicate with family members or pets remotely through the camera, adding convenience and interaction. The built-in microphone and speaker enable clear audio transmission, enriching the overall user experience.
Installation and setup are straightforward, thanks to the camera's user-friendly design. It can be easily mounted on walls or placed on surfaces, and the included setup guide simplifies the process for users of all technical levels.
In terms of storage, the SmartCam supports cloud storage as well as local storage options through a microSD card, giving users flexibility in managing their video recordings.
Overall, the Samsung SmartCam SNH-1010N offers a comprehensive solution for modern home security needs. With its HD video quality, night vision, remote access features, and two-way audio, this camera is an excellent investment for anyone looking to enhance their home surveillance capabilities. Its combination of technology and ease of use makes it a top choice in the realm of home security cameras.