3-3 Remote Control
![]() Using your projector with another remote control device nearby may result in improper functioning due to remote control code (frequency) interference.
Using your projector with another remote control device nearby may result in improper functioning due to remote control code (frequency) interference.
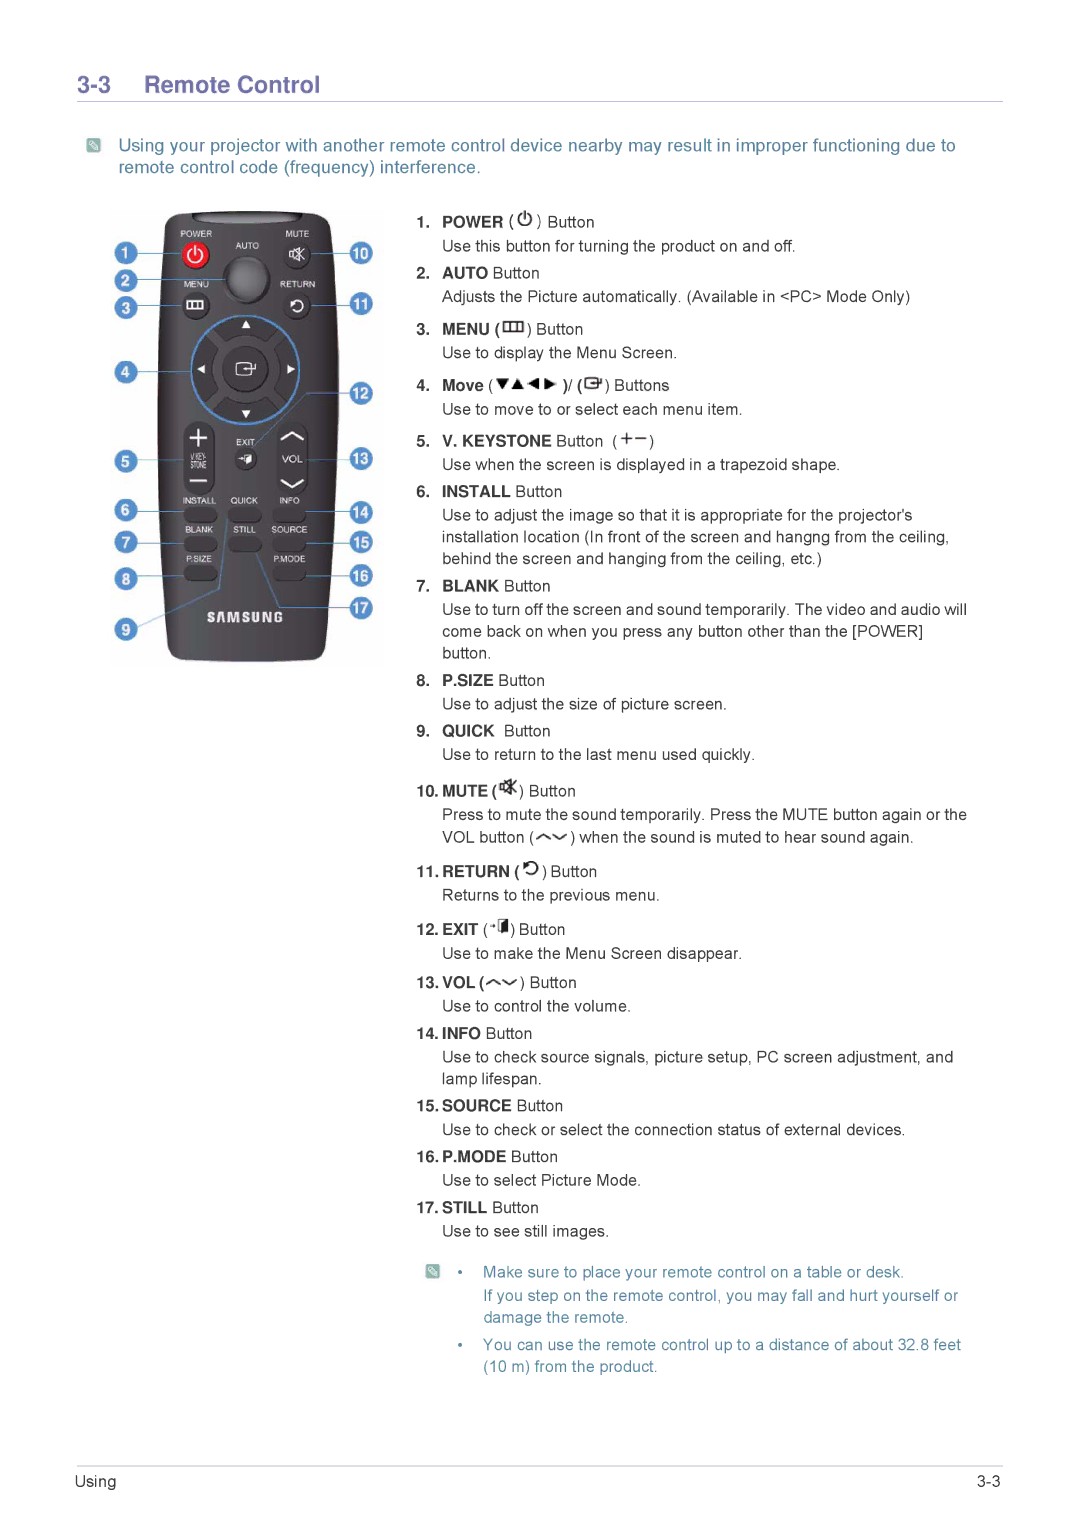
1.POWER ( ![]() ) Button
) Button
Use this button for turning the product on and off.
2.AUTO Button
Adjusts the Picture automatically. (Available in <PC> Mode Only)
3.MENU (![]() ) Button
) Button
Use to display the Menu Screen.
4.Move ( ![]() )/ (
)/ (![]() ) Buttons
) Buttons
Use to move to or select each menu item.
5.V. KEYSTONE Button (![]() )
)
Use when the screen is displayed in a trapezoid shape.
6.INSTALL Button
Use to adjust the image so that it is appropriate for the projector's installation location (In front of the screen and hangng from the ceiling, behind the screen and hanging from the ceiling, etc.)
7.BLANK Button
Use to turn off the screen and sound temporarily. The video and audio will come back on when you press any button other than the [POWER] button.
8.P.SIZE Button
Use to adjust the size of picture screen.
9.QUICK Button
Use to return to the last menu used quickly.
10.MUTE ( ![]() ) Button
) Button
Press to mute the sound temporarily. Press the MUTE button again or the
VOL button ( ![]() ) when the sound is muted to hear sound again.
) when the sound is muted to hear sound again.
11.RETURN (![]() ) Button Returns to the previous menu.
) Button Returns to the previous menu.
12.EXIT ( ![]() ) Button
) Button
Use to make the Menu Screen disappear.
13.VOL (![]() ) Button
) Button
Use to control the volume.
14.INFO Button
Use to check source signals, picture setup, PC screen adjustment, and lamp lifespan.
15.SOURCE Button
Use to check or select the connection status of external devices.
16.P.MODE Button
Use to select Picture Mode.
17.STILL Button
Use to see still images.
![]() • Make sure to place your remote control on a table or desk.
• Make sure to place your remote control on a table or desk.
If you step on the remote control, you may fall and hurt yourself or damage the remote.
•You can use the remote control up to a distance of about 32.8 feet (10 m) from the product.
Using |
