Assembling Parts
 Assembled Vacuum Cleaner Parts
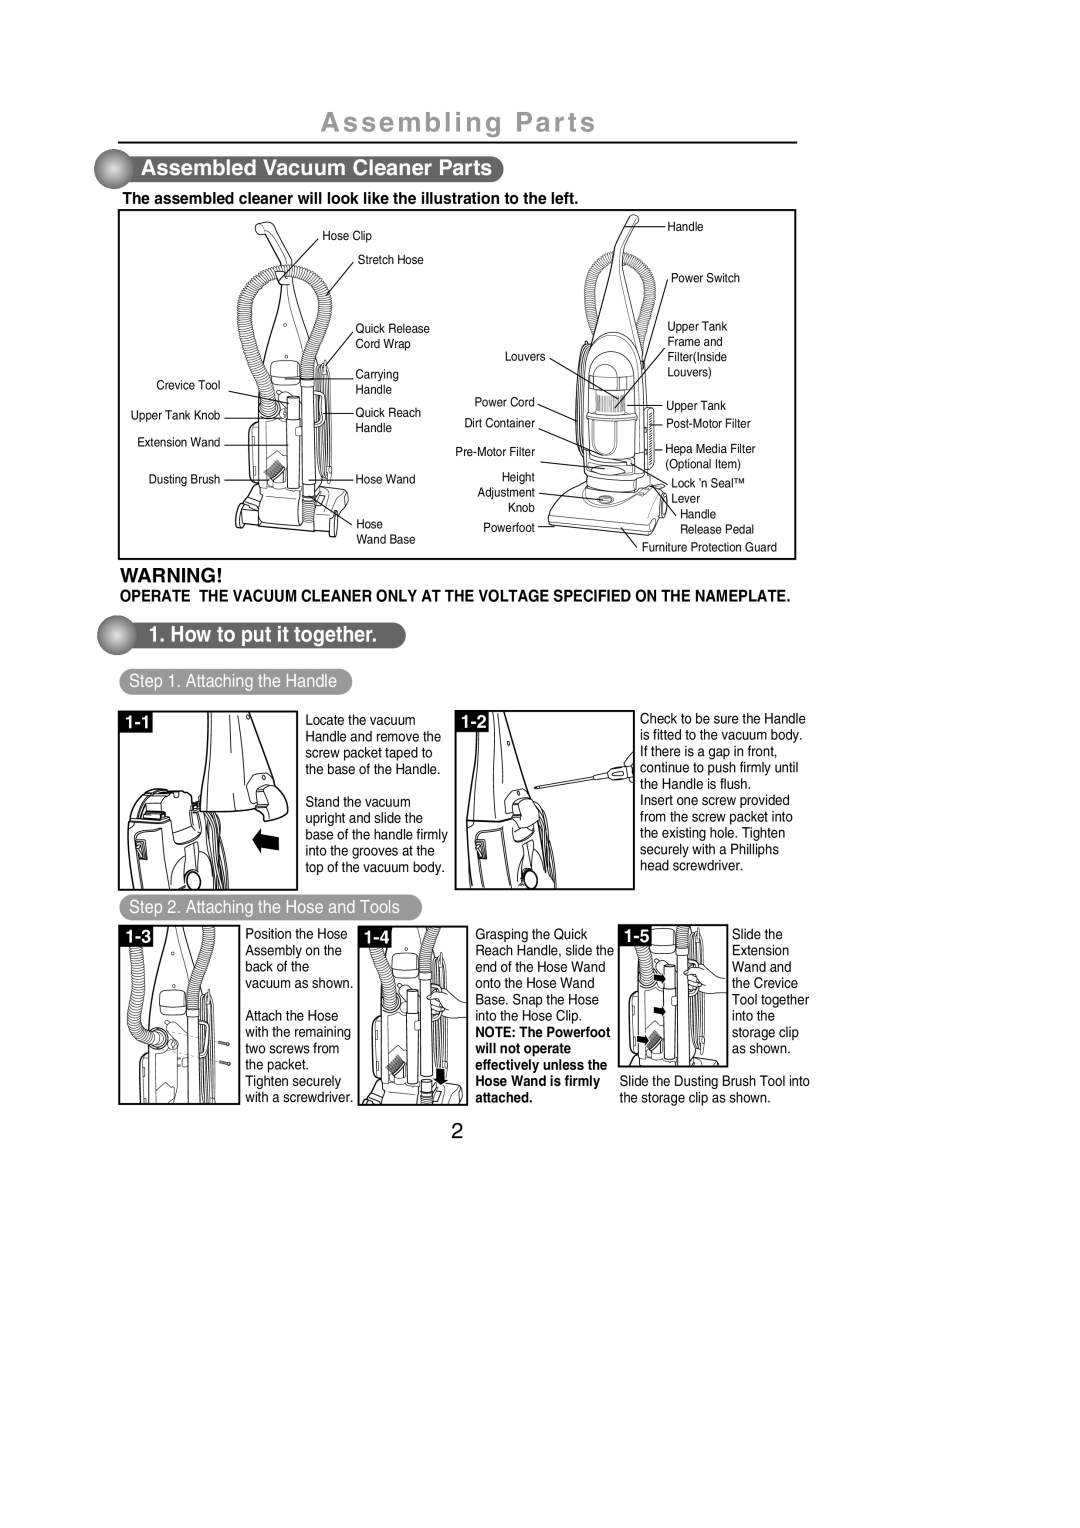
The assembled cleaner will look like the illustration to the left.
Crevice Tool
Upper Tank Knob Extension Wand
Dusting Brush
Handle
Hose Clip
Stretch Hose
|
| Power Switch | |
Quick Release |
| Upper Tank | |
Cord Wrap | Louvers | Frame and | |
| Filter(Inside | ||
Carrying |
| Louvers) | |
Handle | Power Cord |
| |
Quick Reach | Upper Tank | ||
Dirt Container | |||
Handle | |||
|
| ||
| Hepa Media Filter | ||
| Height | (Optional Item) | |
Hose Wand | Lock ’n Seal™ | ||
| Adjustment | ||
| Lever | ||
| Knob | ||
| Handle | ||
Hose | Powerfoot | ||
Release Pedal | |||
Wand Base |
| Furniture Protection Guard | |
|
|
WARNING!
OPERATE THE VACUUM CLEANER ONLY AT THE VOLTAGE SPECIFIED ON THE NAMEPLATE.
 1. How to put it together.
Step 1. Attaching the Handle
Locate the vacuum Handle and remove the screw packet taped to the base of the Handle.
Stand the vacuum upright and slide the base of the handle firmly into the grooves at the top of the vacuum body.
Check to be sure the Handle is fitted to the vacuum body. If there is a gap in front, continue to push firmly until the Handle is flush.
Insert one screw provided from the screw packet into the existing hole. Tighten securely with a Philliphs head screwdriver.
Step 2. Attaching the Hose and Tools
Position the Hose ![]() back of the
back of the ![]() vacuum as shown.
vacuum as shown. ![]()
Attach the Hose with the remaining two screws from the packet.
Grasping the Quick Reach Handle, slide the end of the Hose Wand onto the Hose Wand Base. Snap the Hose into the Hose Clip.
NOTE: The Powerfoot will not operate effectively unless the
Slide the
Extension
Wand and the Crevice Tool together into the storage clip as shown.
Tighten securely![]() with a screwdriver.
with a screwdriver. ![]()
![]()
![]()
![]()
![]()
Hose Wand is firmly attached.
Slide the Dusting Brush Tool into the storage clip as shown.
2