ABC-VW24A specifications
The Sanyo ABC-VW24A is a highly efficient and advanced air conditioner that offers a perfect balance of comfort and energy savings. Designed to cater to various indoor environments, this model stands out for its impressive array of features and cutting-edge technologies, making it a popular choice among homeowners and businesses alike.One of the main highlights of the Sanyo ABC-VW24A is its inverter technology, which enables the unit to adjust its power output according to the cooling needs of the space. This results in significantly lower energy consumption compared to traditional air conditioning systems, which can lead to reduced electricity bills. The inverter's ability to maintain a consistent temperature also provides a more stable and comfortable environment, eliminating the fluctuations associated with conventional units.
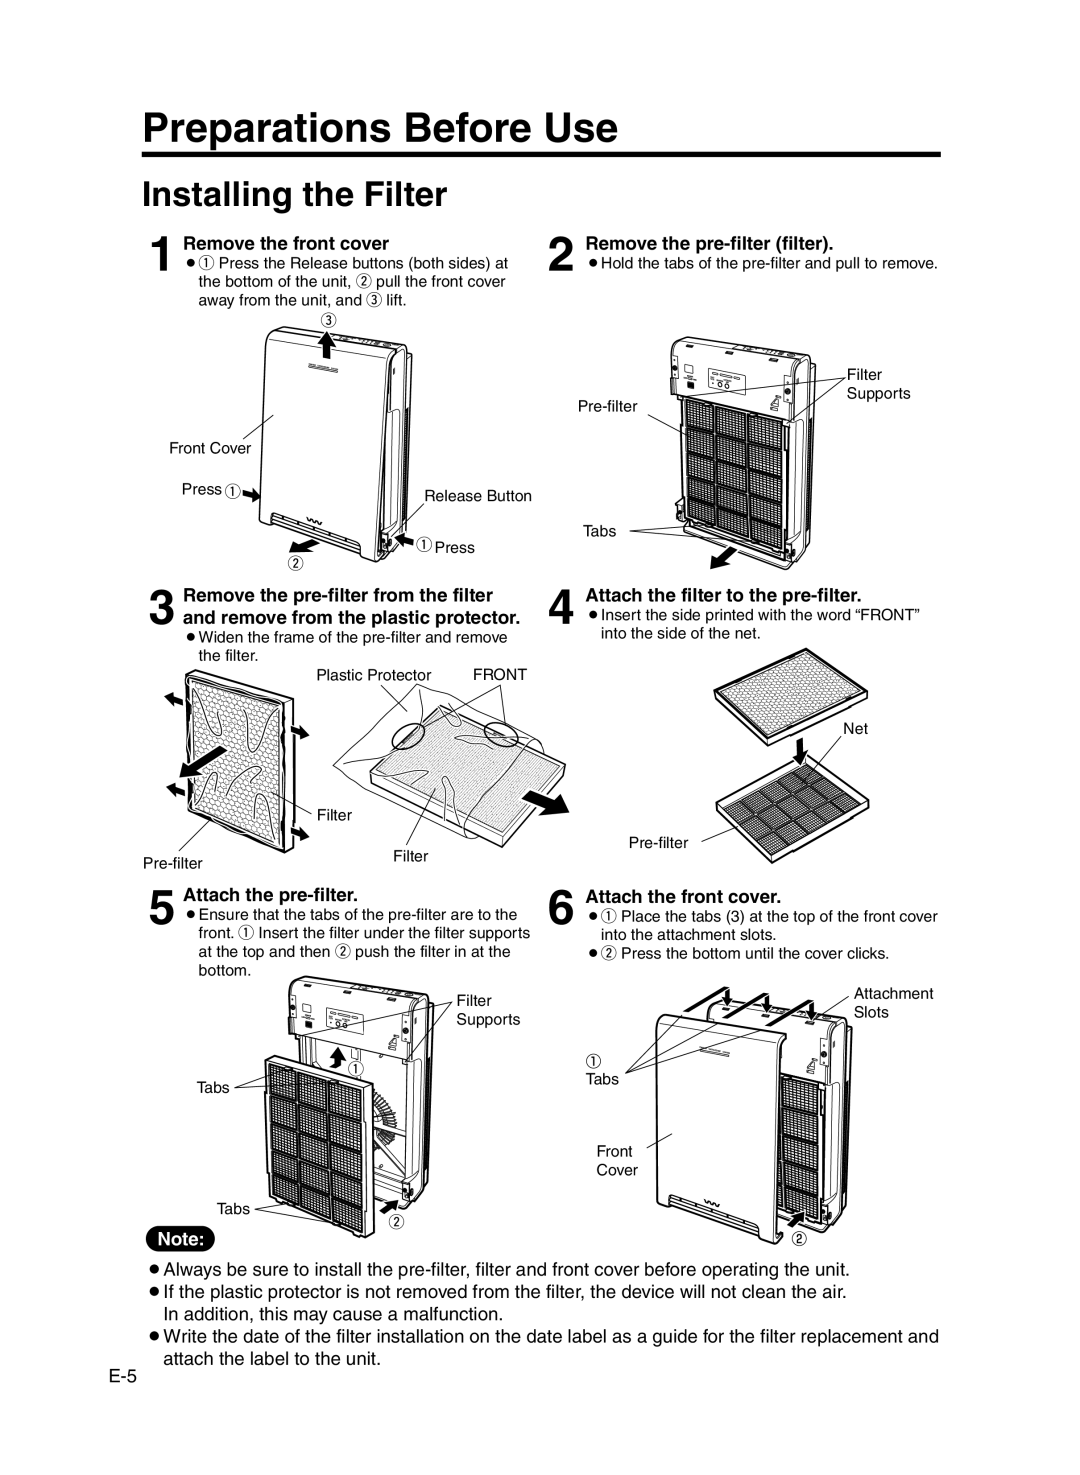
In addition to its inverter technology, the ABC-VW24A is equipped with a multi-stage filtration system. This feature enhances indoor air quality by removing dust, allergens, and other pollutants from the air. The filters are easy to clean and replace, ensuring that the unit operates efficiently while helping users maintain a healthier living space.
Moreover, the Sanyo ABC-VW24A boasts an eco-friendly refrigerant that complies with international standards for environmental safety. This refrigerant not only minimizes the unit's carbon footprint but also ensures effective cooling performance, highlighting Sanyo’s commitment to sustainability.
User convenience is at the forefront of the ABC-VW24A’s design. The air conditioner comes with a user-friendly remote control, allowing easy temperature adjustments and settings from various locations within the room. Additionally, the programmable timer feature enables users to schedule operations according to their routines, further optimizing energy use.
The Sanyo ABC-VW24A is noted for its quiet operation, allowing users to enjoy a tranquil environment without the disruptive noise often associated with air conditioning units. The sleek design of the unit also complements various interior designs, making it a stylish addition to any space.
Overall, the Sanyo ABC-VW24A is a sophisticated air conditioning solution that excels in energy efficiency, air purification, and user comfort, making it a standout option for anyone looking to improve their indoor climate.