3RECORD SET

6 Turn the jog dial to select a recording rate (6.25, for example), and then turn the shuttle dial clockwise.

Camera No. 1 is now set to record at a rate of 6.25. The cursor moves to “02”.

Valid recording rates

25*, 12.5, 6.25, 3.125, 1.563, 1, 0.5, 0.33, 0.25, 0.2, 0.1, 0.05, 0.03, OFF (Unit: FPS)

*A selection cannot be made when pre-alarm recording has been set to “ON”.

7 Set recording rates for Camera No. 2 and Camera No. 3 in the same way.

8 With the cursor flashing on “04” (camera number), turn the jog dial to select “OFF”, and then turn the shuttle dial clockwise.

Video from Camera No. 4 will not be recorded.

9 Use the same procedure to set Camera No. 5 through Camera No. 16 to “OFF”.


<PROGRAM

REC SET>


PROGRAM

: P-1


SELECT INDIVIDUAL

CAMERA RATE(FPS)

01: 6.25

02: 1

03:

1

04: OFF

05: OFF

06: OFF

07:

OFF

08: OFF

09: OFF

10: OFF

11:

OFF

12: OFF

13: OFF

14: OFF

15:

OFF

16: OFF


NORMAL REC :

64H


10 If necessary, use this procedure to setup other programs (i.e., No. 2 through No. 4).

11 Press the [EXIT/OSD] button.

The setting procedure is ended and the display returns to the normal screen.

EXIT/OSD

Timer settings

Use the following procedures to set recording start and stop times using the timer function.

Timer setting items

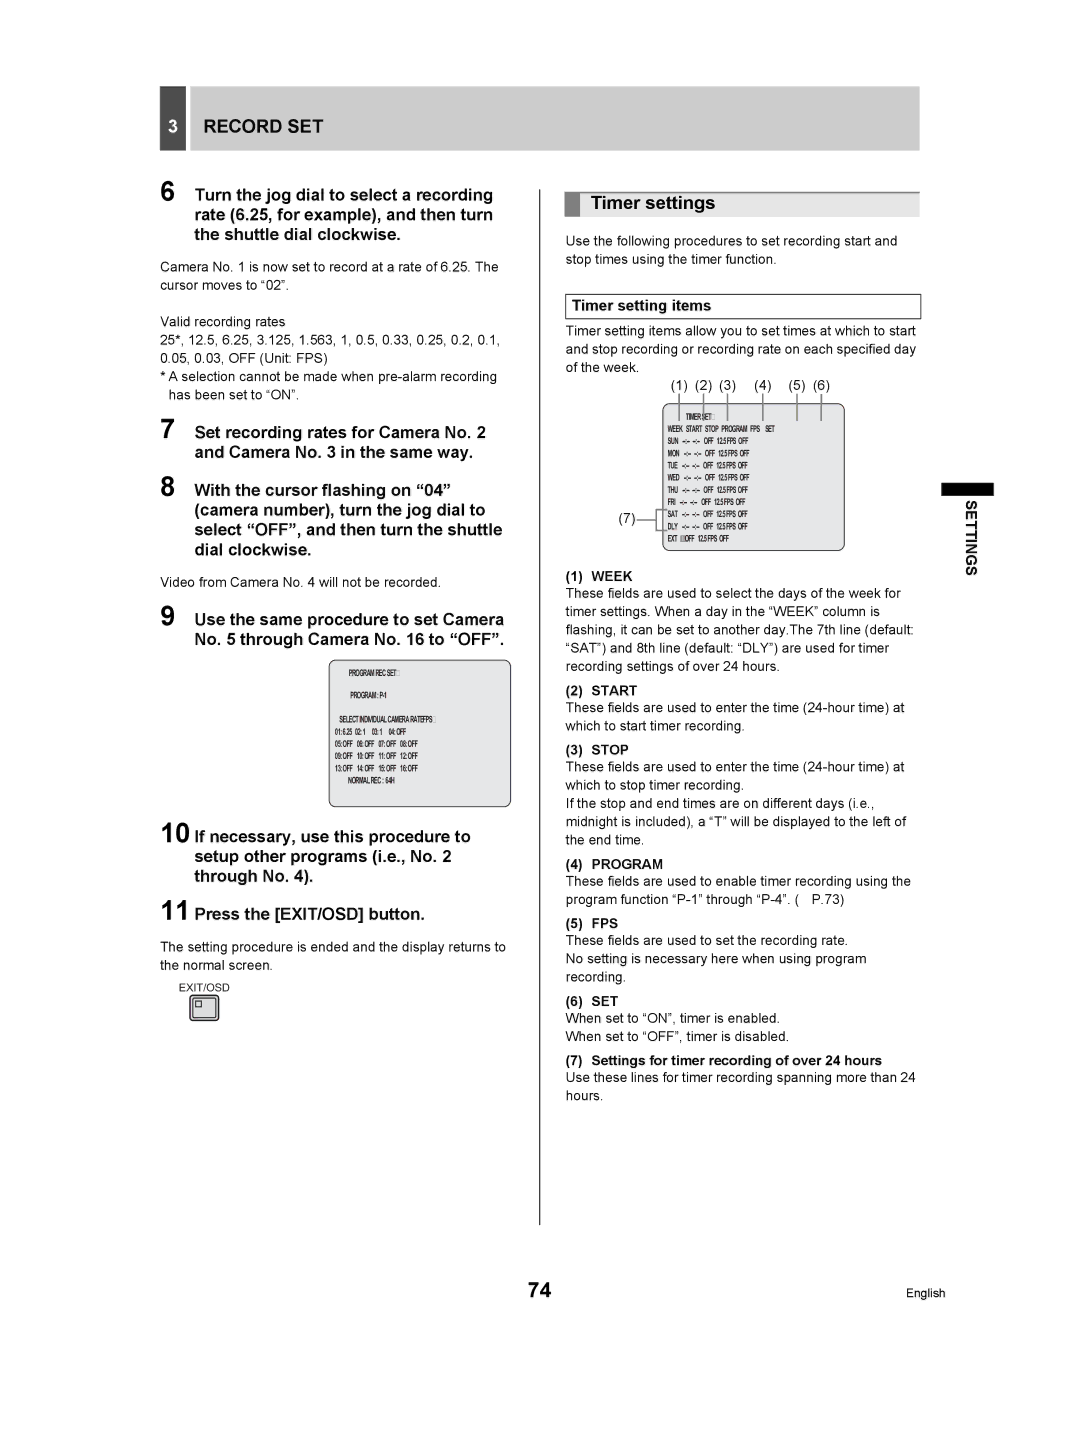
Timer setting items allow you to set times at which to start and stop recording or recording rate on each specified day of the week.


(1)

(2)

(3)

(4)

(5)

(6)


<TIMER

SET>


WEEK

START

STOP

PROGRAM

FPS

SET


SUN

--:--

--:--

OFF

12.5

FPS

OFF


MON

--:--

--:--

OFF

12.5

FPS

OFF


TUE

--:--

--:--

OFF

12.5

FPS

OFF


WED

--:--

--:--

OFF

12.5

FPS

OFF


THU

--:--

--:--

OFF

12.5

FPS

OFF


FRI

--:--

--:--

OFF

12.5

FPS

OFF

(7)


SAT

--:--

--:--

OFF

12.5

FPS

OFF


DLY

--:--

--:--

OFF

12.5

FPS

OFF


EXT

*****

*****

OFF

12.5

FPS

OFF

(1) WEEK

These fields are used to select the days of the week for timer settings. When a day in the “WEEK” column is flashing, it can be set to another day.The 7th line (default: “SAT”) and 8th line (default: “DLY”) are used for timer recording settings of over 24 hours.

(2) START

These fields are used to enter the time (24-hour time) at which to start timer recording.

(3) STOP

These fields are used to enter the time (24-hour time) at which to stop timer recording.

If the stop and end times are on different days (i.e., midnight is included), a “T” will be displayed to the left of the end time.

(4) PROGRAM

These fields are used to enable timer recording using the program function “P-1” through “P-4”. (JP.73)

(5) FPS

These fields are used to set the recording rate. No setting is necessary here when using program recording.

(6) SET

When set to “ON”, timer is enabled.

When set to “OFF”, timer is disabled.

(7) Settings for timer recording of over 24 hours

Use these lines for timer recording spanning more than 24 hours.

SETTINGS

74

English

Page 75
Image 75
Sanyo DSR-3709P manual Timer settings, Timer setting items, Start

DSR-3709P specifications

The Sanyo DSR-3709P is a versatile and advanced digital video recorder (DVR) that is designed for professional video surveillance applications. Known for its reliability and enhanced functionalities, this device is widely utilized across various sectors, including retail, transportation, and security.

One of the standout features of the DSR-3709P is its exceptional video recording capabilities. It supports high-resolution video recording, ensuring that every frame captures clear and detailed imagery. This is particularly beneficial for security applications, where identifying individuals and monitoring events in real-time is crucial. The unit can handle multiple camera inputs, allowing for extensive coverage and monitoring of different areas within a facility.

The DSR-3709P incorporates advanced compression technologies, such as H.264, which enables high-quality video storage while minimizing bandwidth usage. This means users can save significant amounts of storage space without compromising the integrity of recorded footage. The device also offers various recording modes, including continuous, scheduled, and motion-detection recording. This flexibility ensures that users can customize their recording settings based on specific security needs and scenarios.

Another notable characteristic of the Sanyo DSR-3709P is its user-friendly interface, which simplifies operation for both novice and experienced users. The DVR features an intuitive menu system, allowing for quick access to settings and playback options. Additionally, it supports remote viewing capabilities, enabling users to monitor live feeds and access recorded footage from anywhere with an internet connection. This is particularly advantageous for business owners who need to keep an eye on their properties when they are not on-site.

The device is built with robust security features, including user authentication and authorization protocols. This ensures that only authorized personnel can access the system, safeguarding sensitive footage from unauthorized viewing. Additionally, the DSR-3709P is equipped to support various backup options, including USB and network storage, allowing for secure archiving of important data.

In terms of connectivity, the DSR-3709P is designed to integrate seamlessly with other security systems, offering compatibility with a variety of cameras and monitoring devices. This adaptability makes it a valuable addition to existing security infrastructures.

Overall, the Sanyo DSR-3709P is a powerful digital video recorder that combines advanced features with user-friendly design, making it an ideal solution for enhancing security and surveillance efforts across multiple industries.