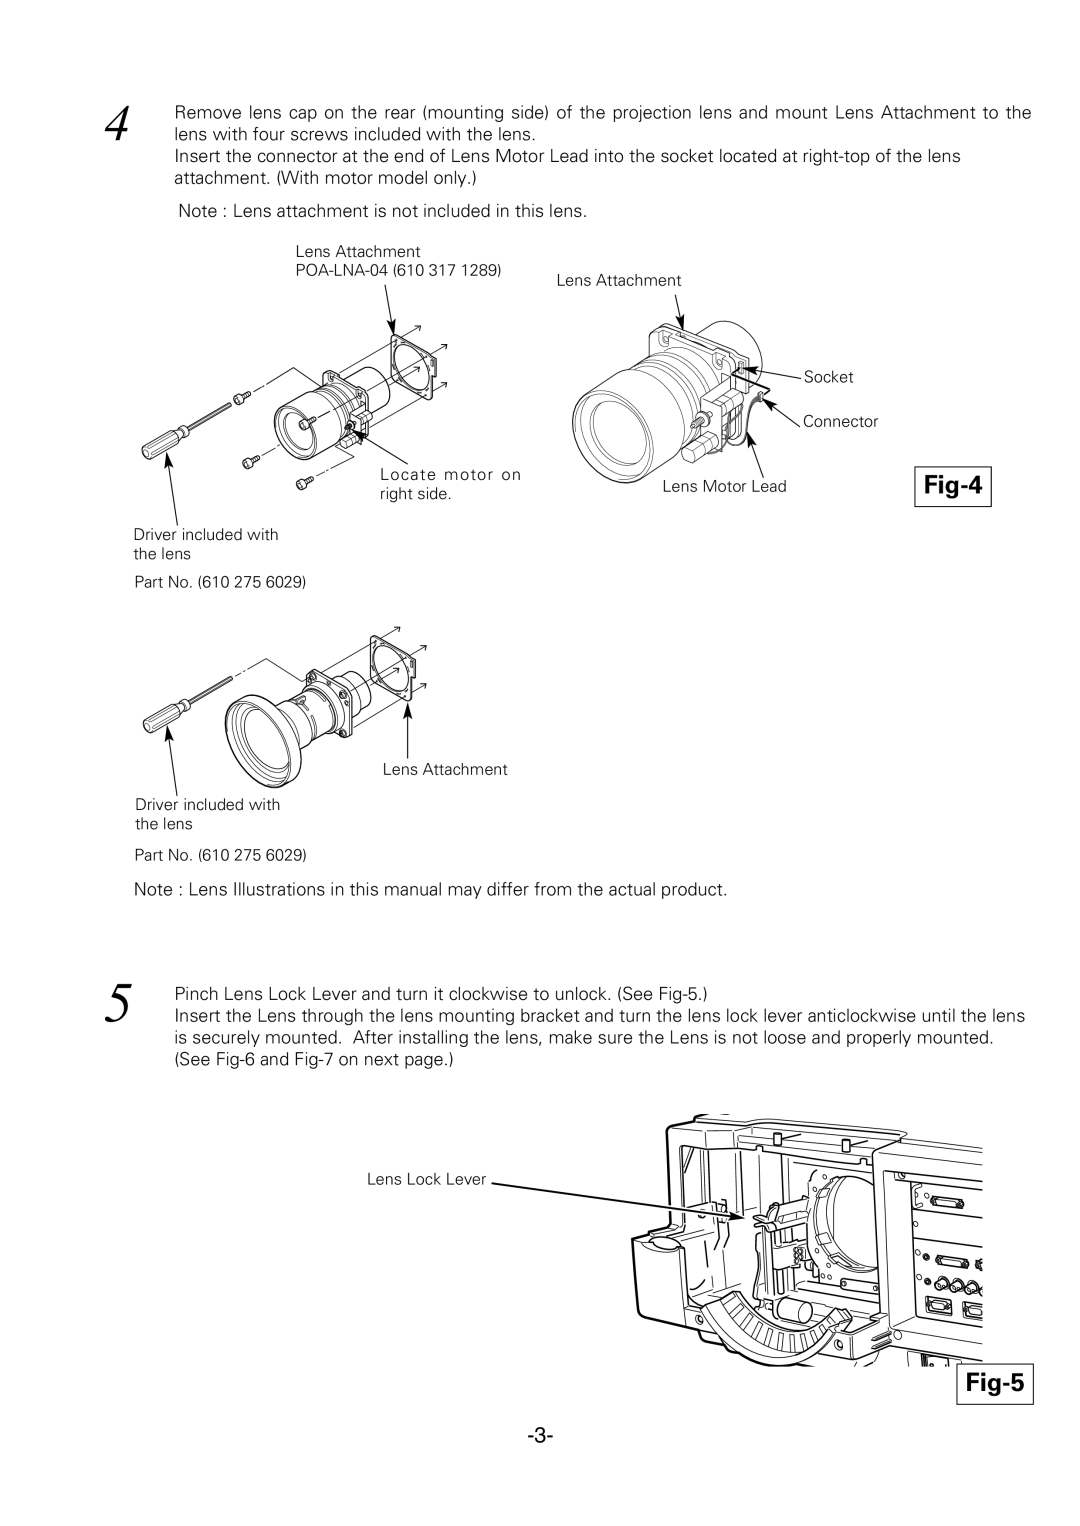
4 | Remove lens cap on the rear (mounting side) of the projection lens and mount Lens Attachment to the |
lens with four screws included with the lens. |
Insert the connector at the end of Lens Motor Lead into the socket located at
Note : Lens attachment is not included in this lens.
Lens Attachment
Lens Attachment
![]()
![]()
![]() Socket
Socket
![]() Connector
Connector
Locate motor on | Lens Motor Lead | |
right side. | ||
|
Driver included with the lens
Part No. (610 275 6029)
Lens Attachment
Driver included with the lens
Part No. (610 275 6029)
Note : Lens Illustrations in this manual may differ from the actual product.
Fig-4
5 | Pinch Lens Lock Lever and turn it clockwise to unlock. (See |
Insert the Lens through the lens mounting bracket and turn the lens lock lever anticlockwise until the lens |
is securely mounted. After installing the lens, make sure the Lens is not loose and properly mounted. (See
Lens Lock Lever
