MOUNTING THE LENS
3
2 (A)
(B)
1 3
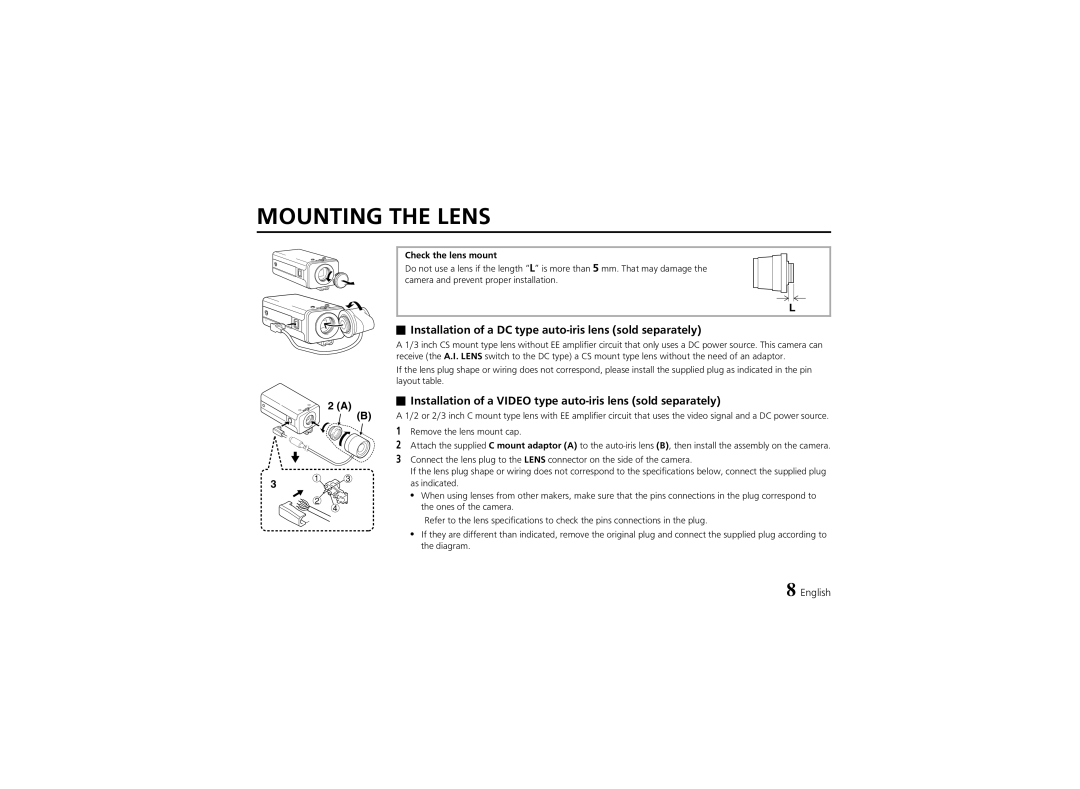
Check the lens mount
Do not use a lens if the length “L” is more than 5 mm. That may damage the camera and prevent proper installation.
L
 Installation of a DC type
 auto-iris lens (sold separately)
A 1/3 inch CS mount type lens without EE amplifier circuit that only uses a DC power source. This camera can receive (the A.I. LENS switch to the DC type) a CS mount type lens without the need of an adaptor.
If the lens plug shape or wiring does not correspond, please install the supplied plug as indicated in the pin layout table.
 Installation of a VIDEO type
 auto-iris lens (sold separately)
A 1/2 or 2/3 inch C mount type lens with EE amplifier circuit that uses the video signal and a DC power source.
1Remove the lens mount cap.
2Attach the supplied C mount adaptor (A) to the
3 Connect the lens plug to the LENS connector on the side of the camera. |
If the lens plug shape or wiring does not correspond to the specifications below, connect the supplied plug |
as indicated. |
• When using lenses from other makers, make sure that the pins connections in the plug correspond to |
![]() 2
2
4
the ones of the camera. |
Refer to the lens specifications to check the pins connections in the plug. |
• If they are different than indicated, remove the original plug and connect the supplied plug according to |
the diagram. |
8 English