Section 4 | R |
4.11MOVING MOWER WITH ENGINE STOPPED
To
4.12 RECOMMENDATIONS FOR MOWING
1.Do not mow with dull blades. A dull blade will tear grass, resulting in poor lawn appearance and reduced mowing power.
![]() WARNING
WARNING
DO NOT operate without Discharge Chute, Mulching Kit, or entire Grass Catcher properly installed.
2.The discharge chute must not be removed and must be kept in the lowest position to deflect grass clippings and thrown objects downward. Direct the side discharge away from sidewalks or streets to minimize cleanup of clippings. When mowing close to obstacles, direct the discharge away from the obstacles to reduce the chance of property damage by thrown objects.
3.Cut grass when it is dry and not too tall. Do not cut grass too short (cut off 1/3 or less of existing grass for best appearance). Mow frequently.
4.Keep mower and discharge chute clean.
5.When mowing wet or tall grass, mow the grass twice. Raise the mower to the highest setting for the first pass and then make a second pass to the desired height.
6.Use a slow travel speed for trimming purposes.
7.Operate the engine at full throttle for best cutting. Mowing with a lower RPM causes the mower to tear the grass. The engine is designed to be operated at full speed.
8.Use the alternate stripe pattern for best lawn appearance. Vary the direction of the stripe each time the grass is mowed to avoid wear patterns in the grass.
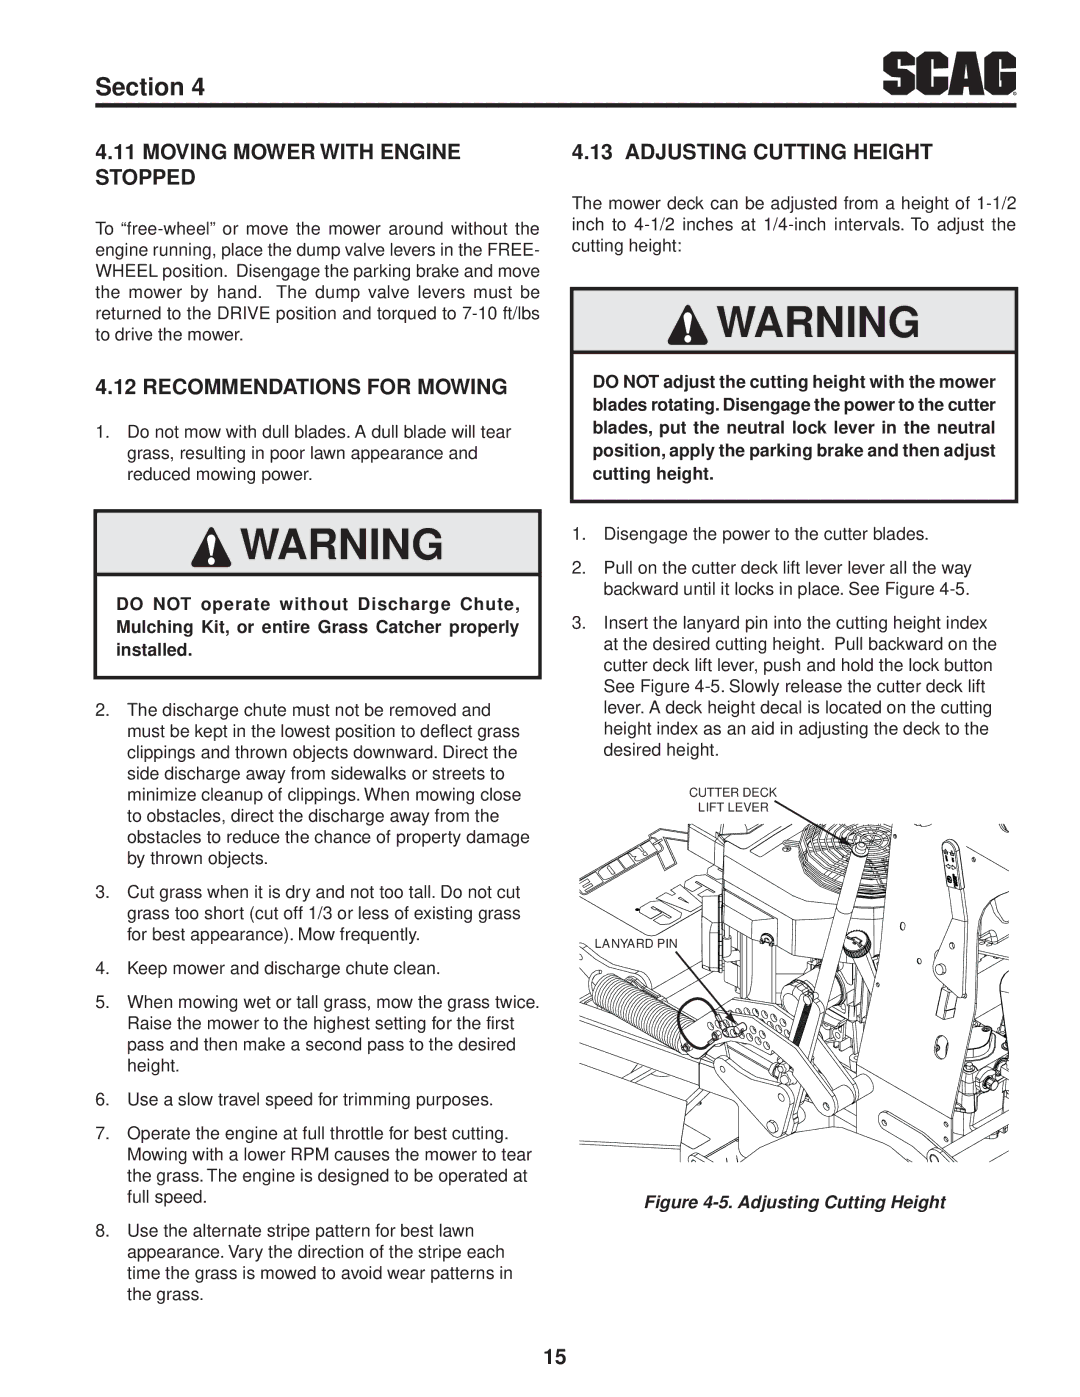
4.13 ADJUSTING CUTTING HEIGHT
The mower deck can be adjusted from a height of
![]() WARNING
WARNING
DO NOT adjust the cutting height with the mower blades rotating. Disengage the power to the cutter blades, put the neutral lock lever in the neutral position, apply the parking brake and then adjust cutting height.
1.Disengage the power to the cutter blades.
2.Pull on the cutter deck lift lever lever all the way backward until it locks in place. See Figure
3.Insert the lanyard pin into the cutting height index at the desired cutting height. Pull backward on the cutter deck lift lever, push and hold the lock button See Figure
CUTTER DECK
LIFT LEVER
LANYARD PIN
Figure 4-5. Adjusting Cutting Height
15