11.MAINTENANCE INSTRUCTIONS
11.1After use and before performing maintenance, turn off, unplug and disconnect the battery charger (see Sections 6 and 7).
11.2Use a dry cloth to wipe all battery corrosion and other dirt or oil from the terminals, cords, and the charger case.
11.3Ensure that all of the charger components are in place and in good working condition.
11.4Servicing does not require opening the unit, as there are no user- serviceable parts.
12.STORAGE INSTRUCTIONS
12.1Store the charger unplugged, in an upright position. The cord will still conduct electricity until it is unplugged from the outlet.
12.2Store inside, in a cool, dry place (unless you’re using an
12.3Do not store the clips on the handle, clipped together, on or around metal, or clipped to cables.
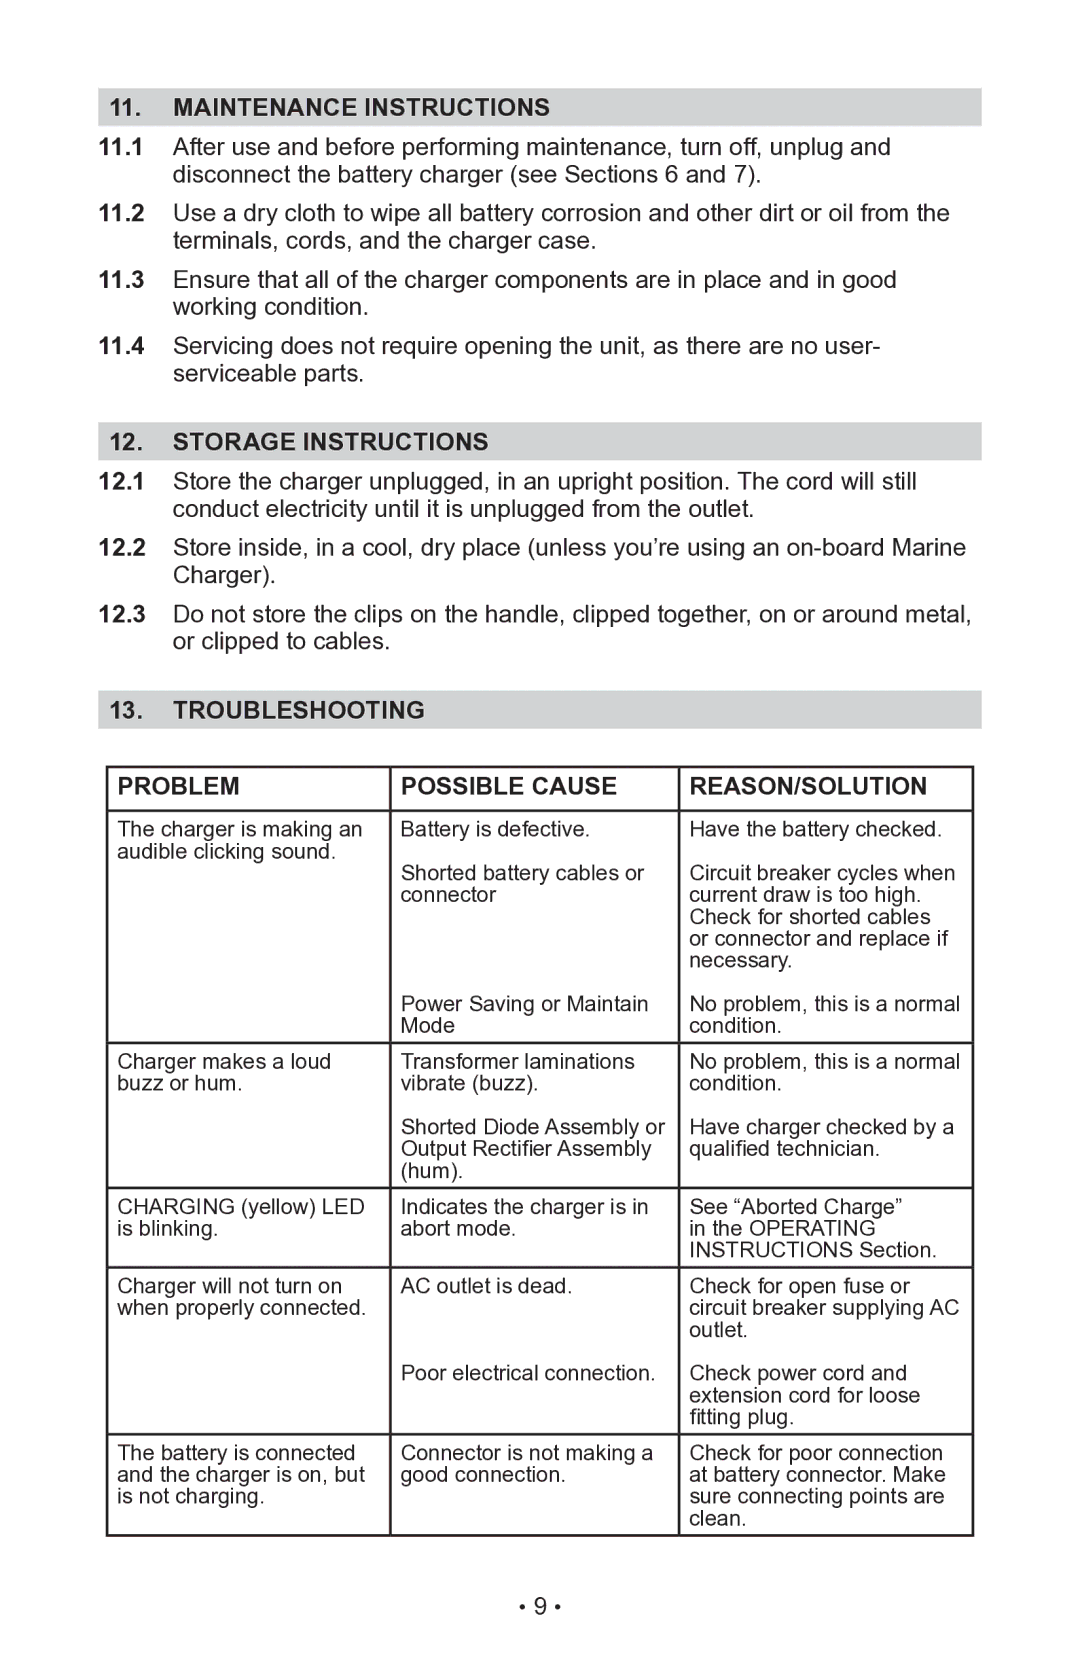
13.TROUBLESHOOTING
PROBLEM | POSSIBLE CAUSE | REASON/SOLUTION |
|
|
|
The charger is making an | Battery is defective. | Have the battery checked. |
audible clicking sound. | Shorted battery cables or | Circuit breaker cycles when |
| ||
| connector | current draw is too high. |
|
| Check for shorted cables |
|
| or connector and replace if |
|
| necessary. |
| Power Saving or Maintain | No problem, this is a normal |
| Mode | condition. |
Charger makes a loud | Transformer laminations | No problem, this is a normal |
buzz or hum. | vibrate (buzz). | condition. |
| Shorted Diode Assembly or | Have charger checked by a |
| Output Rectifier Assembly | qualified technician. |
| (hum). |
|
CHARGING (yellow) LED | Indicates the charger is in | See “Aborted Charge” |
is blinking. | abort mode. | in the OPERATING |
|
| INSTRUCTIONS Section. |
Charger will not turn on | AC outlet is dead. | Check for open fuse or |
when properly connected. |
| circuit breaker supplying AC |
|
| outlet. |
| Poor electrical connection. | Check power cord and |
|
| extension cord for loose |
|
| fitting plug. |
The battery is connected | Connector is not making a | Check for poor connection |
and the charger is on, but | good connection. | at battery connector. Make |
is not charging. |
| sure connecting points are |
|
| clean. |
• 9 •