Assembly

Step 4: Install Static Handlebar and Console

Parts

Main Unit (from Step 3)

#19 - Console (Qty. 1)

#20 - Static Handlebar (Qty. 1)

Hardware

#24 - M8 Flat Washer (Qty. 4)

#25 - M8 Lock Washer (Qty. 4)

#30 - M8x20 Hex Screw (Qty. 4)

Pre-installed Screws in Back of Console (Qty. 4)

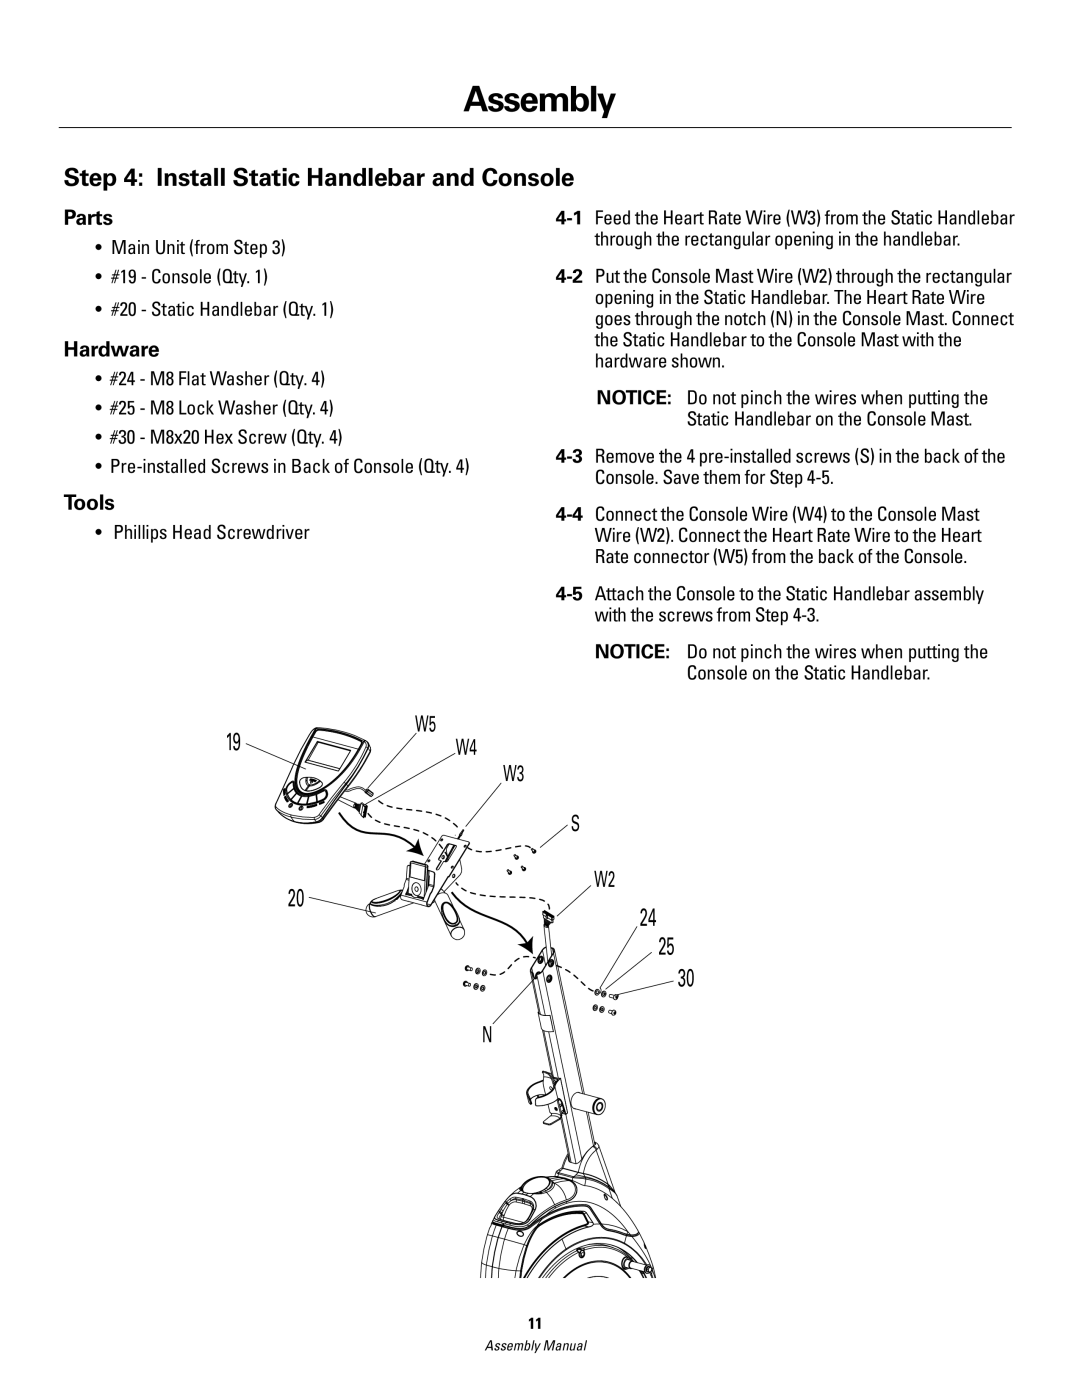
4-1Feed the Heart Rate Wire (W3) from the Static Handlebar through the rectangular opening in the handlebar.

4-2Put the Console Mast Wire (W2) through the rectangular opening in the Static Handlebar. The Heart Rate Wire goes through the notch (N) in the Console Mast. Connect the Static Handlebar to the Console Mast with the hardware shown.

NOTICE: Do not pinch the wires when putting the Static Handlebar on the Console Mast.

4-3Remove the 4 pre-installed screws (S) in the back of the Console. Save them for Step 4-5.

Tools

• Phillips Head Screwdriver

4-4Connect the Console Wire (W4) to the Console Mast Wire (W2). Connect the Heart Rate Wire to the Heart Rate connector (W5) from the back of the Console.

4-5Attach the Console to the Static Handlebar assembly with the screws from Step 4-3.

NOTICE: Do not pinch the wires when putting the Console on the Static Handlebar.

19


W5


W4


W3


S


20

W2


24


25

30

N

11

Assembly Manual

Page 11
Image 11
Schwinn 420 manual Install Static Handlebar and Console