assembOy
An alternate method of mounting is to fasten band saw to a mounting board The board should be of suf- ficient size to avoid tipping el saw while in use Any good grade of plywood or chipboard with a 3/4" mini- mum thickness is recommended, (Thinner chipboard can break ) Once the saw is mounted, securely clamp the board to the workbench using "C" ;:lamps
WARNING: Supporting surface where band saw is mounted should be examined carefully after mounting to insure that no movement during use can result, tf any tipping or walking is noted, secure workbench or supporting surface before operating band saw.
INSTALLING THE TABLE
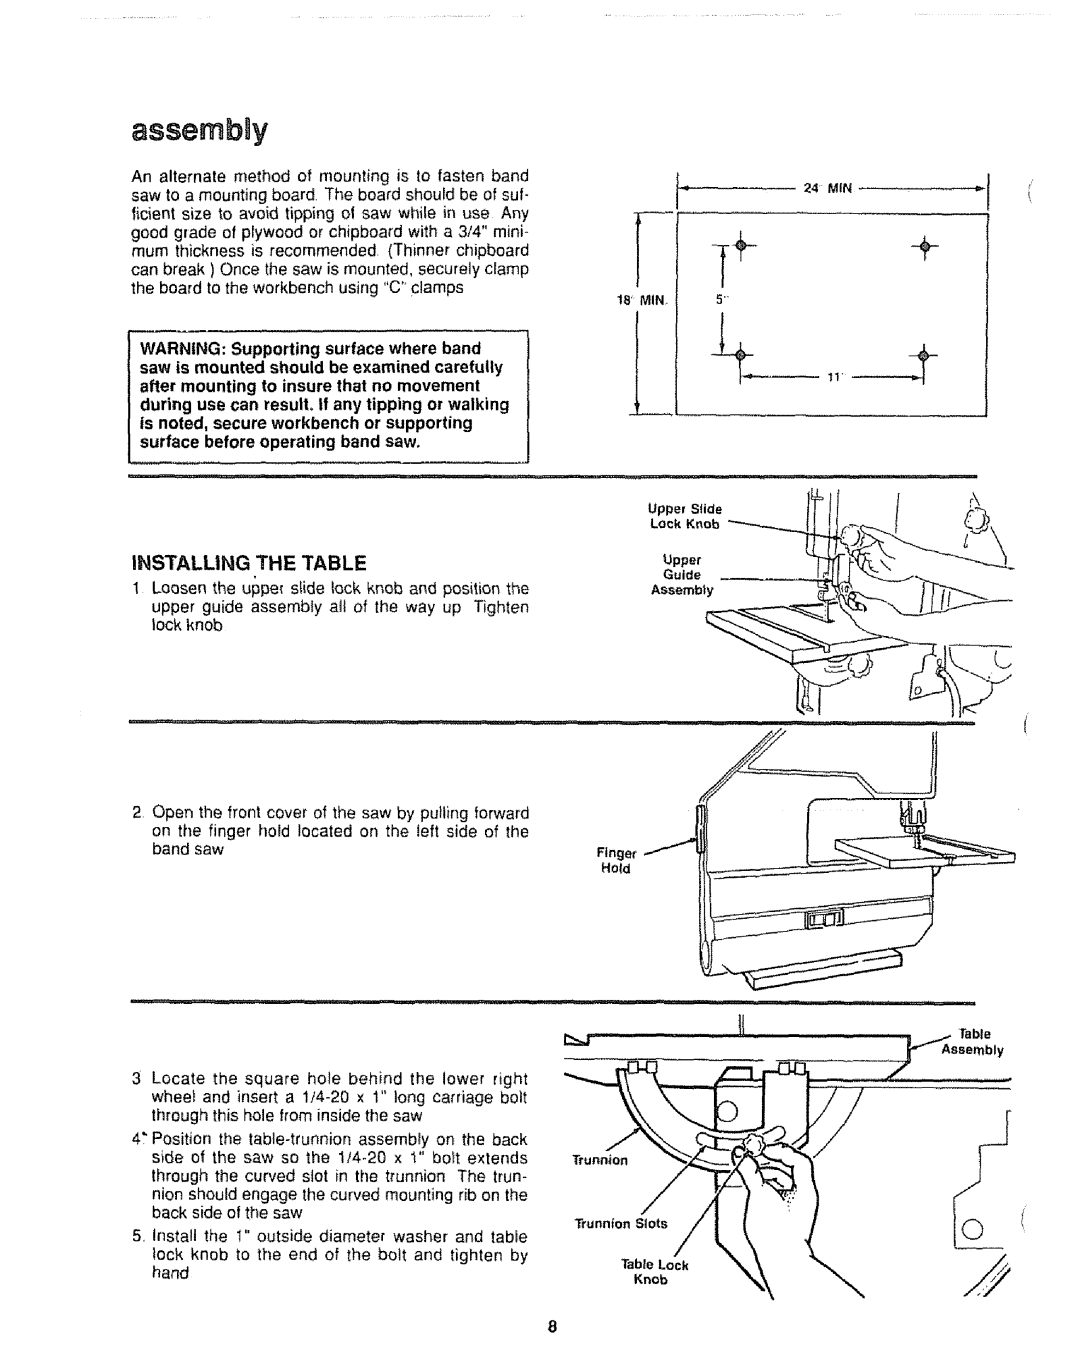
1Loosen the upper slide lock knob and position the
upper guide assembly atl of the way up Tighten lock knob
2Open the front cover of the saw by pulling forward on the finger hold located on the left side of the band saw
3 Locate the square hole behind the lower right wheet and insert a
4" Position the
through the curved slot in the trunnion The trun- nion should engage the curved mounting rib on the back side of the saw
5, Install the t" outside diameter washer and table
lock knob to the end of the bolt and tighten by hand
24 MIN | ....... |
t
18' MIN,
Upper Slide
Lock Knob
Upper
Guide ,
Assembly
Finger
Ho_d
| [ |
Trunnion | / |
Trunnion Slots | !o |
| |
Table Lock |
|
Knob |
|