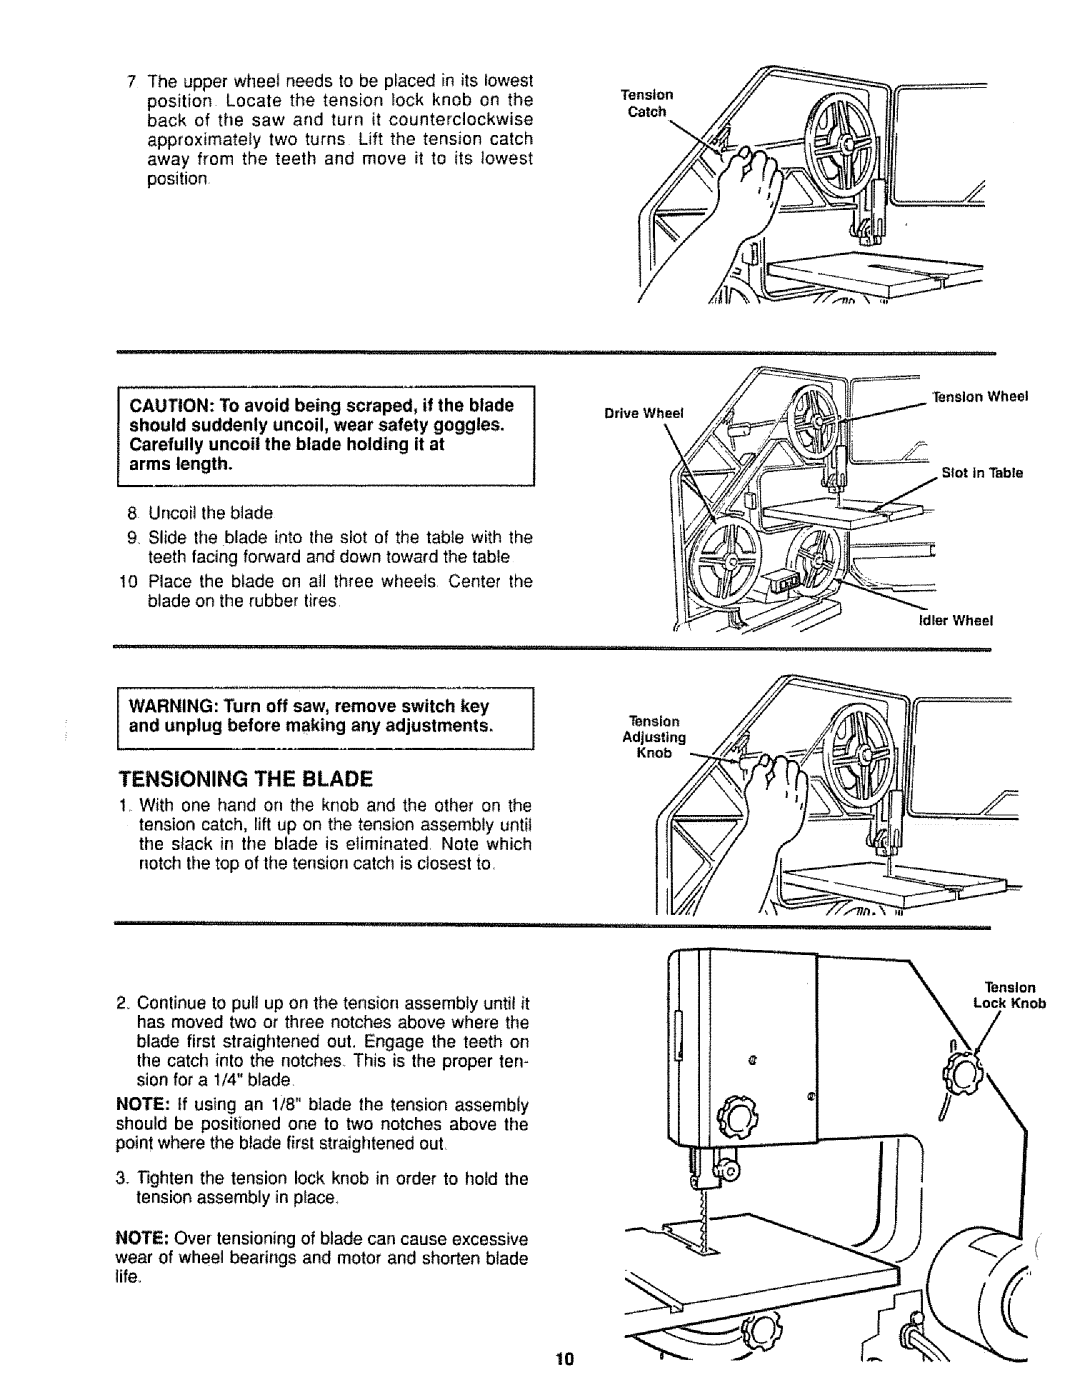
7 The upper wheel needs to be placed in its lowest position Locate the tension lock knob on the back of the saw and turn it counterclockwise approximately two turns Lift the tension catch away from the teeth and move it to its lowest position
CAUTION: To avoid being scraped, if the blade should suddenly uncoil, wear safety goggles.
Carefully uncoil the blade holding it at arms length.
8 Uncoil the blade
9_ Slide the blade into the slot of the table with the teeth facing forward and down toward the table
10 Place the blade on all three wheels Center the blade on the rubber tires
ill,,!lii,l,l,,,llll,i
WARNING: Turn off saw, remove switch key and unplug before making arty adjustments.
TENSIONING THE BLADE
1._With one hand on the knob and the other on the
tension catch, lift up on the tension assembly until the slack in the blade is eliminated. Note which
notch the top of the tension catch is closest to.
2_ Continue to pult up on the tension assembly until it has moved two or three notches above where the
blade first straightened out. Engage the teeth on
the catch into the notches. This is the proper ten- sion for a !/4" blade.
NOTE: If using an 1/8" blade the tension assembly should be positioned one to two notches above the point where the blade first straightened out.
3.Tighten the tension lock knob in order to hold the tension assembly in place,
NOTE: Over tensioning of blade carl cause excessive
wear of wheel bearings and motor and shorten blade life.
Tension
Catch
illlll.......................................
Drive Wheel!
TensionWheel
Slot in Table
1
r Wheel
Tension /
Aot..,,ng
Tension
Lock Knob
10