MAINTENANCE
GENERAL
Only the partsshownon parts list,page 15, are intendedto be repairedor replaced by the customer. All other parts representan importantpart of the doubleinsulationsystem and shouldbe serviced only by a qualified Sears service technician.
Avoid using solvents when cleaning plastic parts. Most plasticsare susceptible to various types of commercial solventsand may be damaged by their use. Use clean clothsto removedirt, carbon dust,etc.
When electdc tools are used on fiberglassboats, sports cars, wallboard,spacklingcompounds,or plaster, it has been found that they are subject to acceleratedwear and possible premature failure, as the fiberglass chips and grindings are highly abrasive to bearings, brushes, commutator,etc. Consequently,itis not recommendedthat thistoolbe usedfor extendedworkon anyfiberglassmaterial, wallboard,spacklingcompounds,or plaster. During any use on fiberglassit is extremely importantthat the tool is cleanedfrequentlyby blowingwith an air jet.
PROPER CARE OF CU'I'FERS
Get fastermore accurate cuttingresultsby keepingcutters cleanand sharp.Removeall accumulatedpitchandgumfrom cuttersaftereach use.
A cuttersharpeningkit (Item No.
Sears RetailStores.
PROPER CARE OF COLLET
From time totime, italso becomes necessaryto cleanyour colletand colletnut.To do so, simplyremovecolletnutfrom colletandclean thedustandchipsthathavecollectedThen. returncolletnut to its originalposition.
LUBRICATION
When sharpening cutters, sharpen only the Inside of the cuffingedge. Never gdnd the outside diameter. Be sure when sharpening the end of a cutter to grind the clearance angle the same as originally ground.
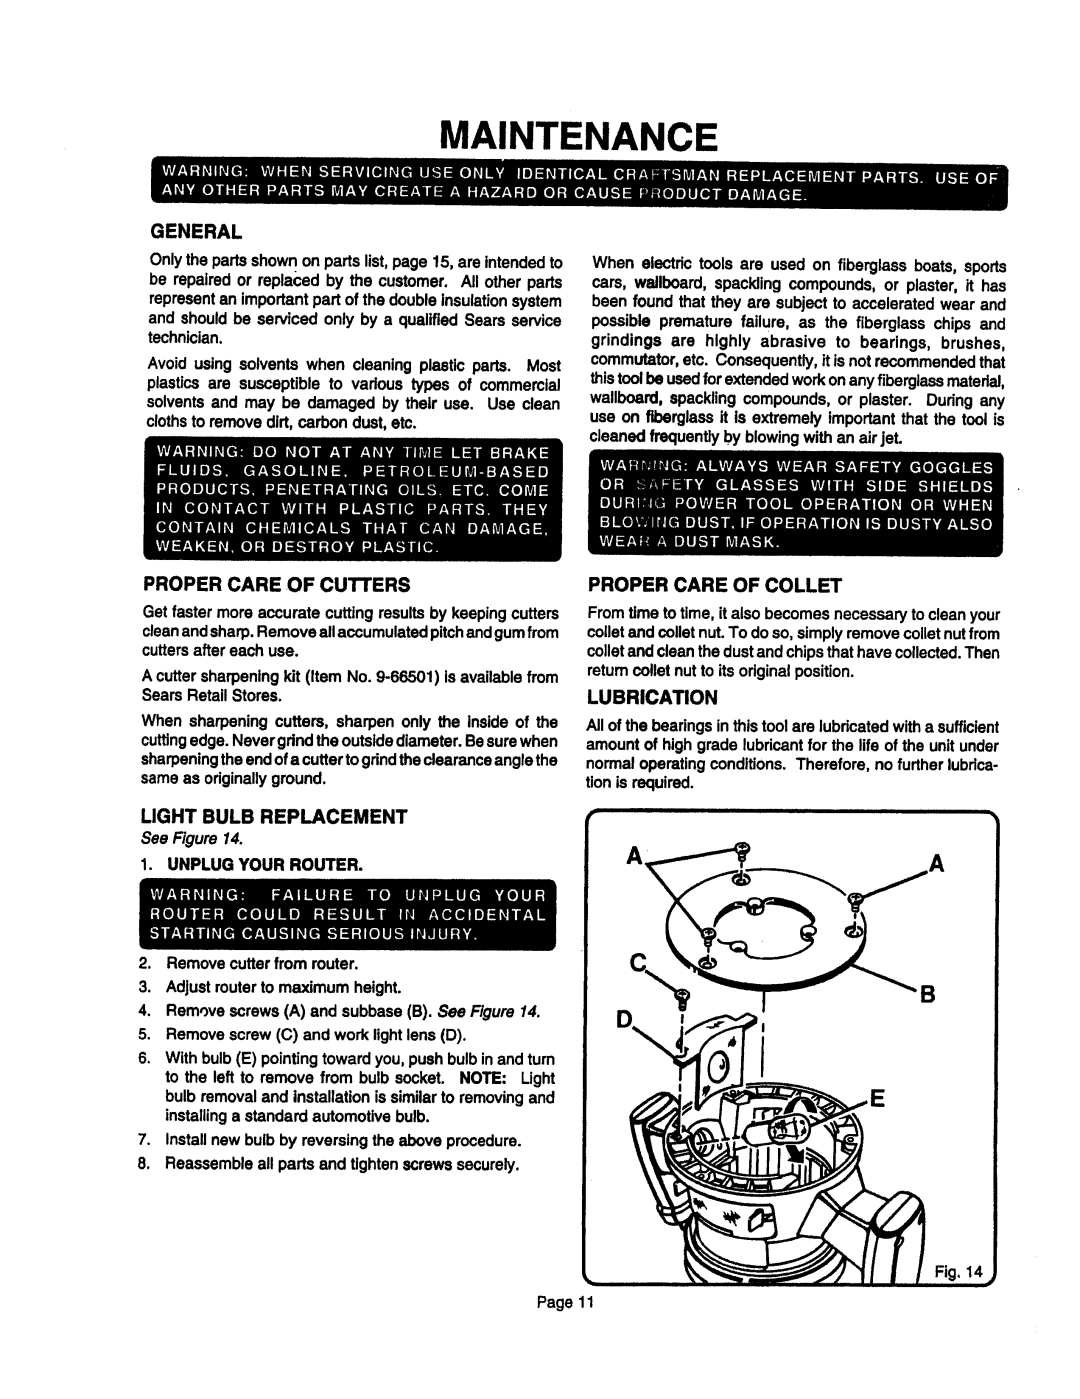
LIGHT BULB REPLACEMENT
See Figure 14.
1.UNPLUG YOUR ROUTER.
2.Remove cutterfrom muter.
3.Adjustmuter to maximum height.
4.Removescrews (A) and subbase(B). See Figure14.
5.Removescrew (C) and work lightlens (D).
6.With bulb(E) pointingtowardyou,pushbulbin and turn to the left to remove from bulb socket. NOTE: Light bulb removaland installationis similarto removingand installinga standardautomotivebulb.
7.Installnew bulb by reversingthe above procedure.
8.Reassembleall parts and tightenscrews securely.
All of thebearingsin this toolare lubricatedwitha sufficient amountof highgrade lubricantfor the life of the unit under normaloperatingconditions. Therefore, no further lubrica- tionis required.
Page 11