OPERATION
WRENCH STORAGE AREA
Your routerhas a wrench storagearea locatedon the top end cap portionof the motor housing. When installingor removingcuttersremove the wrenchfrom itsstoragearea. Properstorageof wrench when not in use willhelpreduce the possiblilityof losingwrench. See Figure 1.
INSTALLING/REMOVING CUTTERS
See Figure2.
1.UNPLUG YOUR ROUTER.
2.Removedust bag from muter.
3.Removeone ofthe clearplasticchipshieldsfromrouter. To remove,press on tabs and pull outward.
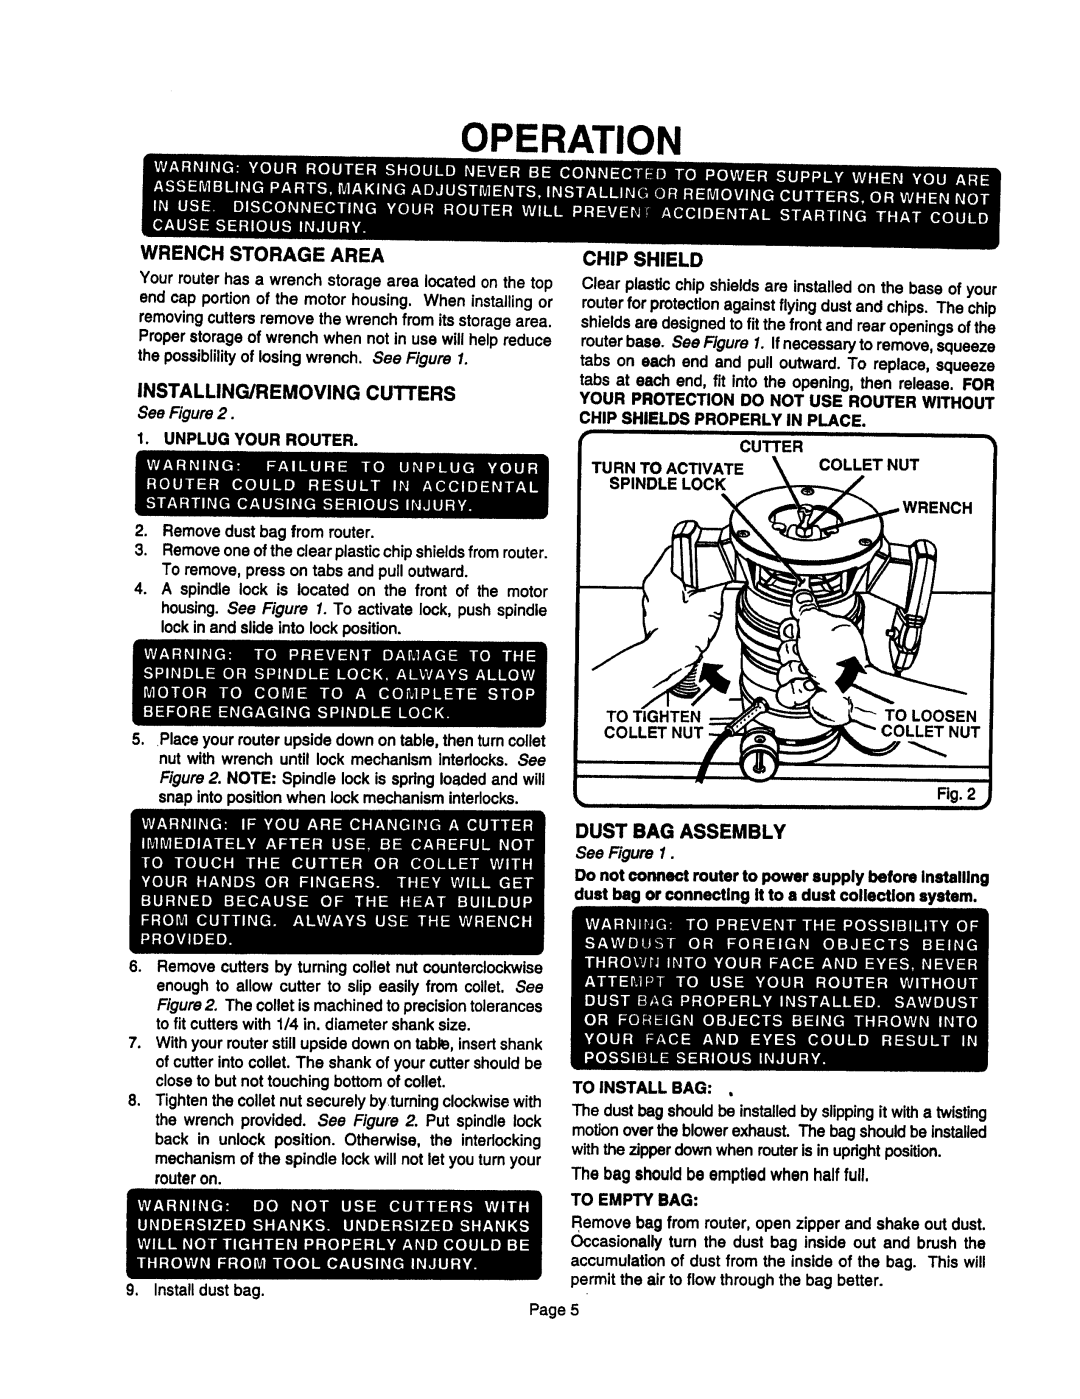
4.A spindle lock is located on the front of the motor housing.See Figure 1. To activate lock, pushspindle lockin and slideinto lockposition.
CHIP SHIELD
Clear plasticchipshieldsare installedon the base of your routerfor protectionagainstflyingdust and chips. The chip shieldsare designedto fitthe frontand rear openingsof the routerbase. See Figure1. If necessaryto remove,squeeze tabs on each end and pull outward.To replace, squeeze tabs at each end, fit into the opening,then release. FOR YOUR PROTECTION DO NOT USE ROUTER WITHOUT CHIP SHIELDS PROPERLY IN PLACE.
CUTTER |
|
TURN TO ACTIVATE _ | COLLET NUT |
. Place yourmuter upside downon table,then turncollet nut with wrench until lock mechanismInterlocks.See
Figure2. NOTE: Spindle lock is spdng loadedand will snapintopositionwhen lockmechanisminterlocks.
6.Remove cuttersby tuming collet nut counterclockwise enough to allow cutter to slip easily from collet. See
Figure2. The collaris machinedto precisiontolerances to fit cutterswith 114in. diametershank size.
7.Withyourmuter stillupsidedownon table, insertshank of cutterintocollet. The shankof your cuttershouldbe closeto but not touchingbottomofcollet.
8.Tightenthecolletnut securelybyturningclockwisewith the wrenchprovided. See Figure 2. Put spindlelock back in unlock position. Otherwise, the interlocking
mechanismofthe spindlelockwill not letyou turnyour muter on.
9.Installdust bag.
TO TIGHTEN =::_..'__=,,__" | TO LOOSEN |
Fig. 2
DUST BAG ASSEMBLY
See Figure 1.
Do not connect router to power supply before Installing duet beg or connecting it to • dust collection system.
TO INSTALL BAG: ,
The dustbag ehouldbe installedby slippingit witha twisting moUonoverthe blowerexhaust.The bag shouldbe installed withthe zipperdownwhenrouteris in updghtposition.
The bag shouldbe emptiedwhen half full.
TO EMPTY BAG:
Remove bag from router,open zipper and shake out dust. Occasionallyturn the dust bag inside out and brush the
accumulationof dust from the inside of the bag. This will permitthe air to flow throughthe bag better.
Page5