5. Remove the pulley screw in the center of the
..... | pulley. | Figure | 50. |
| _ _ _ | :.. | " |
|
6. | Lift the | pulley carefully | while | gently | twisting | it | ||
| counterclockwise | _ | , | and remove | the | |||
_ | old rope. |
|
|
| .: | : |
| |
7.Move away from the fuel tank and burn the end of the new rope to go into the pulley. '
8.Pull the burnt end while hot through a_rag to smooth it.
9.Feed the rope through the housing and the round starter hole. Figure 50.
10.Put the rope into the pulley groove and up through the hole.
11.Wrap rope counterclockwise around pulley rachet end and tuck loose end back under
rope leaving a 3/8 to 1/2 inch tail.
12.Rewind all the rope onto the pulley, turnin
court....
13.Set the pulley into thehousing; PUSh it down
:and engage the spring;:
;_14. Replace and tighten the pulley screw.
D, CLUTCH,ANDDRUM!SPROCKET
WARNING!
Do not start engine without Guide Bar, Chain, and Bar Clamp completely assembled. The clutch Can come off without the guidebar and chain co_PleteL assembled and serious injury could resulL Do not loosen and spin the clutch
off of the crankshaft with a power too!, The clutch shoes and drum could separate causing the clutch to violentlyfly apart and serious per-
sonal injury could result. :_: _ | :. | :;. |
•Take the saw to yournearestSears Service Center for full. clutch'inspect{on and Service after each 100 hours of operation./t is recom- mended that you do not try i to'_service the c/utch yourse/f un/ess you am a competent
,..... sma/[ engine mechanic and have the proper ;_ _ ,clutch service too/s. Proper disassembly and
repair of the clutch is extremely important to
the life of the engine and thesafety of the
operator......
•Clutch maintenance is requiredwhen:
•Clean the clutch, drum/sprocket_ and sur- rounding area daily during heavy, use of the saw: Check't0 see that the clutch drum turns freely and Smo0thty.
•Inspect the sprocket regularly for wear. A worn sprocket will make the chain run er- ratically and will Shorten the life of the bar and chain. Figure 52.
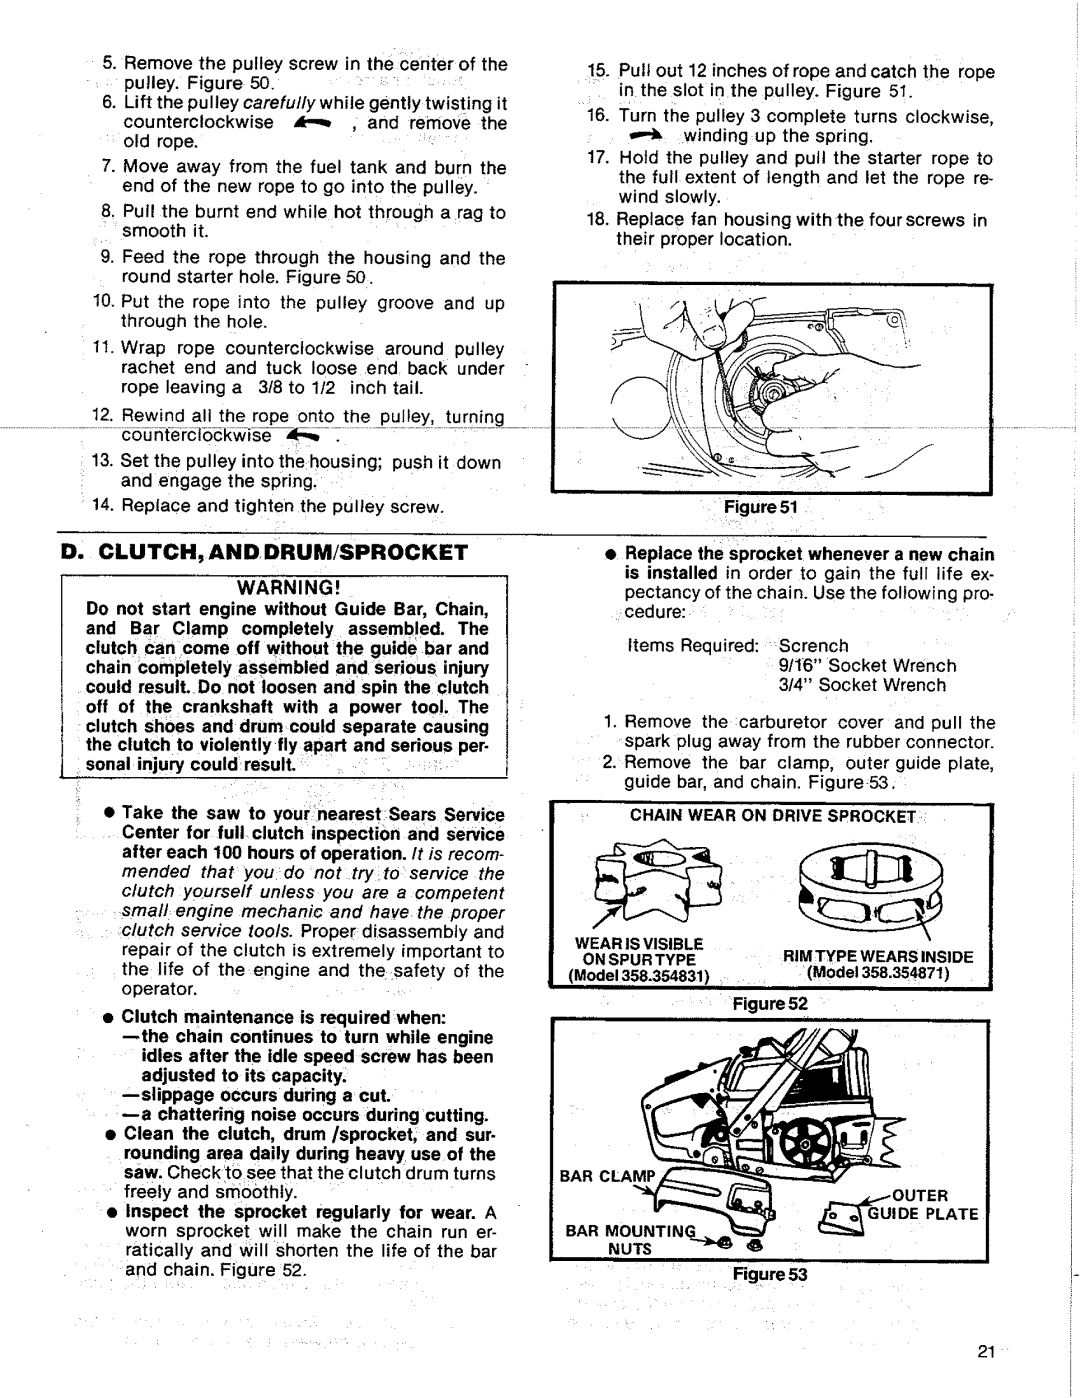
!5, Pull out 12 inches of rope and catch the rope in. the slot in the pulley. Figure 51.
16."rurn the pulley 3 complete turns clockwise,
,,,"_ windingup the spring.
17.Hold the pulley and pull the starter rope to the full extent of length and let the rope re- wind slowly.
18.Replace fan housing withthe fourscrews in their proper location.
• Replace the sprocket whenever a new chain
is installed in order to gain the full life ex-
pectancy of the chain. Use the | following pro- | ||
./cedure:. _ | _ |
|
|
Items Required: | Scrench | Wrench | |
| 9/16" | Socket | |
| 3/4" | Socket | Wrench |
1.Remove the:carburetor cover and pull the spark plug away from the rubber connector.
2.Remove the bar clamp, outer guide plate, guide bar, and chain. Figure53.
CHAIN WEAR ON DRIVE SPROCKET
i
WEAR IS VISIBLE |
| RIM TyPE WEARS INSIDE |
ON SPUR TYPE |
| |
(Model 358......354831) | , | (Model 358,354871),, |
Figure 52
BAR CLAMP |
|
|
|
| (_OUTER |
BAR MOUNTING |
| UIDE PLATE |
|
| |
NUTS |
| 6 |
III | I | iiii |
L |
| '' |
21
