PREPARING YOUR SAW FOR USE
A. GEEING READY
1. READ YOUR 0PERATOWS MANUAL
CAREFULLY'" .....
.......Your Operators; Manual has been developed to
i_ help you,prepare your saw for use and to under-
•Stand its safe operation. It is;important that you read your manual completely to become familiar with the unitbeforeyou begin assembly.
•, ,, H,,
2. HAVE THE FOLLOWING AVAILABLE:
a. Protective | gloves | |
b; Approved, | marked fuel | container |
c. One gallon | leaded or | unleaded, | regular | |
gasoline | • | • | : | _ :_' |
d. Bar and Chain Lubricant | (see page 9). | |||
e.
. tool is necessary for assembly. The long end of the too! can be used as a slotted
screwdriver. The small PiPe end canbe us-
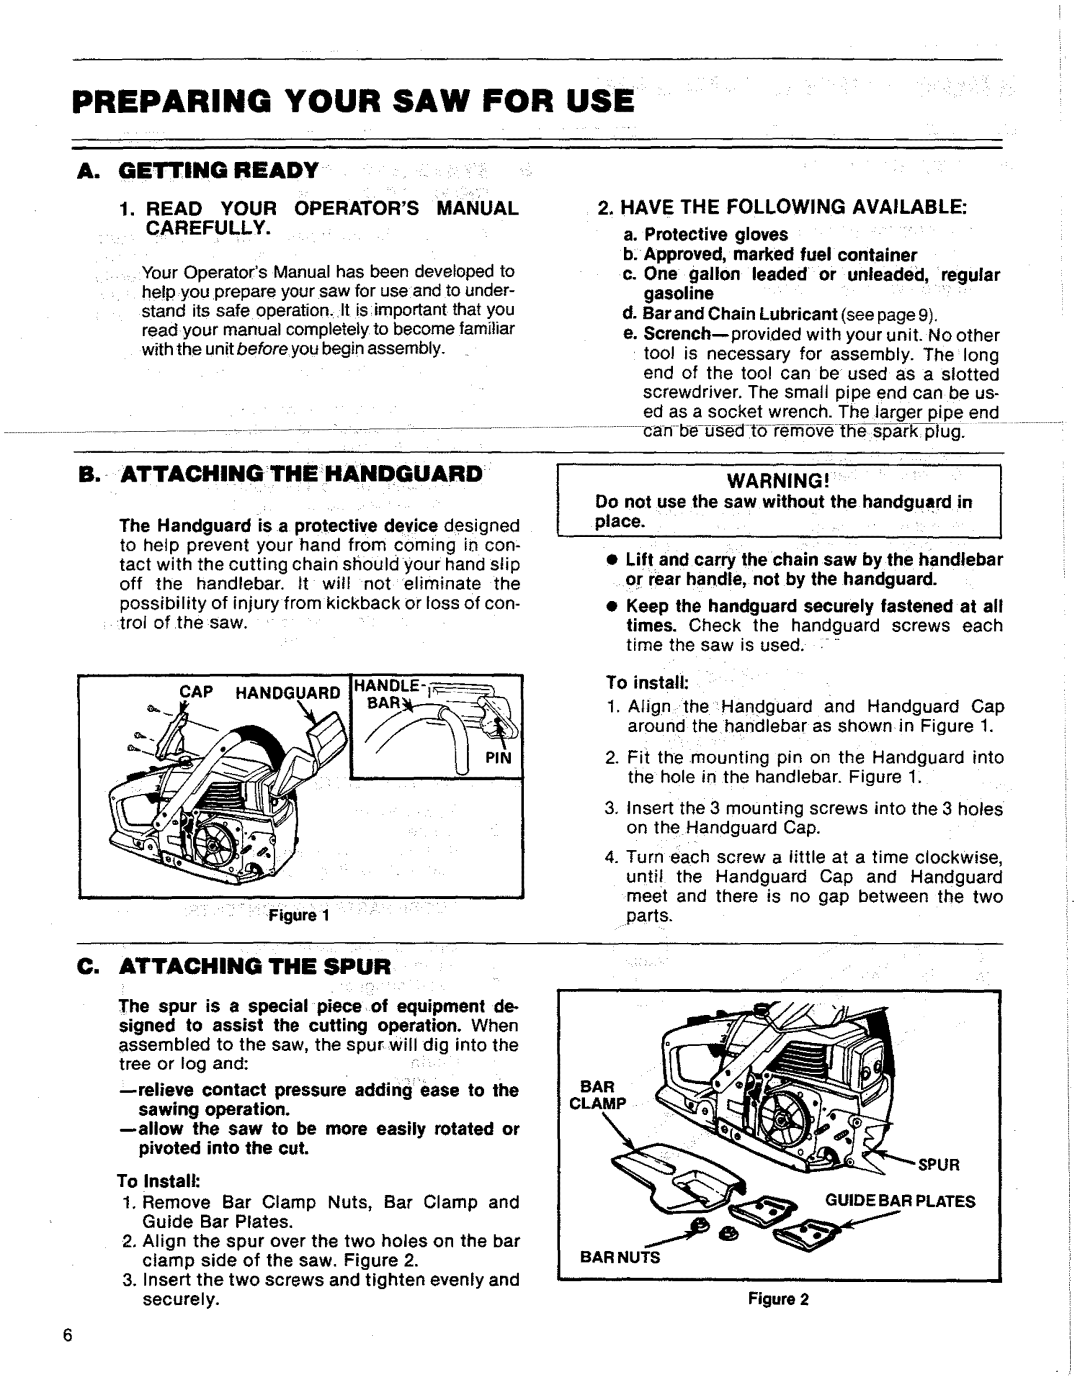
B. ATTACHINGTHE HANDGUARD
The Handguard is a protective device designed
to hetp prevent your hand from coming in con- tact with the cutting chain should your hand slip
off the handlebar, tt will not:eliminate the
possibility of injury from kickback or toss of con- _trol of.the saw. .........
CAP HANDGUARD HANDLE
?_ _ |
WARNING! .......
Do not use the saw without the handguard in
place.,
•Lift and carry the chain saw by the handlebar or rear handle, not by the handguard.
•Keep the handguard securely fastened at all times. Check the handguard screws each time the saw is used. ....
To install:
1. Alignthe Handguard and Handguard Cap around the handlebar as shownin Figure 1.
2.Fit the imounting pin on the Handguard into the hole in the handlebar. Figure 1.
3.Insert the 3 mounting screws into the 3 holes on the Handguard Cap.
4.Turn .each screw a little at a time clockwise, until the Handguard Cap and Handguard meet and there is no gap between the two parts.
C. ATTACHING | THE | SPUR |
| |
The spur is a special piece,of equipment de- | ||||
signed to | assist | the | cutting operation. | When |
assembled | to the | saw, | the spur. will dig | into the |
tree or log | and: |
| _i .... |
|
To Install:
1.Remove Bar Clamp Nuts, Bar Clamp and Guide Bar Plates.
2.Align the spur over the two holes on the bar clamp side of the saw. Figure 2.
3.Insert the two screws and tighten evenly and securely.
i,,i
BAR
CLAMP. (
GUIDE BAR PLATES
BAR NUTS
Figure 2