
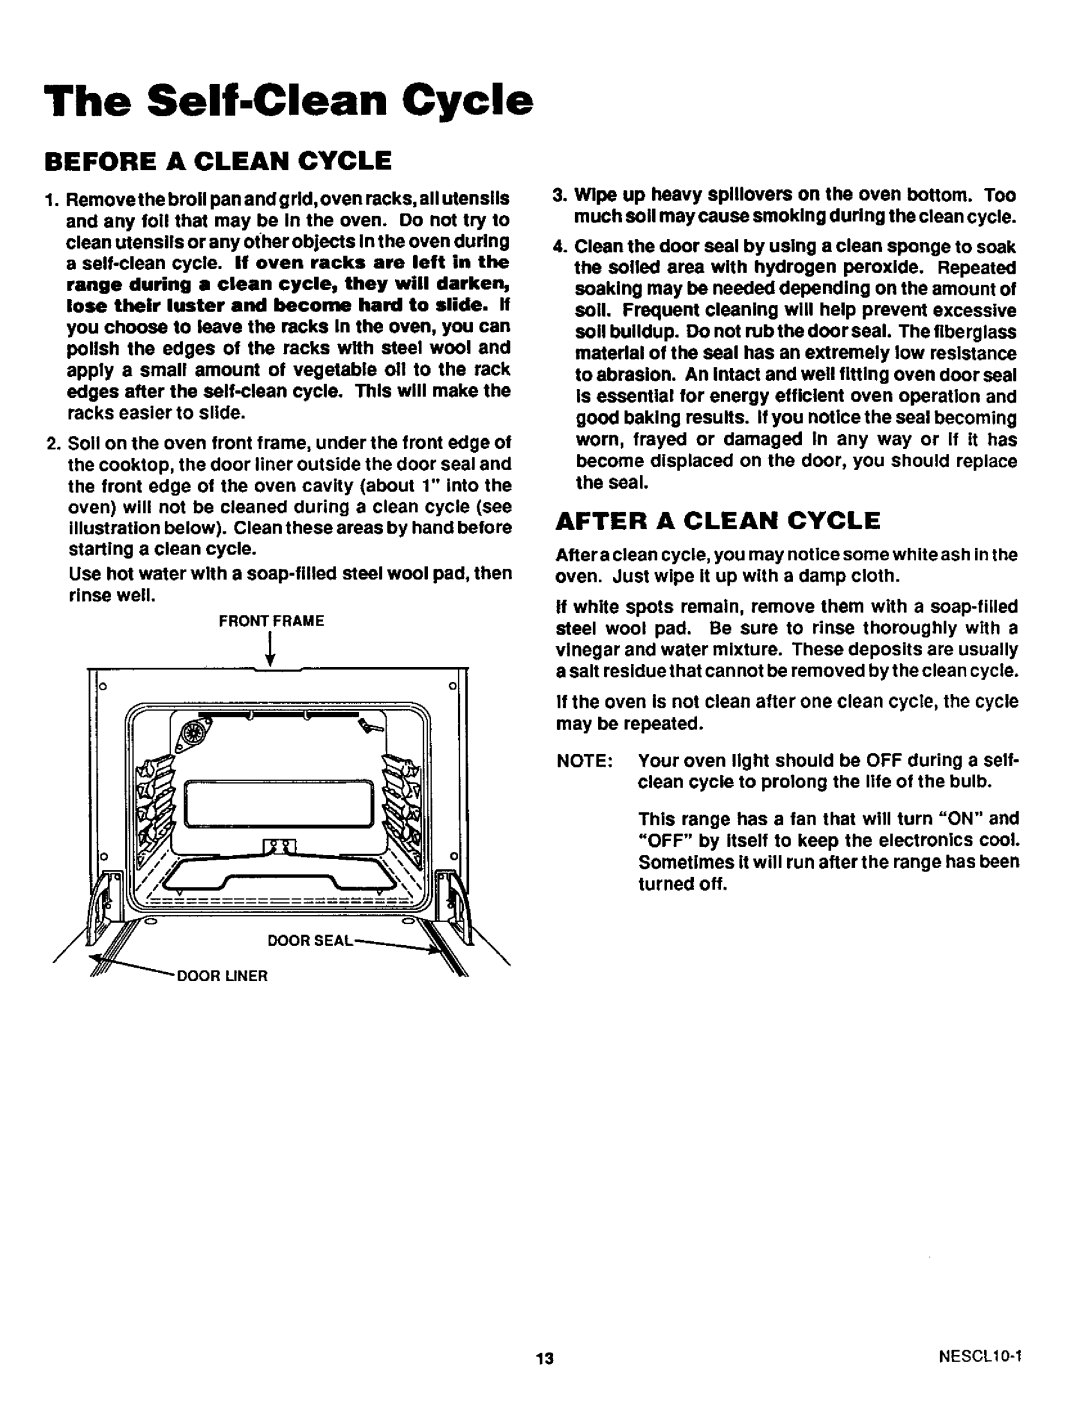
46521, 46520, 46525 specifications
Sears has long been known for providing quality appliances, and models 46525, 46520, and 46521 are exemplary representations of this tradition. Each of these models showcases a blend of functionality, innovative technology, and user-friendly designs that cater to varied consumer needs.The Sears 46525 model stands out with its robust stainless-steel construction, ensuring durability and a sleek appearance. This unit features an adjustable temperature control, allowing users to customize their cooking environment according to specific recipes and preferences. Its spacious interior can accommodate larger meals, making it ideal for families or those who love to entertain. The model also includes an eco-friendly mode that conserves energy while maintaining optimal performance, appealing to environmentally conscious consumers.
Model 46520 offers a variety of smart features, including a built-in digital display that simplifies the cooking process. With programmable settings and a timer function, it allows users to achieve consistent results with minimal effort. This unit stands out due to its rapid preheat capability, which reduces wait time significantly. Additionally, the unit features self-cleaning technology, which not only eases the maintenance burden but also enhances the overall cooking experience by ensuring a clean cooking environment.
The Sears 46521 model takes convenience to the next level with its advanced sensor cooking technology. This feature automatically adjusts cooking time and temperature based on the food's moisture and density, resulting in perfectly cooked meals every time. The model’s versatility is complemented by multiple cooking modes, including bake, broil, and roast, making it suitable for a wide range of culinary tasks. Its compact design does not compromise on performance, providing a formidable cooking environment even in smaller kitchens.
In terms of energy efficiency, all three models are designed to meet or exceed industry standards. They utilize seamless insulation, which helps retain heat while minimizing energy consumption. Additionally, their user-friendly interfaces and clear control layouts make these ovens accessible for users of all ages.
In summary, Sears models 46525, 46520, and 46521 combine innovative technology, practical features, and stylish designs to cater to diverse culinary preferences. Whether you’re a novice cook or a seasoned chef, these appliances offer an impressive range of functionalities that can enhance any kitchen experience. With these models, Sears continues to uphold its reputation for quality and innovation.