Vacuum Cleaner specifications
Sears has long been a trusted name in home appliances, and its vacuum cleaners are no exception. Known for their reliability, efficiency, and innovative technologies, Sears vacuum cleaners have carved a niche for themselves in the market. With a focus on delivering thorough cleaning, Sears offers a wide range of models tailored to the unique needs of consumers.One of the standout features of Sears vacuum cleaners is their powerful suction technology. Whether you're dealing with carpets, hard floors, or upholstery, these vacuums provide the strength needed to remove dust, dirt, and allergens effectively. Equipped with powerful motors, they deliver consistent performance, making cleaning a breeze.
Another remarkable aspect of Sears vacuum cleaners is their filtration systems. Many models come with HEPA filters, which can trap up to 99.97% of dust and allergens as small as 0.3 microns. This is particularly advantageous for allergy sufferers or anyone looking to maintain a cleaner home environment. The combination of powerful suction and advanced filtration ensures that the air remains clean and free of irritants while vacuuming.
Sears also prioritizes convenience in their vacuum designs. Many models are lightweight and easy to maneuver, which makes them user-friendly, especially for those who may struggle with heavier alternatives. Furthermore, several models offer versatile cleaning options, including detachable canisters for above-floor cleaning, making them ideal for tight spaces and corners.
Durability is another key characteristic of Sears vacuum cleaners. Constructed from high-quality materials, these vacuums are built to last and withstand regular use. This durability ensures that consumers receive long-term value from their investment.
Sears has embraced technology as well, with some models featuring smart sensors that automatically adjust suction power based on the surface being cleaned. Additionally, models with bagless designs allow for easy emptying and maintenance, saving users time and hassle.
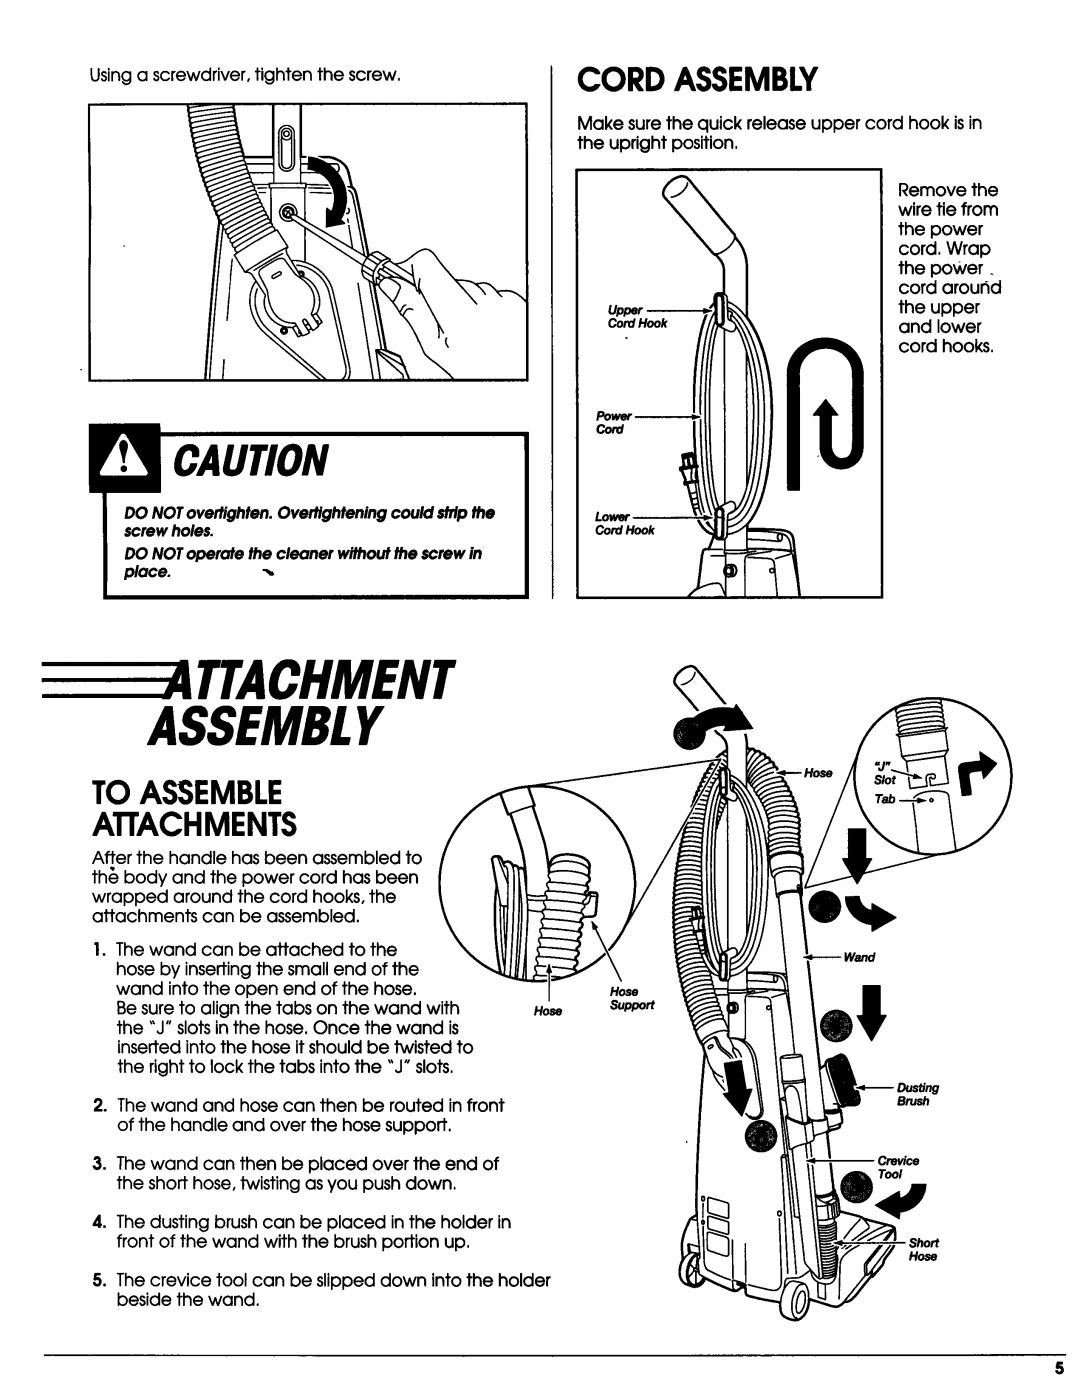
Lastly, Sears vacuum cleaners are known for their range of accessories and attachments. From crevice tools to pet hair brushes, these extras enhance the vacuum's versatility, making it suitable for various cleaning tasks around the home.
In conclusion, Sears vacuum cleaners combine powerful suction, advanced filtration, user-friendly designs, and durable construction to deliver exceptional cleaning solutions for modern households. With a commitment to quality and innovation, Sears continues to be a reliable choice for consumers looking to maintain clean and healthy living environments.