S1215C specifications
The Shark S1215C is an advanced vacuum cleaner that combines powerful suction with innovative design to deliver an exceptional cleaning experience. This model is part of Shark's commitment to creating versatile and efficient cleaning solutions for modern households.One of the hallmark features of the Shark S1215C is its substantial suction power, which is enhanced by Shark's proprietary technologies. This vacuum utilizes a high-efficiency motor that generates strong suction across a variety of surfaces, making it ideal for tackling both carpets and hard floors. With its multi-surface cleaning capability, users can effortlessly transition from one surface to another, ensuring a thorough clean throughout the home.
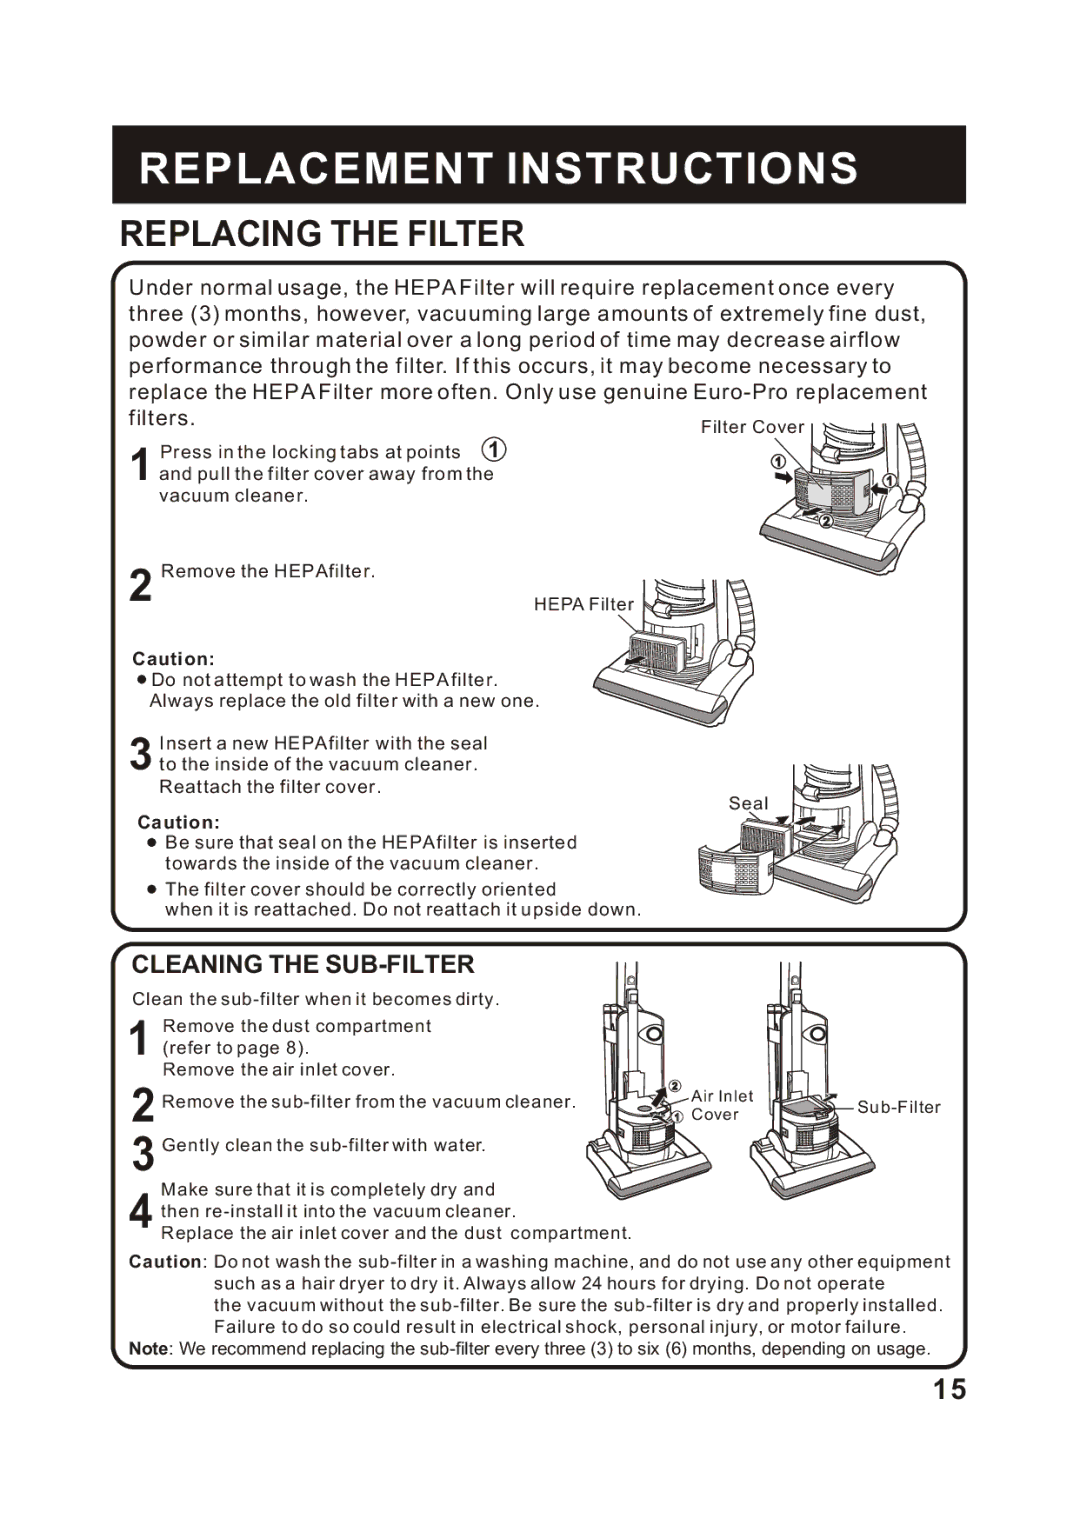
The Shark S1215C also incorporates a HEPA filtration system, which is crucial for those with allergies or respiratory sensitivities. This advanced filtration traps allergens and fine dust particles, allowing for cleaner air quality. The vacuum’s design not only emphasizes performance but also user convenience. It features a lightweight and ergonomic design that makes maneuvering around the home simple and comfortable.
Another notable aspect is its versatility. The Shark S1215C comes with a range of attachments and tools tailored for specific cleaning tasks, such as a crevice tool for tight spaces and an upholstery tool for furniture. These attachments allow users to tackle various cleaning challenges effectively, from high corners to delicate fabrics.
The vacuum is designed for easy maintenance, featuring a washable dust cup that can be emptied with minimal effort, reducing the hassle associated with vacuuming routines. Additionally, the power cord is of an adequate length, allowing for flexibility when reaching different areas without constantly changing outlets.
User-friendly controls and indicators are also a significant part of the S1215C's design. The vacuum includes an easy-to-read indicator for filter cleaning, which helps maintain optimal performance. The combination of efficient cleaning technologies, user-centric design, and powerful performance makes the Shark S1215C an exceptional choice for anyone seeking a reliable vacuum cleaner that meets the demands of contemporary cleaning needs. With its ability to deliver a deep clean while ensuring ease of use, the Shark S1215C stands out in the crowded market of home cleaning appliances.

