4 Plug and Play Screen does not Appear
If the Plug and Play screen does not appear after you connect the unit to your computer with a USB cable and turn on the power of both devices, follow the steps below to verify that the USB port is available.
1
2
Click the "start" button, click "Control Panel", and then click "Performance and Maintenance".
•On Windows Vista, click the "start" button, click "Control Panel", and then click "System and Maintenance".
•On Windows 98/Me/2000, click the "Start" button, select "Settings", and then click "Control Panel".
Click "System", click the "Hardware" tab, and click the "Device Manager" button.
•On Windows Vista, click the "Device Manager", and if a message screen appears asking you for confirmation, click "Continue".
•On Windows 2000,
•On Windows 98/Me,
•"Universal Serial Bus controllers" will appear in the list of devices.
If the "System" icon does not appear on Windows ![]()
![]() Me, click "view all Control Panel options" to view Note it.
Me, click "view all Control Panel options" to view Note it.
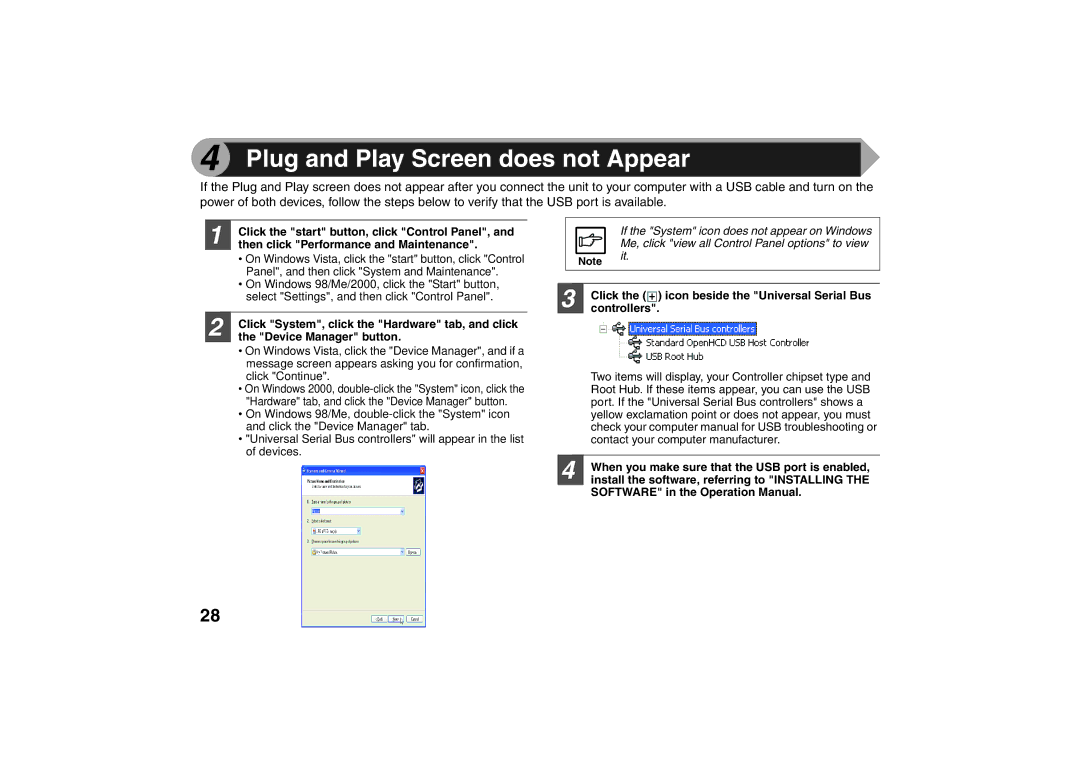
3 | Click the ( ) icon beside the "Universal Serial Bus |
controllers". |
| Two items will display, your Controller chipset type and |
| Root Hub. If these items appear, you can use the USB |
| port. If the "Universal Serial Bus controllers" shows a |
| yellow exclamation point or does not appear, you must |
| check your computer manual for USB troubleshooting or |
| contact your computer manufacturer. |
|
|
4 | When you make sure that the USB port is enabled, |
install the software, referring to "INSTALLING THE |
SOFTWARE" in the Operation Manual.
28