System connections
Make sure to unplug the AC power lead before making any connections.
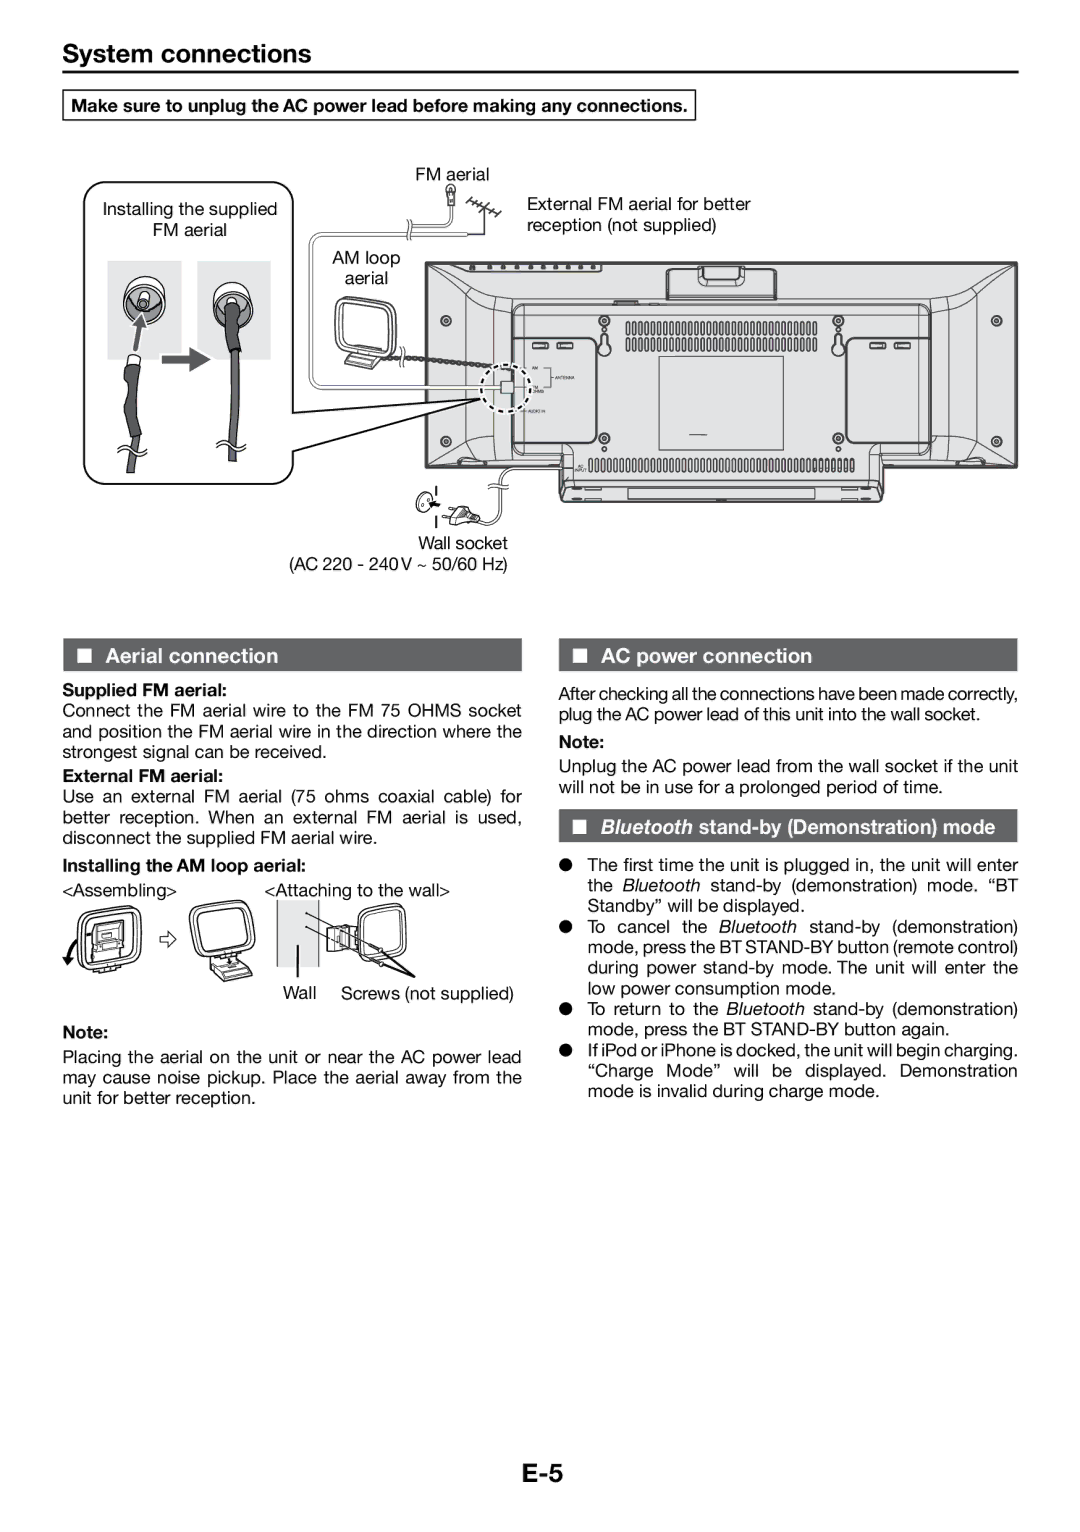
Installing the supplied
FM aerial
FM aerial
External FM aerial for better
reception (not supplied)
AM loop
aerial
Wall socket (AC 220 - 240 V ~ 50/60 Hz)
■■ Aerial connection
Supplied FM aerial:
Connect the FM aerial wire to the FM 75 OHMS socket and position the FM aerial wire in the direction where the strongest signal can be received.
External FM aerial:
Use an external FM aerial (75 ohms coaxial cable) for better reception. When an external FM aerial is used, disconnect the supplied FM aerial wire.
Installing the AM loop aerial:
<Assembling> | <Attaching to the wall> |
| Wall Screws (not supplied) |
Note:
Placing the aerial on the unit or near the AC power lead may cause noise pickup. Place the aerial away from the unit for better reception.
■■ AC power connection
After checking all the connections have been made correctly, plug the AC power lead of this unit into the wall socket.
Note:
Unplug the AC power lead from the wall socket if the unit will not be in use for a prolonged period of time.
■■ Bluetooth stand-by (Demonstration) mode
●● The fiirst time the unit is plugged in, the unit will enter the Bluetooth
●● To cancel the Bluetooth
●● To return to the Bluetooth
●● If iPod or iPhone is docked, the unit will begin charging. “Charge Mode” will be displayed. Demonstration mode is invalid during charge mode.
