
KC-860U specifications
The Sharp KC-860U is an innovative air purifier and humidifier designed to provide a healthier living environment. This multifunctional device combines advanced air cleaning technologies with humidification capabilities, making it particularly beneficial for households seeking to enhance air quality and comfort.One of the standout features of the KC-860U is its unique Plasmacluster technology. This patented system releases positive and negative ions into the air, which work to neutralize airborne pollutants, including bacteria, viruses, mold spores, and allergens. The Plasmacluster ions essentially mimic the purification process that occurs in nature, creating a fresher atmosphere inside your home.
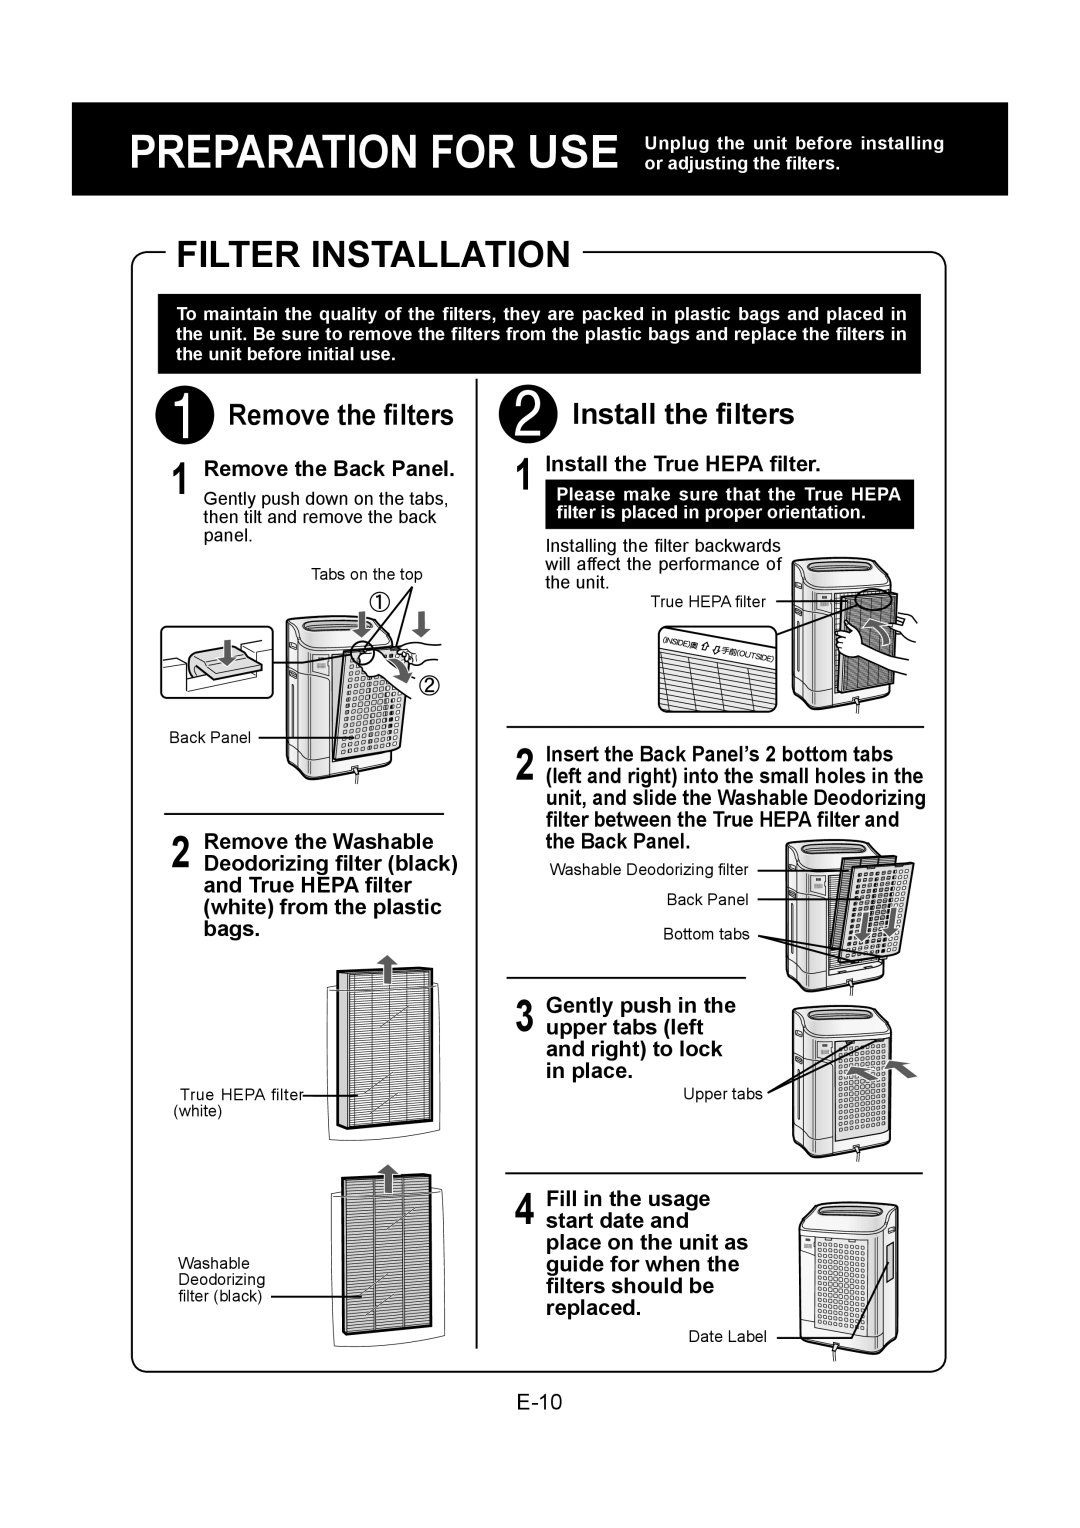
Another key characteristic of the KC-860U is its HEPA filter. This filter captures at least 99.97% of particles that are as small as 0.3 microns, including dust, pollen, pet dander, and smoke. The combination of HEPA filtration and Plasmacluster technology ensures that harmful substances are effectively removed from the air, providing you with peace of mind that your indoor environment is safe and clean.
The device is also equipped with an activated carbon filter that effectively absorbs odors and volatile organic compounds (VOCs). This feature is particularly useful in kitchens or areas with pets, as it helps to eliminate unwanted smells and chemicals from the air.
In terms of humidity control, the KC-860U boasts a built-in humidifier that adds moisture to dry air, improving overall air quality. This is especially important in winter months or arid climates where low humidity can lead to discomfort, dry skin, and respiratory issues. The humidifier operates quietly, allowing for seamless integration into daily life without disturbing your peace.
The KC-860U is designed for convenience and ease of use. It features a user-friendly interface with intuitive controls, allowing you to adjust settings effortlessly. Additionally, it includes a filter replacement indicator, ensuring that you are always aware of when maintenance is required.
With its sleek design, the Sharp KC-860U is not just functional but also complements modern home aesthetics. It operates efficiently and is suitable for medium to large-sized rooms, making it a versatile choice for various living spaces.
In summary, the Sharp KC-860U stands out as a robust air purification and humidification solution, combining advanced Plasmacluster ion technology, HEPA filtration, and an effective humidifier. Whether you are combating allergens or simply seeking a fresher environment, this device delivers high performance and comfort in one sleek package.