Basic Adjustment Settings (Continued)
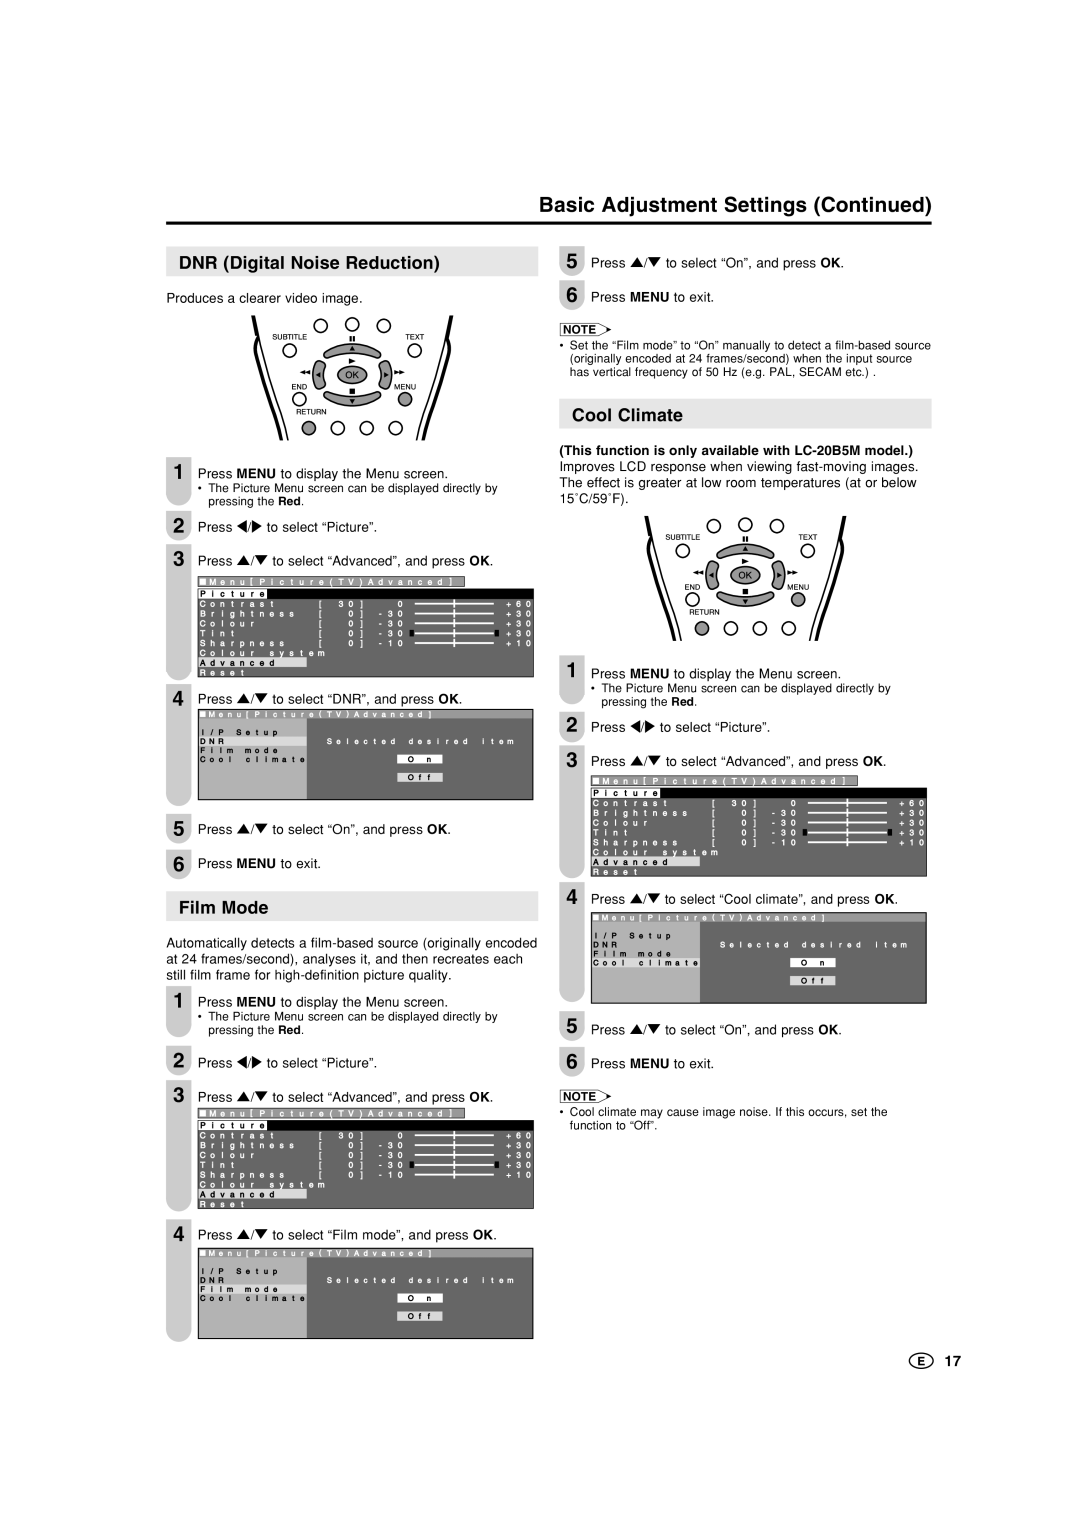
DNR (Digital Noise Reduction)
Produces a clearer video image.
5 Press '/" to select “On”, and press OK.
6 Press MENU to exit.
NOTE
•Set the “Film mode” to “On” manually to detect a
1 Press MENU to display the Menu screen.
•The Picture Menu screen can be displayed directly by pressing the Red.
2 Press \/to select “Picture”.
3 Press '/" to select “Advanced”, and press OK.
| M e n u [ P i c t u r e ( T V ) A d v a n c e d ] |
|
| ||||||
|
|
|
|
|
|
|
|
|
|
P i c t u r e |
|
|
|
|
|
|
|
| |
C o n t r a s t | [ 3 0 ] | 0 |
|
|
| + 6 0 | |||
B r i g h t n e s s | [ | 0 ] - 3 0 |
|
|
| + 3 0 | |||
C o l o u r | [ | 0 ] - 3 0 |
|
|
| + 3 0 | |||
T i n t | [ | 0 ] - 3 0 |
|
|
|
| + 3 0 | ||
S h a r p n e s s | [ | 0 ] - 1 0 |
|
|
| + 1 0 | |||
C o l o u r s y s t e m |
|
|
|
|
|
|
| ||
A d v a n c e d |
|
|
|
|
|
|
|
| |
R e s e t |
|
|
|
|
|
|
|
| |
4 | Press '/" to select “DNR”, and press OK. |
| |||
|
| M e n u [ P i c t u r e ( T V ) A d v a n c e d ] |
| ||
|
| I / P S e t u p |
|
|
|
|
| D N R |
| S e l e c t e d d e s i r e d i t e m |
|
|
| F i l m m o d e |
|
|
|
|
| C o o l c l i m a t e |
| O n |
|
|
|
|
| O f f |
|
|
|
|
|
| |
5 |
|
|
|
|
|
| Press '/" to select “On”, and press OK. |
| |||
|
| ||||
6 | Press MENU to exit. |
|
| ||
Film Mode
Automatically detects a
1 Press MENU to display the Menu screen.
•The Picture Menu screen can be displayed directly by pressing the Red.
2 Press \/to select “Picture”.
3 Press '/" to select “Advanced”, and press OK.
![]()
![]() M e n u [ P i c t u r e ( T V ) A d v a n c e d ]
M e n u [ P i c t u r e ( T V ) A d v a n c e d ]
P i c t u r e
C o n t r a s t | [ 3 0 ] | 0 |
|
| + 6 0 | |||
B r i g h t n e s s | [ | 0 ] - 3 0 |
|
| + 3 0 | |||
| ||||||||
C o l o u r | [ | 0 ] - 3 0 |
|
| + 3 0 | |||
| ||||||||
T i n t | [ | 0 ] - 3 0 |
|
|
|
| + 3 0 | |
| ||||||||
|
|
| ||||||
S h a r p n e s s | [ | 0 ] | - 1 0 |
|
| + 1 0 | ||
|
| |||||||
C o l o u r s y s t e m
A d v a n c e d
R e s e t
4 Press '/" to select “Film mode”, and press OK.
![]() M e n u [ P i c t u r e ( T V ) A d v a n c e d ]
M e n u [ P i c t u r e ( T V ) A d v a n c e d ]
I / P | S e t u p |
|
|
|
D N R |
| S e l e c t e d d e s i r e d i t e m | ||
F i l m m o d e |
|
|
| |
C o o l c l i m a t e |
| O n |
| |
O f f
Cool Climate
(This function is only available with
1 Press MENU to display the Menu screen.
•The Picture Menu screen can be displayed directly by pressing the Red.
2 Press \/to select “Picture”.
3 Press '/" to select “Advanced”, and press OK.
![]()
![]() M e n u [ P i c t u r e ( T V ) A d v a n c e d ]
M e n u [ P i c t u r e ( T V ) A d v a n c e d ]
P i c t u r e |
|
|
|
|
|
|
|
C o n t r a s t | [ 3 0 ] | 0 |
|
| + 6 0 | ||
B r i g h t n e s s | [ | 0 ] - 3 0 |
|
| + 3 0 | ||
C o l o u r | [ | 0 ] - 3 0 |
|
| + 3 0 | ||
T i n t | [ | 0 ] - 3 0 |
|
|
| + 3 0 | |
S h a r p n e s s | [ | 0 ] - 1 0 |
|
| + 1 0 | ||
C o l o u r s y s t e m |
|
|
|
|
|
| |
A d v a n c e d |
|
|
|
|
|
|
|
R e s e t |
|
|
|
|
|
|
|
4 | Press '/" to select “Cool climate”, and press OK. | |||||||
|
|
|
|
|
|
| ||
|
|
| M e n u [ P i c t u r e ( T V ) A d v a n c e d ] | |||||
|
| I / P S e t u p |
|
|
|
|
| |
|
| D N R |
| S e l e c t e d d e s i r e d i t e m | ||||
|
| F i l m m o d e |
|
|
|
|
| |
|
| C o o l c l i m a t e |
|
| O n |
| ||
|
|
|
|
|
|
| ||
|
|
|
|
|
| O f f |
| |
|
|
|
|
|
|
|
|
|
5 |
|
|
|
|
|
|
|
|
Press '/" to select “On”, and press OK. | ||||||||
6 | Press MENU to exit. |
|
|
|
| |||
NOTE
•Cool climate may cause image noise. If this occurs, set the function to “Off”.
17