Quick guide
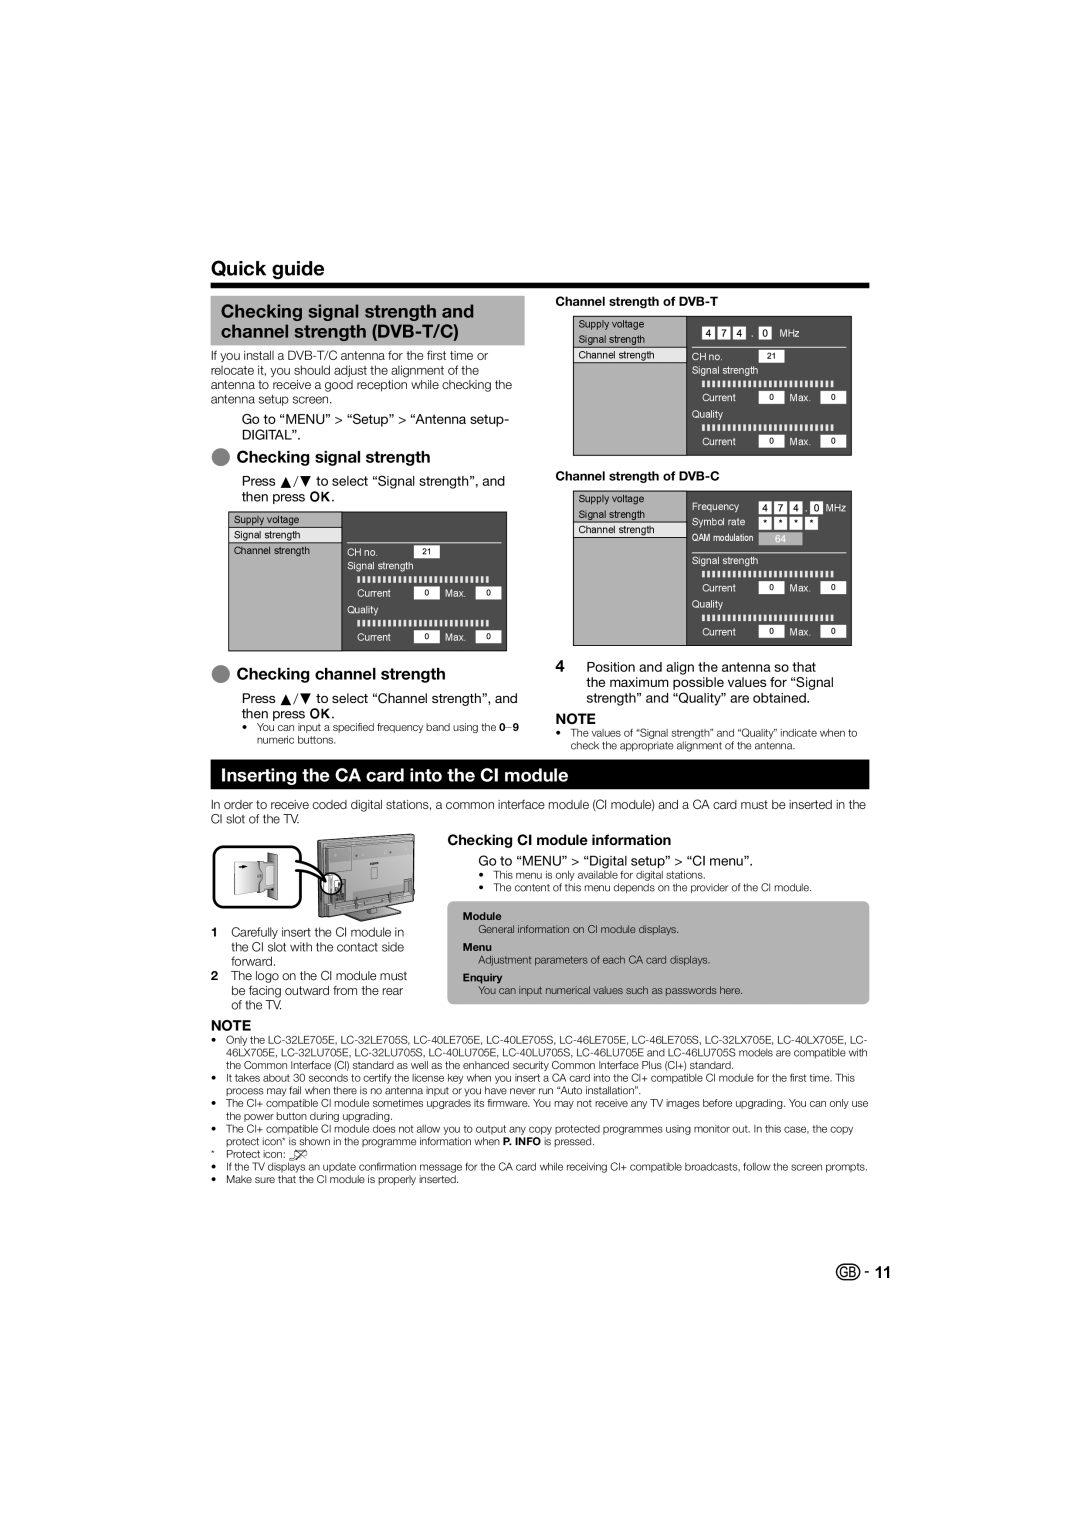
Checking signal strength and channel strength (DVB-T/C)
If you install a
Go to “MENU” > “Setup” > “Antenna setup- DIGITAL”.
EChecking signal strength
Press a/bto select “Signal strength”, and then press ;.
Channel strength of
Supply voltage |
| MHz |
Signal strength |
| |
|
| |
Channel strength | CH no. |
|
| Signal strength |
|
| Current | Max. |
| Quality |
|
| Current | Max. |
Channel strength of DVB-C
Supply voltage
Frequency | MHz |
Supply voltage
Signal strength
Channel strength
CH no. ![]() Signal strength
Signal strength
| Current |
|
|
|
|
|
| Max. | |||||||||||||
Quality |
|
|
|
|
|
|
|
|
|
| |||||||||||
|
|
|
|
|
|
|
|
|
|
|
|
|
|
|
|
|
|
|
|
|
|
|
|
|
|
|
|
|
|
|
|
|
|
|
|
|
|
|
|
|
|
|
|
| Current |
|
|
|
|
|
| Max. | |||||||||||||
|
|
|
|
|
|
| |||||||||||||||
Signal strength
Channel strength
Symbol rate |
|
|
|
|
|
|
|
|
|
|
|
| |||||||||||
QAM modulation |
|
|
|
|
|
|
|
|
|
|
| ||||||||||||
|
|
|
|
|
|
|
|
|
|
| |||||||||||||
Signal strength |
|
|
|
|
|
|
|
|
|
| |||||||||||||
|
|
|
|
|
|
|
|
|
|
|
|
|
|
|
|
|
|
|
|
|
|
|
|
|
|
|
|
|
|
|
|
|
|
|
|
|
|
|
|
|
|
|
|
|
|
|
|
| Current |
|
|
|
|
| Max. | ||||||||||||||||
|
|
|
|
|
| ||||||||||||||||||
Quality |
|
|
|
|
|
|
|
|
|
| |||||||||||||
|
|
|
|
|
|
|
| ||||||||||||||||
|
|
|
|
|
|
|
|
|
|
|
|
|
|
|
|
|
|
|
|
|
|
|
|
| Current |
|
|
|
|
| Max. | ||||||||||||||||
|
|
|
|
|
| ||||||||||||||||||
EChecking channel strength
Press a/bto select “Channel strength”, and then press ;.
•You can input a specified frequency band using the 0_9 numeric buttons.
4Position and align the antenna so that the maximum possible values for “Signal strength” and “Quality” are obtained.
NOTE
•The values of “Signal strength” and “Quality” indicate when to check the appropriate alignment of the antenna.
Inserting the CA card into the CI module
In order to receive coded digital stations, a common interface module (CI module) and a CA card must be inserted in the CI slot of the TV.
1Carefully insert the CI module in
the CI slot with the contact side forward.
2The logo on the CI module must be facing outward from the rear of the TV.
Checking CI module information
Go to “MENU” > “Digital setup” > “CI menu”.
•This menu is only available for digital stations.
•The content of this menu depends on the provider of the CI module.
Module
General information on CI module displays.
Menu
Adjustment parameters of each CA card displays.
Enquiry
You can input numerical values such as passwords here.
NOTE
•Only the
•It takes about 30 seconds to certify the license key when you insert a CA card into the CI+ compatible CI module for the first time. This process may fail when there is no antenna input or you have never run “Auto installation”.
•The CI+ compatible CI module sometimes upgrades its firmware. You may not receive any TV images before upgrading. You can only use the power button during upgrading.
•The CI+ compatible CI module does not allow you to output any copy protected programmes using monitor out. In this case, the copy protect icon* is shown in the programme information when P. INFO is pressed.
*Protect icon: X
•If the TV displays an update confirmation message for the CA card while receiving CI+ compatible broadcasts, follow the screen prompts.
•Make sure that the CI module is properly inserted.
![]()
![]() 11
11
