Connecting a PC
1Adjusting the PC image
1automatically
This function enables the screen to be automatically adjusted to its best possible condition when the analogue terminals of the TV and PC are connected with a commercially available DVI/VGA conversion cable, etc.
1Press b to select
2Press MENU key.
3Press ► key to select Setup and press OK.
4Press ▼ key to select Picture→more... and press
OK.
5Press ► key to select PC IN display and press OK.
6Press ▼ key to select Auto Adjustment and press OK.
NOTE
•When connecting a PC and select
•“Auto adjustment” may fail if the PC image has low resolution, has unclear (black) edges, or is moved while executing “Auto adjustment”.
•Be sure to connect the PC to the TV and switch it on before starting “Auto adjustment”.
•“Auto adjustment” can be executed only when inputting analogue signals through the “PC IN” terminal.
Adjusting the PC image manually
Ordinarily you can easily adjust the picture as necessary to change image position using “Auto Adjustment”. In some cases, however, manual adjustment is needed to optimise the image.
1Press b to select
2Press MENU on the remote control.
3Select Setup → Picture → more..., then press OK.
4Press ► key to select “PC IN display”, then press OK.
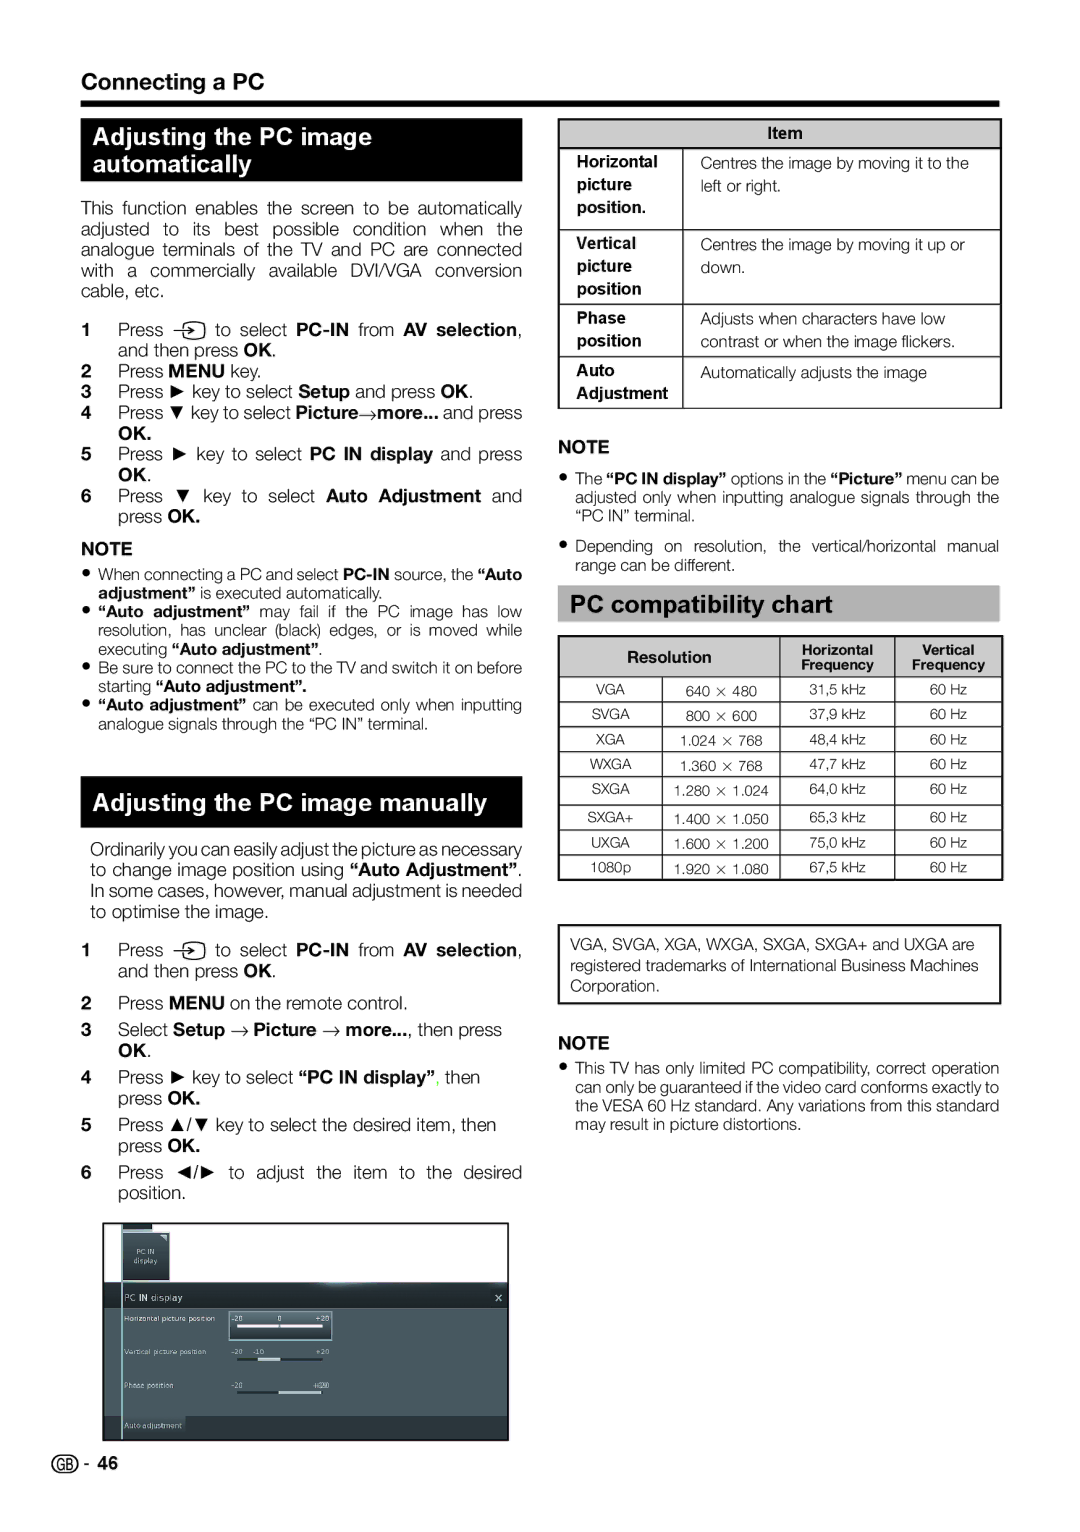
5Press ▲/▼ key to select the desired item, then press OK.
6Press ◄/► to adjust the item to the desired position.
| Item |
Horizontal | Centres the image by moving it to the |
picture | left or right. |
position. |
|
|
|
Vertical | Centres the image by moving it up or |
picture | down. |
position |
|
|
|
Phase | Adjusts when characters have low |
position | contrast or when the image fl ickers. |
|
|
Auto | Automatically adjusts the image |
Adjustment |
|
|
|
NOTE
•The “PC IN display” options in the “Picture” menu can be adjusted only when inputting analogue signals through the “PC IN” terminal.
•Depending on resolution, the vertical/horizontal manual range can be different.
PC compatibility chart
Resolution | Horizontal | Vertical | ||
Frequency | Frequency | |||
|
| |||
|
|
|
| |
VGA | 640 g 480 | 31,5 kHz | 60 Hz | |
SVGA | 800 g 600 | 37,9 kHz | 60 Hz | |
XGA | 1.024 g 768 | 48,4 kHz | 60 Hz | |
WXGA | 1.360 g 768 | 47,7 kHz | 60 Hz | |
SXGA | 1.280 g 1.024 | 64,0 kHz | 60 Hz | |
|
|
|
| |
SXGA+ | 1.400 g 1.050 | 65,3 kHz | 60 Hz | |
UXGA | 1.600 g 1.200 | 75,0 kHz | 60 Hz | |
1080p | 1.920 g 1.080 | 67,5 kHz | 60 Hz | |
VGA, SVGA, XGA, WXGA, SXGA, SXGA+ and UXGA are registered trademarks of International Business Machines Corporation.
NOTE
•This TV has only limited PC compatibility, correct operation can only be guaranteed if the video card conforms exactly to the VESA 60 Hz standard. Any variations from this standard may result in picture distortions.
![]()
![]() 46
46