Charging the Battery Pack
1 Attach the battery pack on the camcorder, and make sure that the Power switch is set to OFF.
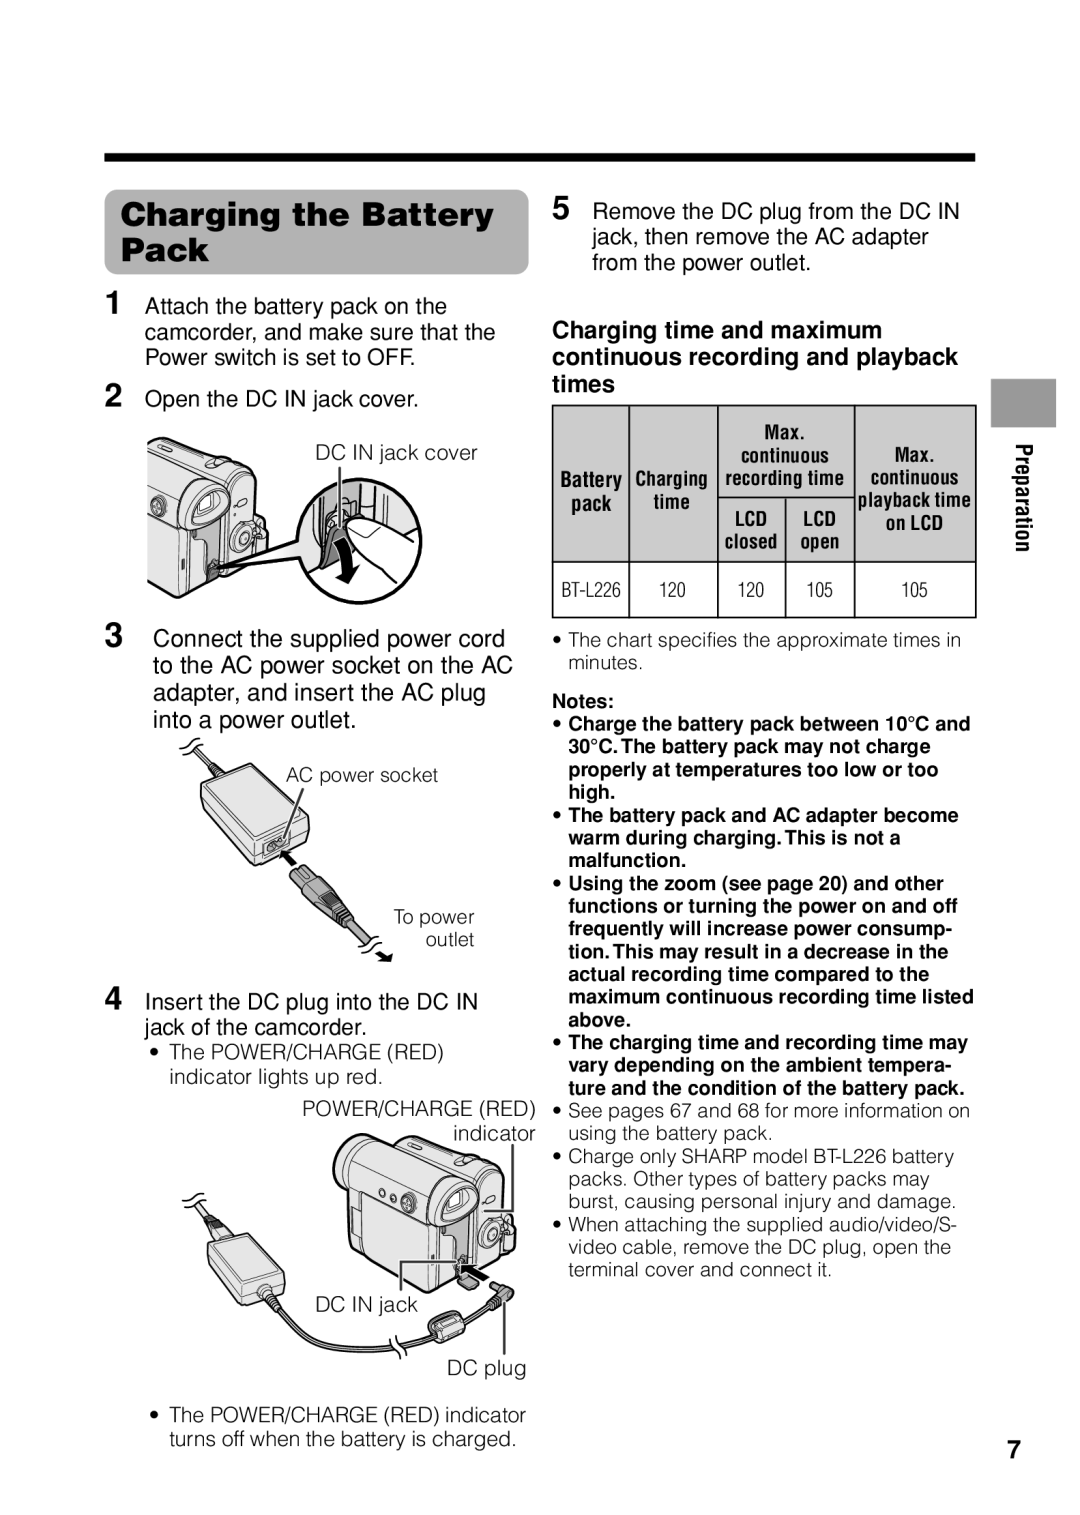
2 Open the DC IN jack cover.
DC IN jack cover
3 Connect the supplied power cord to the AC power socket on the AC adapter, and insert the AC plug into a power outlet.
AC power socket
To power outlet
4 Insert the DC plug into the DC IN jack of the camcorder.
•The POWER/CHARGE (RED) indicator lights up red.
POWER/CHARGE (RED) indicator
DC IN jack
DC plug
•The POWER/CHARGE (RED) indicator turns off when the battery is charged.
5 Remove the DC plug from the DC IN jack, then remove the AC adapter from the power outlet.
Charging time and maximum continuous recording and playback times
|
| Max. | Max. | |
|
| continuous | ||
Battery | Charging | recording time | continuous | |
pack | time | LCD | LCD | playback time |
|
| on LCD | ||
|
| closed | open |
|
120 | 120 | 105 | 105 | |
|
|
|
|
|
•The chart specifies the approximate times in minutes.
Notes:
•Charge the battery pack between 10°C and 30°C. The battery pack may not charge properly at temperatures too low or too high.
•The battery pack and AC adapter become warm during charging. This is not a malfunction.
•Using the zoom (see page 20) and other functions or turning the power on and off frequently will increase power consump- tion. This may result in a decrease in the actual recording time compared to the maximum continuous recording time listed above.
•The charging time and recording time may vary depending on the ambient tempera- ture and the condition of the battery pack.
•See pages 67 and 68 for more information on using the battery pack.
•Charge only SHARP model
•When attaching the supplied audio/video/S- video cable, remove the DC plug, open the terminal cover and connect it.
Preparation
7