Basic Operations
Camera Recording
Easy Camera
Recording in Full
Auto Mode
•Before you start recording, perform the operations described on pages 5 through 18 to prepare your camcorder for recording.
3 Press the Start/Stop button to begin recording.
R E C
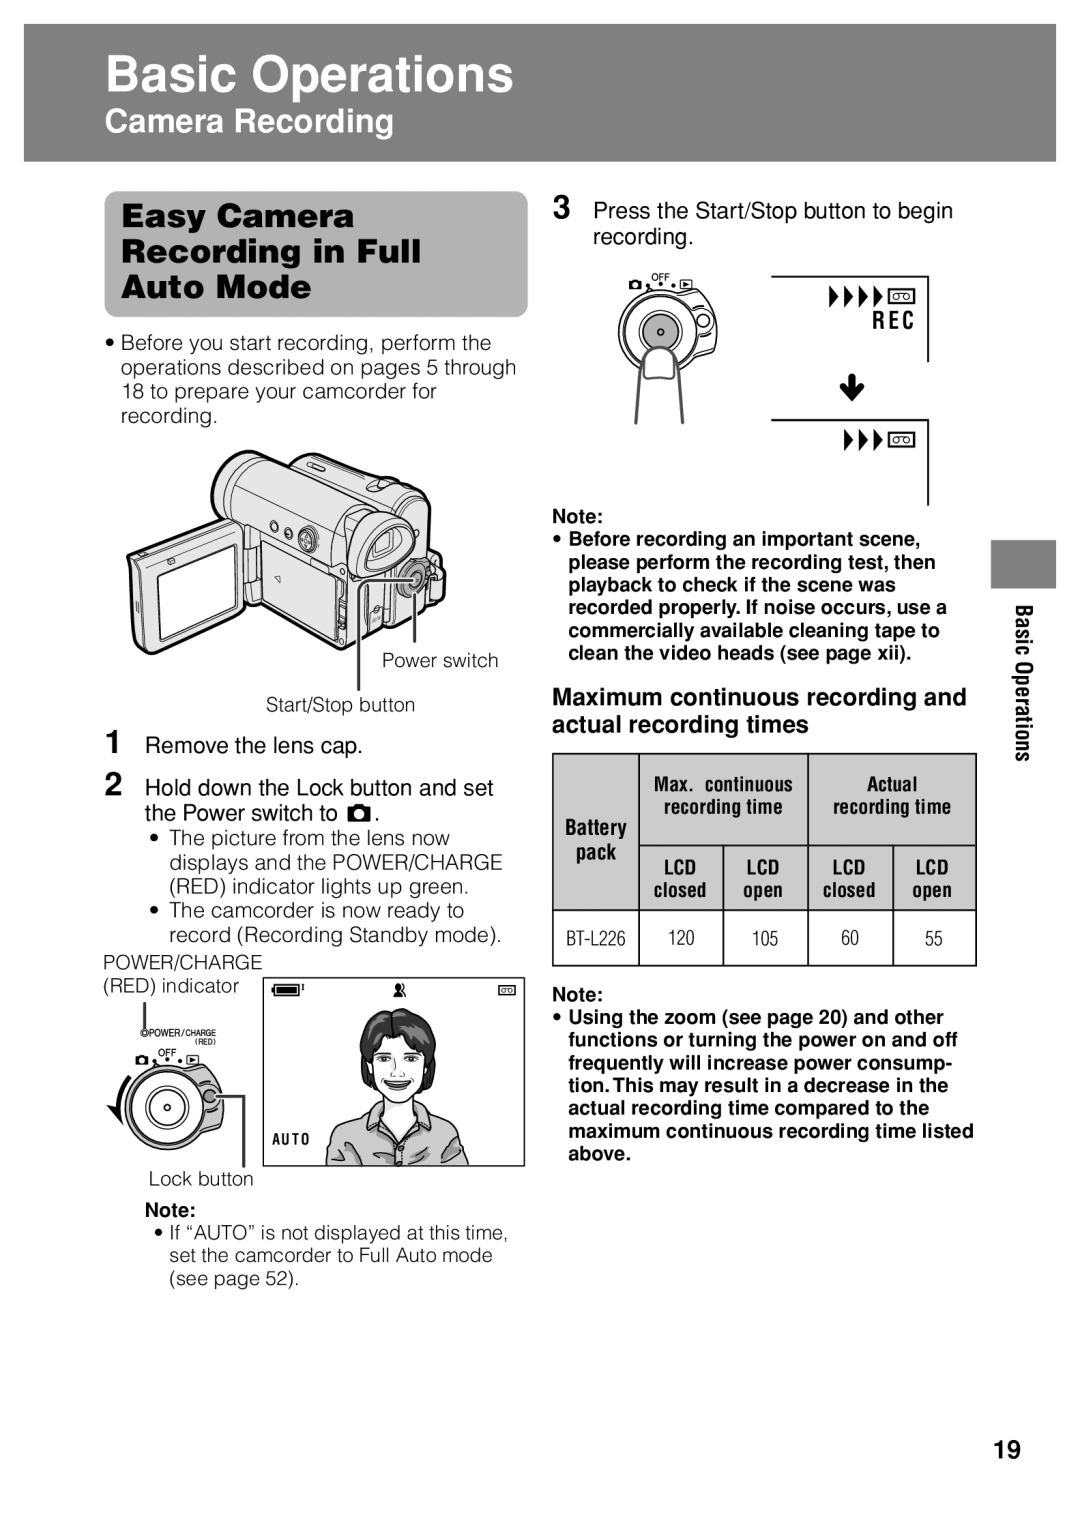
Power switch
Start/Stop button
1 Remove the lens cap.
2 Hold down the Lock button and set the Power switch to v.
•The picture from the lens now displays and the POWER/CHARGE (RED) indicator lights up green.
•The camcorder is now ready to record (Recording Standby mode).
POWER/CHARGE (RED) indicator ![]()
A U T O
Lock button
Note:
•If “AUTO” is not displayed at this time, set the camcorder to Full Auto mode (see page 52).
Note:
•Before recording an important scene, please perform the recording test, then playback to check if the scene was recorded properly. If noise occurs, use a commercially available cleaning tape to clean the video heads (see page xii).
Maximum continuous recording and actual recording times
| Max. continuous | Actual | ||
Battery | recording time | recording time | ||
|
|
|
| |
pack | LCD | LCD | LCD | LCD |
| ||||
| closed | open | closed | open |
120 | 105 | 60 | 55 | |
|
|
|
|
|
Note:
•Using the zoom (see page 20) and other functions or turning the power on and off frequently will increase power consump- tion. This may result in a decrease in the actual recording time compared to the maximum continuous recording time listed above.
Basic Operations
19