Initial Installation
QUALIFIED INSTALLERS ONLY
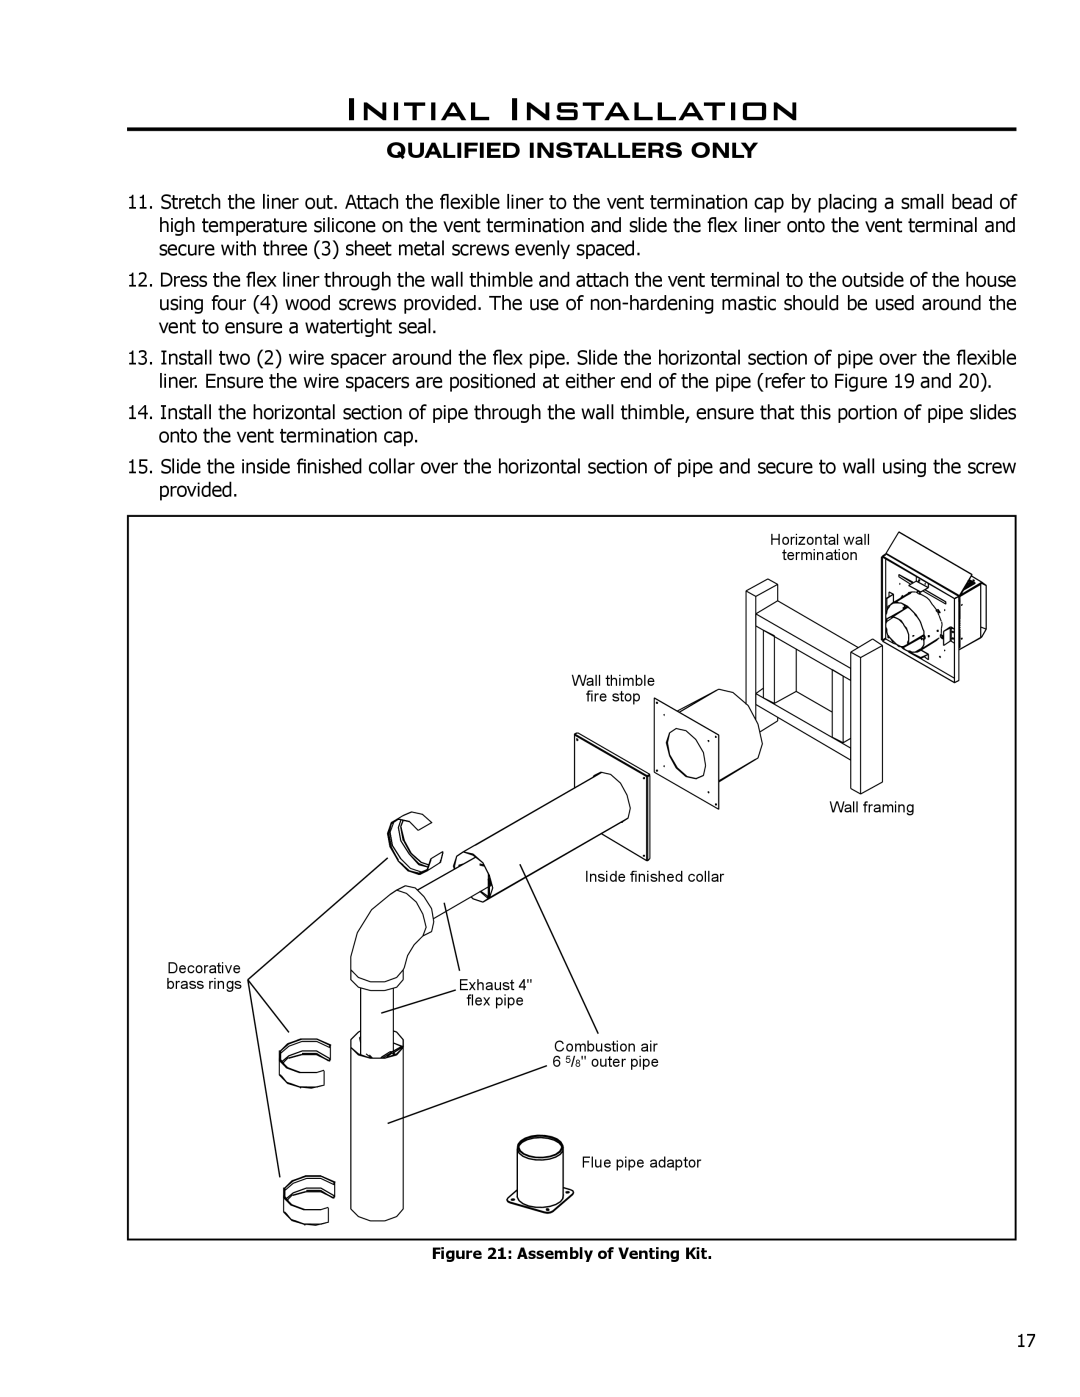
11.Stretch the liner out. Attach the flexible liner to the vent termination cap by placing a small bead of high temperature silicone on the vent termination and slide the flex liner onto the vent terminal and secure with three (3) sheet metal screws evenly spaced.
12.Dress the flex liner through the wall thimble and attach the vent terminal to the outside of the house using four (4) wood screws provided. The use of
13.Install two (2) wire spacer around the flex pipe. Slide the horizontal section of pipe over the flexible liner. Ensure the wire spacers are positioned at either end of the pipe (refer to Figure 19 and 20).
14.Install the horizontal section of pipe through the wall thimble, ensure that this portion of pipe slides onto the vent termination cap.
15.Slide the inside finished collar over the horizontal section of pipe and secure to wall using the screw provided.
|
| Horizontal wall |
|
| termination |
|
| Wall thimble |
|
| fire stop |
|
| Wall framing |
|
| Inside finished collar |
Decorative |
|
|
brass rings | Exhaust 4" |
|
| flex pipe |
|
| Combustion air | |
| 6 | 5/8" outer pipe |
|
| Flue pipe adaptor |
Figure 21: Assembly of Venting Kit.
17