Initial Installation
QUALIFIED INSTALLERS ONLY
VENTING INTO A CLASS ‘A’ CHIMNEY:
This model is also certified and tested to vent into CLASS ‘A’ wood stove chimneys. Place the freestanding direct vent appliance in the desired location.
Use a conversion kit from Simpson Duravent (931, 932, or 933), or Security Chimney (SV4CCK1, SV4CCK2, or SV4CCK1). Which kit is used will depending on the inner diameter of the CLASS ‘A’ chimney that this appliance is to be vented into.
Place a bead of high temperature silicone or
NOTE: An approved 4” (10 cm) diameter flex liner must be used in the application.
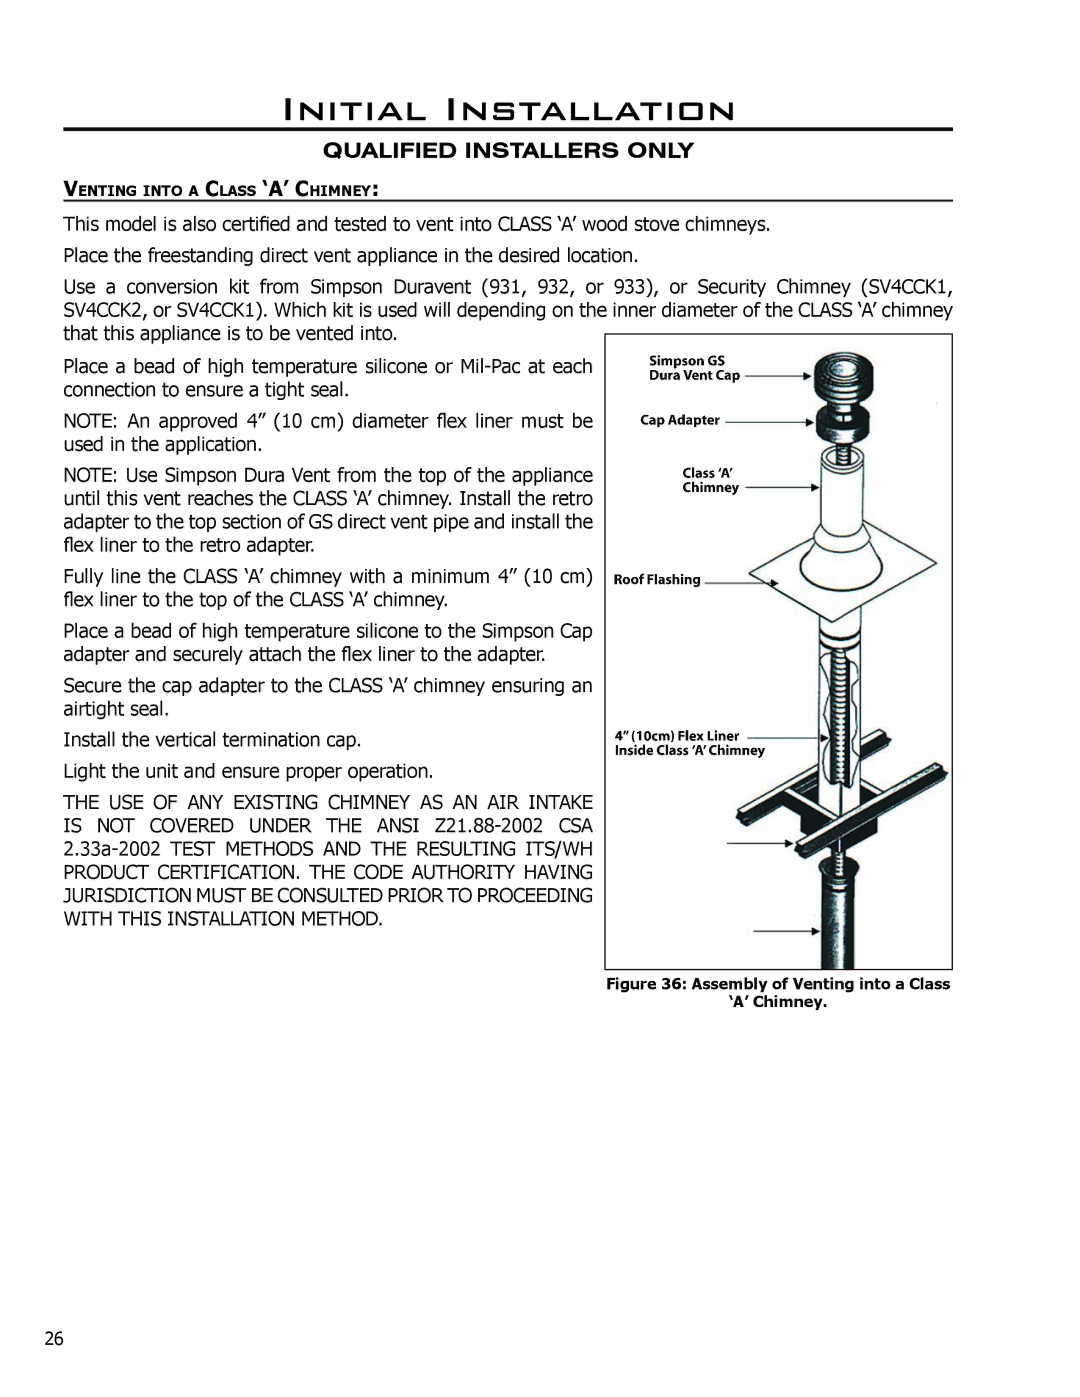
NOTE: Use Simpson Dura Vent from the top of the appliance until this vent reaches the CLASS ‘A’ chimney. Install the retro adapter to the top section of GS direct vent pipe and install the flex liner to the retro adapter.
Fully line the CLASS ‘A’ chimney with a minimum 4” (10 cm) flex liner to the top of the CLASS ‘A’ chimney.
Place a bead of high temperature silicone to the Simpson Cap adapter and securely attach the flex liner to the adapter.
Secure the cap adapter to the CLASS ‘A’ chimney ensuring an airtight seal.
Install the vertical termination cap.
Light the unit and ensure proper operation.
THE USE OF ANY EXISTING CHIMNEY AS AN AIR INTAKE
IS NOT COVERED UNDER THE ANSI
2.33a-2002 TEST METHODS AND THE RESULTING ITS/WH
PRODUCT CERTIFICATION. THE CODE AUTHORITY HAVING
JURISDICTION MUST BE CONSULTED PRIOR TO PROCEEDING WITH THIS INSTALLATION METHOD.
Figure 36: Assembly of Venting into a Class
‘A’ Chimney.
26
