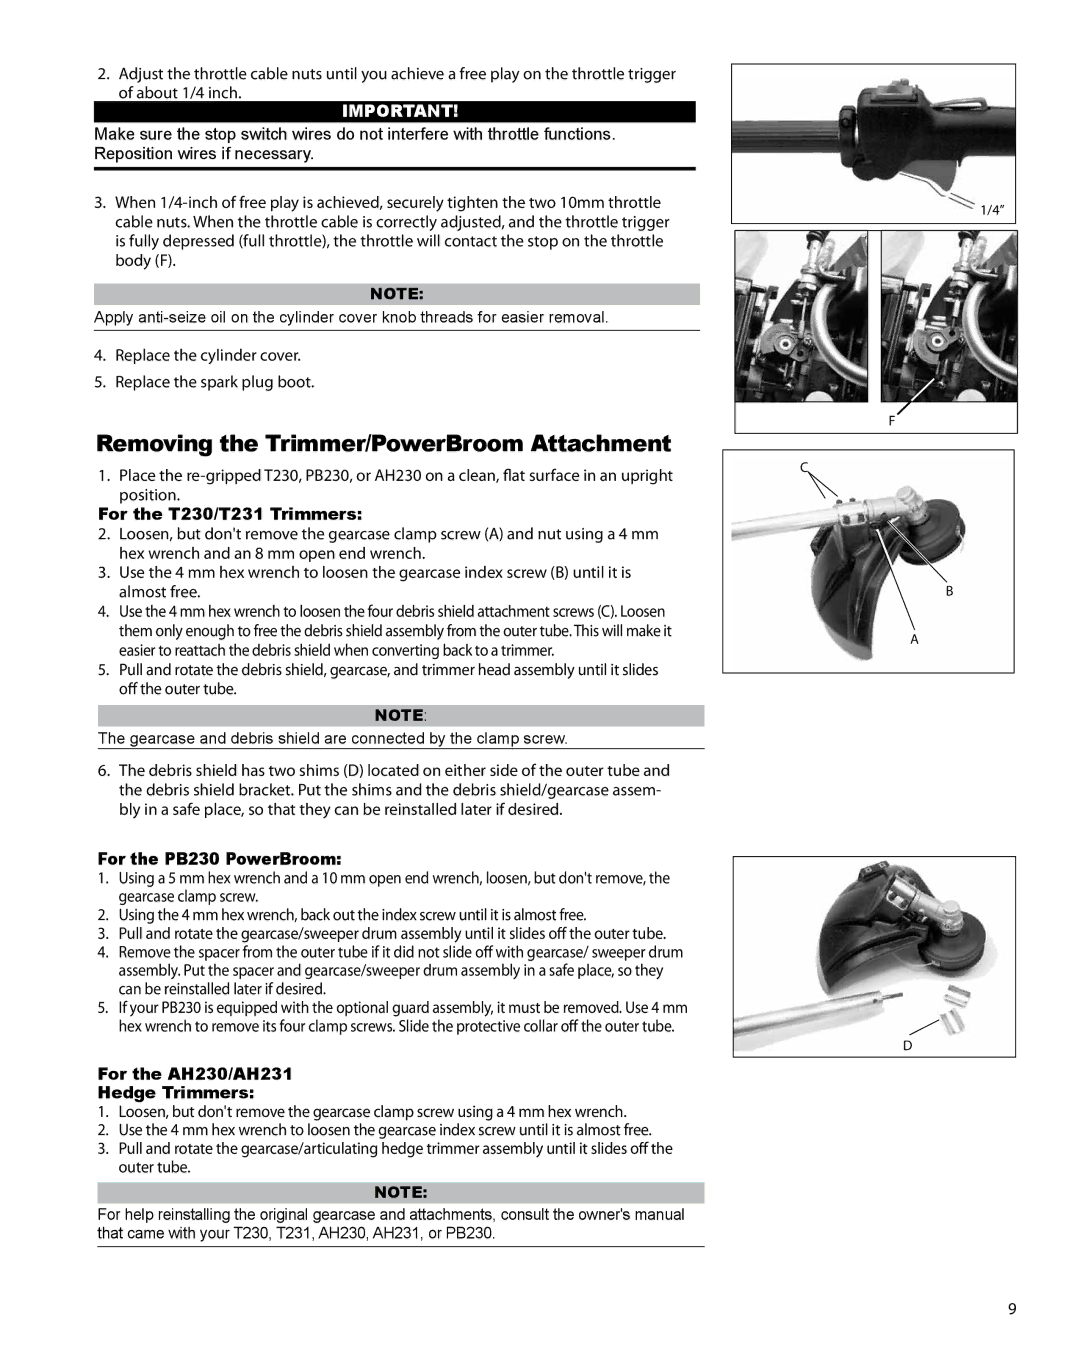
2. Adjust the throttle cable nuts until you achieve a free play on the throttle trigger of about 1/4 inch.
IMPORTANT!
Make sure the stop switch wires do not interfere with throttle functions. Reposition wires if necessary.
3.When
NOTE:
Apply
4.Replace the cylinder cover.
5.Replace the spark plug boot.
Removing the Trimmer/PowerBroom Attachment
1.Place the
For the T230/T231 Trimmers:
2.Loosen, but don't remove the gearcase clamp screw (A) and nut using a 4 mm hex wrench and an 8 mm open end wrench.
3.Use the 4 mm hex wrench to loosen the gearcase index screw (B) until it is almost free.
4.Use the 4 mm hex wrench to loosen the four debris shield attachment screws (C). Loosen them only enough to free the debris shield assembly from the outer tube. This will make it easier to reattach the debris shield when converting back to a trimmer.
5.Pull and rotate the debris shield, gearcase, and trimmer head assembly until it slides off the outer tube.
NOTE:
The gearcase and debris shield are connected by the clamp screw.
6.The debris shield has two shims (D) located on either side of the outer tube and the debris shield bracket. Put the shims and the debris shield/gearcase assem- bly in a safe place, so that they can be reinstalled later if desired.
For the PB230 PowerBroom:
1.Using a 5 mm hex wrench and a 10 mm open end wrench, loosen, but don't remove, the gearcase clamp screw.
2.Using the 4 mm hex wrench, back out the index screw until it is almost free.
3.Pull and rotate the gearcase/sweeper drum assembly until it slides off the outer tube.
4. Remove the spacer from the outer tube if it did not slide off with gearcase/ sweeper drum assembly. Put the spacer and gearcase/sweeper drum assembly in a safe place, so they can be reinstalled later if desired.
5.If your PB230 is equipped with the optional guard assembly, it must be removed. Use 4 mm hex wrench to remove its four clamp screws. Slide the protective collar off the outer tube.
For the AH230/AH231
Hedge Trimmers:
1.Loosen, but don't remove the gearcase clamp screw using a 4 mm hex wrench.
2.Use the 4 mm hex wrench to loosen the gearcase index screw until it is almost free.
3.Pull and rotate the gearcase/articulating hedge trimmer assembly until it slides off the outer tube.
NOTE:
For help reinstalling the original gearcase and attachments, consult the owner's manual that came with your T230, T231, AH230, AH231, or PB230.
1/4” |
F |
C |
B
A
D
9