Prior To Assembly
Before assembling, make sure you have all the components required for a complete unit:
Gearcase assembly
Guide Bar
Saw Chain
Throttle Grip w/interlock
Scabbard
Owner's/Operator's manual
Assembly Tool (s)
Safety Labels
Carefully inspect all components mak- ing sure they are not damaged.
IMPORTANT!
The terms “left”,
WARNING!
Assembly
Installing The Interlock Throttle Grip
Do not make unauthorized modifi- cations or alterations to your pole pruner or its components.
NOTE:
The steps on pages 6 - 8 are not necessary for models AH230 and AH231 because they come equipped with an interlocking throttle grip assembly as standard equipment.
Remove Outer Tube From Powerhead
1.Place the T230 or PB230 on a clean flat surface, in an upright position.
2. Remove the cylinder cover as instructed in your unit owner's manual.
3. Loosen the inner throttle cable adjusting nut with a 10 mm wrench.
4. Lift the throttle cable housing out of the notch on the powerhead.
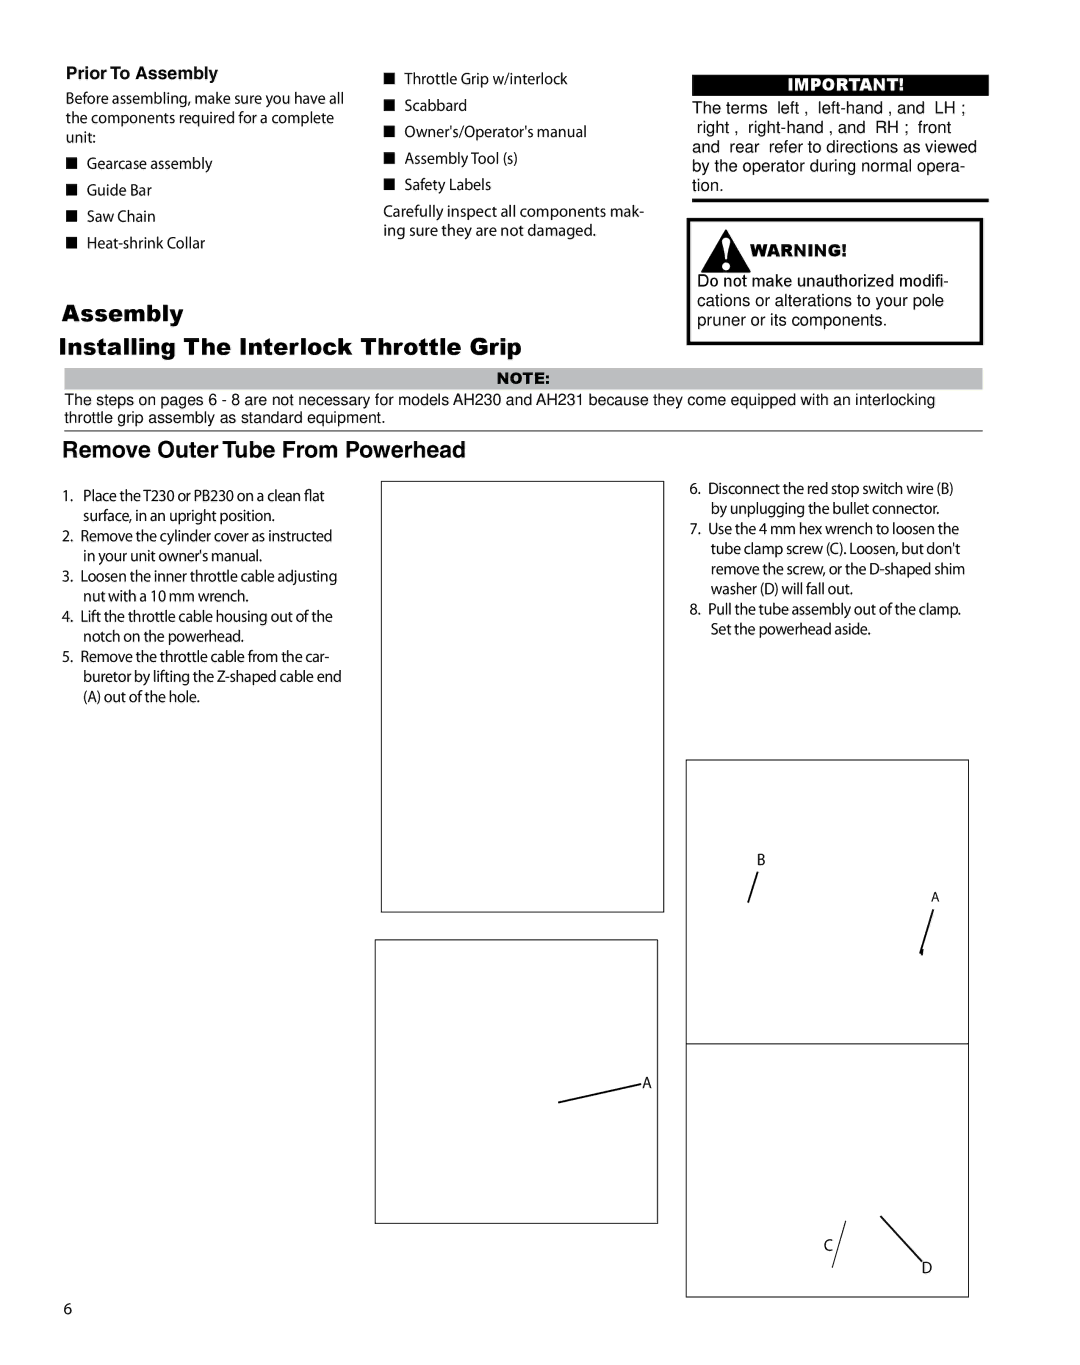
5. Remove the throttle cable from the car- buretor by lifting the
(A) out of the hole.
6. Disconnect the red stop switch wire (B) by unplugging the bullet connector.
7. Use the 4 mm hex wrench to loosen the tube clamp screw (C). Loosen, but don't remove the screw, or the
8. Pull the tube assembly out of the clamp. Set the powerhead aside.
B
A
A
C
D
6