FOUR SEASONS™ III


 CROSSBAR MOUNTING BRACKET INSTALLATION
|
|
| CEILING FAN |
| FOR FAN INSTALLATION OUTSIDE THE |
| APPROVED |
| USA GO TO PAGE 8 |
| WIRING BOX |
| EXCLUDING MODELS ENDING IN ‘E’ |
|
|
|
|
|
|
|
|
|
|
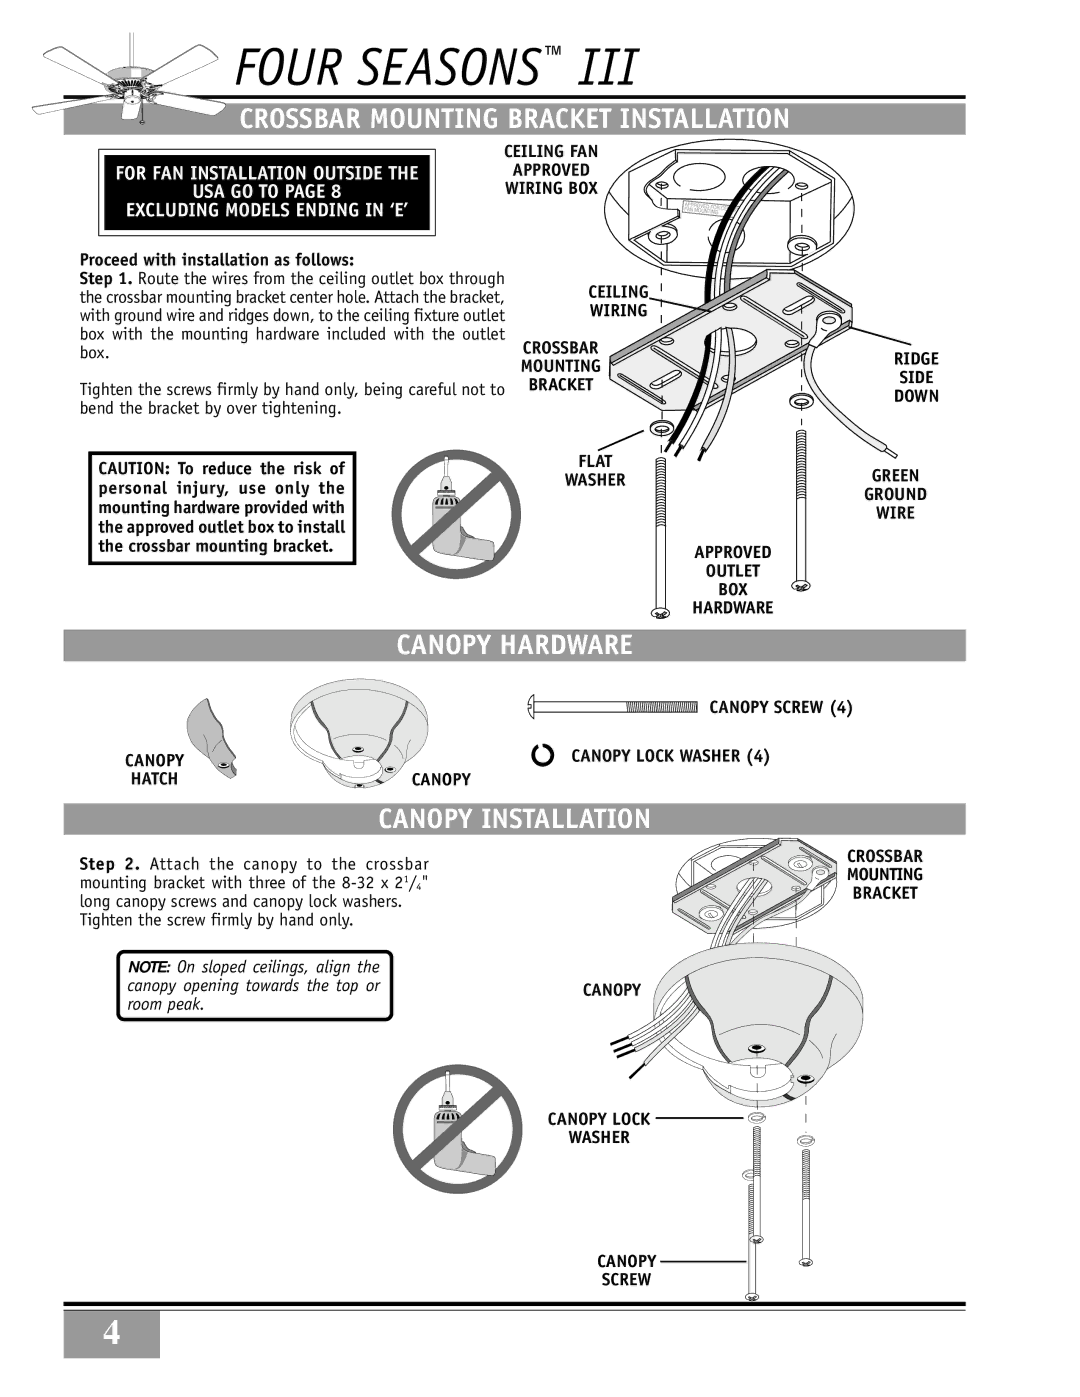
Proceed with installation as follows:
Step 1. Route the wires from the ceiling outlet box through the crossbar mounting bracket center hole. Attach the bracket, with ground wire and ridges down, to the ceiling fixture outlet box with the mounting hardware included with the outlet box.
Tighten the screws firmly by hand only, being careful not to bend the bracket by over tightening.
CAUTION: To reduce the risk of personal injury, use only the mounting hardware provided with the approved outlet box to install the crossbar mounting bracket.
CEILING
WIRING![]()
CROSSBAR
MOUNTING
BRACKET
FLAT
WASHER
APPROVED
OUTLET
BOX
HARDWARE
RIDGE
SIDE
DOWN
GREEN
GROUND
WIRE
CANOPY HARDWARE
CANOPY SCREW (4)
CANOPY | CANOPY LOCK WASHER (4) |
HATCH | CANOPY |
CANOPY INSTALLATION
Step 2. Attach the canopy to the crossbar mounting bracket with three of the
Tighten the screw firmly by hand only.
NOTE: On sloped ceilings, align the
canopy opening towards the top orCANOPY room peak.
CROSSBAR MOUNTING BRACKET
CANOPY LOCK ![]()
![]() WASHER
WASHER![]()
CANOPY
SCREW
4