FOUR SEASONS™ III 


PREPARATION INSTRUCTIONS
Unpacking: Before assembling and installing your ceiling fan, remove all parts from the shipping cartons and check them against the parts listed here. Before discarding packaging material, be certain that all parts have been removed.
GETTING STARTED
Carton Contents
The fan carton contains the fan body, warranty card, owner's manual, and all the parts necessary to assemble and install your Casablanca ceiling fan. These parts are shown at the start of each installation section. Before you start, go through this Owner’s Manual and confirm that you have all the parts shown in each section.
Be sure to use only genuine Casablanca blades. The blade shrink wrap holds 5 blades of matched weight. If more than one fan is being installed, be sure not to mix blade sets.
CAUTION: When removing the shrink wrap, be careful not to scratch the blades.
PERMA•LOCK™ HARDWARE
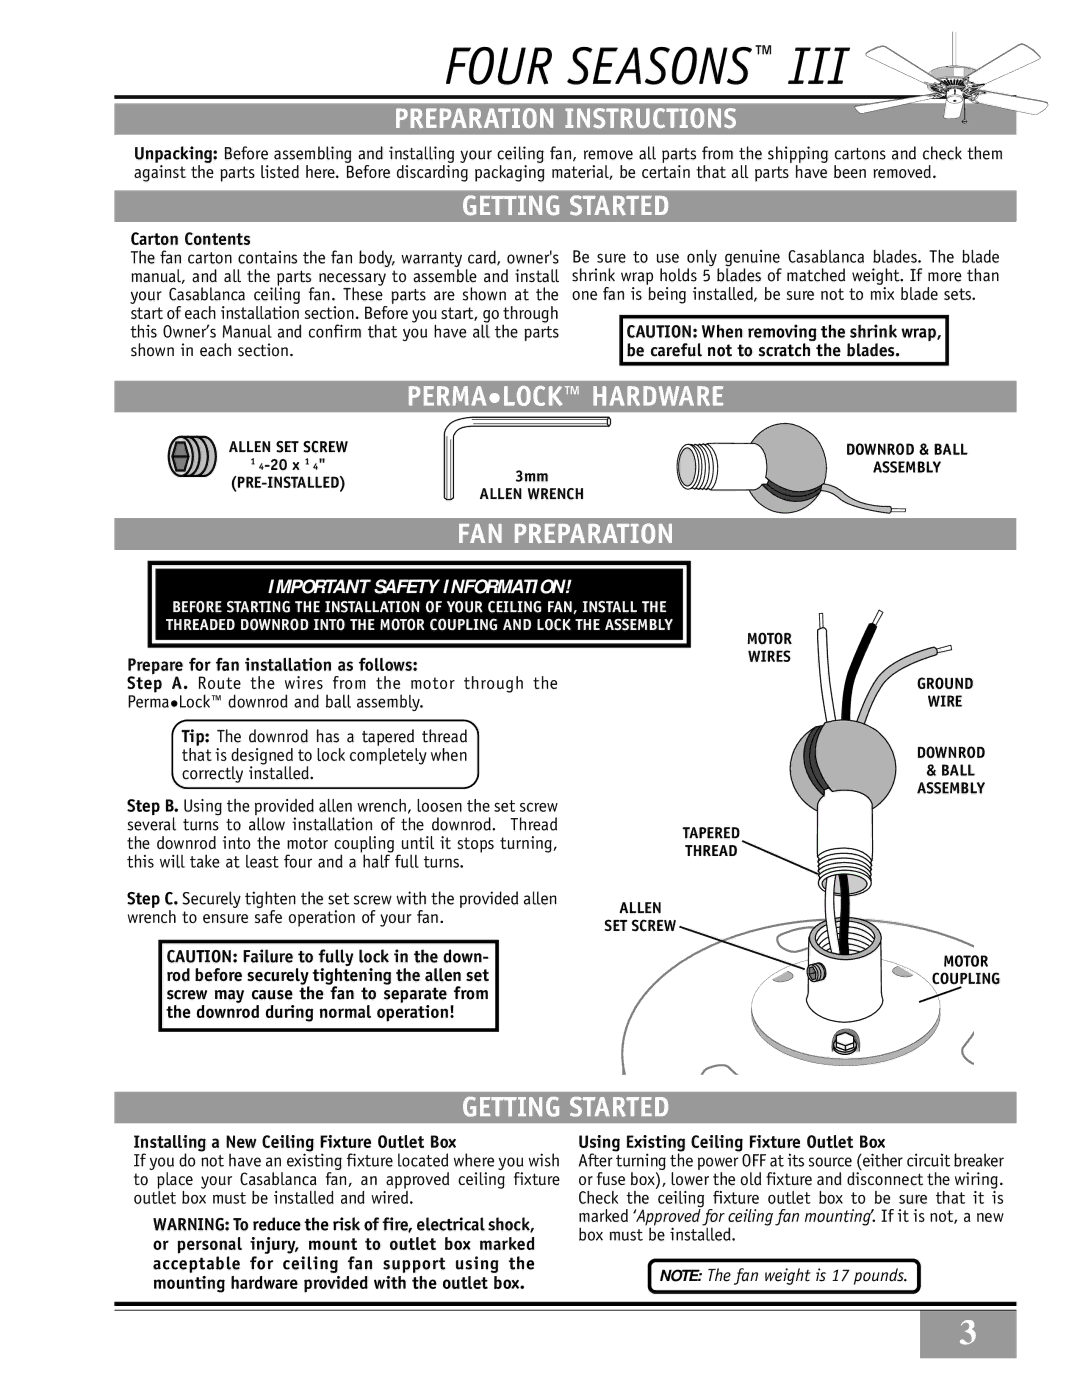
ALLEN SET SCREW
DOWNROD & BALL
1 |
3mm
ASSEMBLY
ALLEN WRENCH
FAN PREPARATION
|
|
|
|
|
|
| IMPORTANT SAFETY INFORMATION! |
|
|
|
| BEFORE STARTING THE INSTALLATION OF YOUR CEILING FAN, INSTALL THE |
|
|
|
| THREADED DOWNROD INTO THE MOTOR COUPLING AND LOCK THE ASSEMBLY |
| MOTOR |
|
|
|
| |
|
|
| ||
Prepare for fan installation as follows: |
| WIRES | ||
|
| |||
Step A. Route the wires from the motor through the | GROUND | |
Perma•Lock™ downrod and ball assembly. | WIRE | |
Tip: The downrod has a tapered thread | DOWNROD | |
that is designed to lock completely when | ||
correctly installed. | & BALL | |
Step B. Using the provided allen wrench, loosen the set screw | ASSEMBLY | |
| ||
several turns to allow installation of the downrod. Thread | TAPERED | |
the downrod into the motor coupling until it stops turning, | ||
THREAD | ||
this will take at least four and a half full turns. | ||
| ||
Step C. Securely tighten the set screw with the provided allen | ALLEN | |
wrench to ensure safe operation of your fan. | ||
SET SCREW | ||
| ||
CAUTION: Failure to fully lock in the down- | MOTOR | |
rod before securely tightening the allen set | COUPLING | |
screw may cause the fan to separate from |
| |
the downrod during normal operation! |
|
GETTING STARTED
Installing a New Ceiling Fixture Outlet Box
If you do not have an existing fixture located where you wish to place your Casablanca fan, an approved ceiling fixture outlet box must be installed and wired.
WARNING: To reduce the risk of fire, electrical shock, or personal injury, mount to outlet box marked acceptable for ceiling fan support using the mounting hardware provided with the outlet box.
Using Existing Ceiling Fixture Outlet Box
After turning the power OFF at its source (either circuit breaker or fuse box), lower the old fixture and disconnect the wiring. Check the ceiling fixture outlet box to be sure that it is marked ‘Approved for ceiling fan mounting’. If it is not, a new box must be installed.
NOTE: The fan weight is 17 pounds.
3