555970

MARK V – MOUNTED OVERARM PIN ROUTER

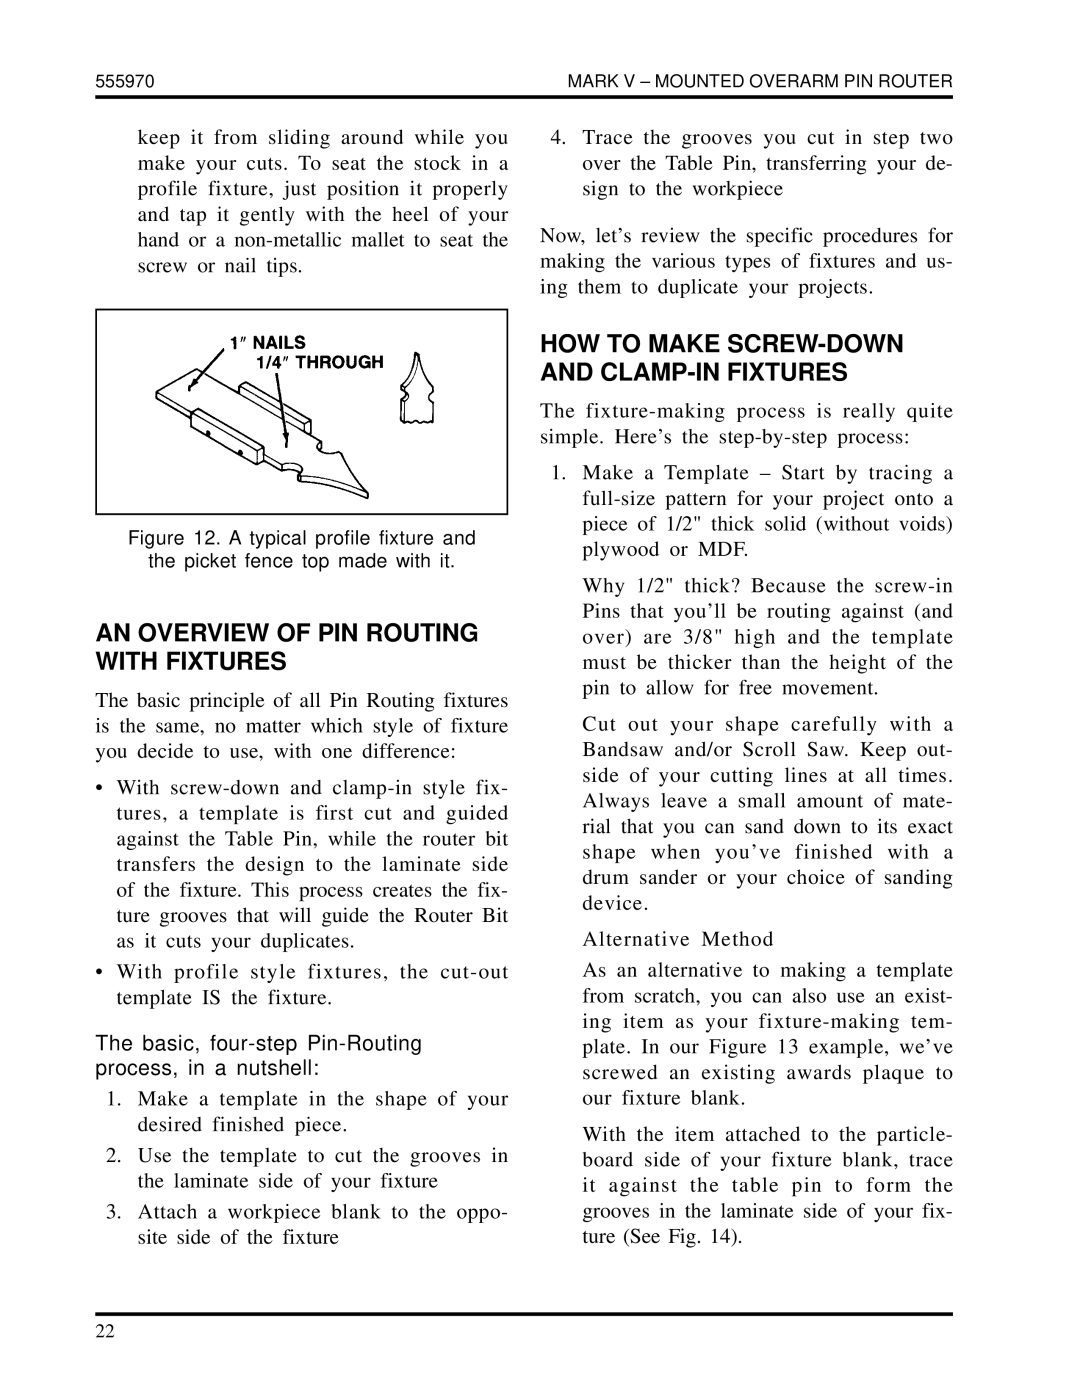
keep it from sliding around while you make your cuts. To seat the stock in a profile fixture, just position it properly and tap it gently with the heel of your hand or a non-metallic mallet to seat the screw or nail tips.

4.Trace the grooves you cut in step two over the Table Pin, transferring your de- sign to the workpiece

Now, let’s review the specific procedures for making the various types of fixtures and us- ing them to duplicate your projects.

Figure 12. A typical profile fixture and

the picket fence top made with it.

AN OVERVIEW OF PIN ROUTING WITH FIXTURES

The basic principle of all Pin Routing fixtures is the same, no matter which style of fixture you decide to use, with one difference:

With screw-down and clamp-in style fix- tures, a template is first cut and guided against the Table Pin, while the router bit transfers the design to the laminate side of the fixture. This process creates the fix- ture grooves that will guide the Router Bit as it cuts your duplicates.

With profile style fixtures, the cut-out template IS the fixture.

The basic, four-step Pin-Routing process, in a nutshell:

1.Make a template in the shape of your desired finished piece.

2.Use the template to cut the grooves in the laminate side of your fixture

3.Attach a workpiece blank to the oppo- site side of the fixture

HOW TO MAKE SCREW-DOWN AND CLAMP-IN FIXTURES

The fixture-making process is really quite simple. Here’s the step-by-step process:

1.Make a Template – Start by tracing a full-size pattern for your project onto a piece of 1/2" thick solid (without voids) plywood or MDF.

Why 1/2" thick? Because the screw-in Pins that you’ll be routing against (and over) are 3/8" high and the template must be thicker than the height of the pin to allow for free movement.

Cut out your shape carefully with a Bandsaw and/or Scroll Saw. Keep out- side of your cutting lines at all times. Always leave a small amount of mate- rial that you can sand down to its exact shape when you’ve finished with a drum sander or your choice of sanding device.

Alternative Method

As an alternative to making a template from scratch, you can also use an exist- ing item as your fixture-making tem- plate. In our Figure 13 example, we’ve screwed an existing awards plaque to our fixture blank.

With the item attached to the particle- board side of your fixture blank, trace it against the table pin to form the grooves in the laminate side of your fix- ture (See Fig. 14).

22

Page 22
Image 22
Shopsmith 555970 manual AN Overview of PIN Routing with Fixtures, HOW to Make SCREW-DOWN and CLAMP-IN Fixtures

555970 specifications

The Shopsmith 555970 is a versatile woodworking tool that embodies the ideal solution for hobbyists and professional woodworkers alike. As a multi-function machine, it combines multiple woodworking capabilities into a singular unit, allowing users to seamlessly transition between various tasks with ease and efficiency.

One of the standout features of the Shopsmith 555970 is its ability to operate as a table saw, bandsaw, drill press, disc sander, and lathe—all in one compact design. This all-in-one functionality eliminates the need for multiple machines, saving both space in the workshop and the expense of purchasing separate tools.

The device is powered by a robust motor that delivers consistent performance, enabling users to tackle a variety of materials, from softwoods to hardwoods. This makes the Shopsmith 555970 an excellent choice for diverse projects, whether constructing furniture, crafting detailed woodwork, or completing home repairs. With adjustable speeds and settings, users can customize their experience according to the specific needs of their project.

One innovative technology integrated into the Shopsmith 555970 is its quick-change tooling system. This feature allows users to switch from one function to another in a matter of minutes. For example, converting from a table saw to a lathe does not require extensive setup; instead, it can be done easily, enhancing workflow and reducing downtime.

Additionally, the Shopsmith 555970 is equipped with a dual-tube design for rigidity and stability, which contributes to safer operation and improved accuracy during cutting and shaping tasks. Safety features such as blade guards and secure locking mechanisms have also been thoughtfully integrated into the design, prioritizing user safety without sacrificing performance.

The compact design of the Shopsmith 555970 makes it particularly appealing for home workshops with limited space. Its dimensions allow it to be stored easily when not in use, catering to those who appreciate functionality without compromising their available workspace.

In summary, the Shopsmith 555970 stands out in the woodworking market for its multifunctionality, powerful motor, user-friendly features, and compact design. Whether you are a professional woodworker or a passionate DIY enthusiast, this machine offers the versatility needed to bring creative woodworking ideas to life.