Step 2: Display Bracket Installation
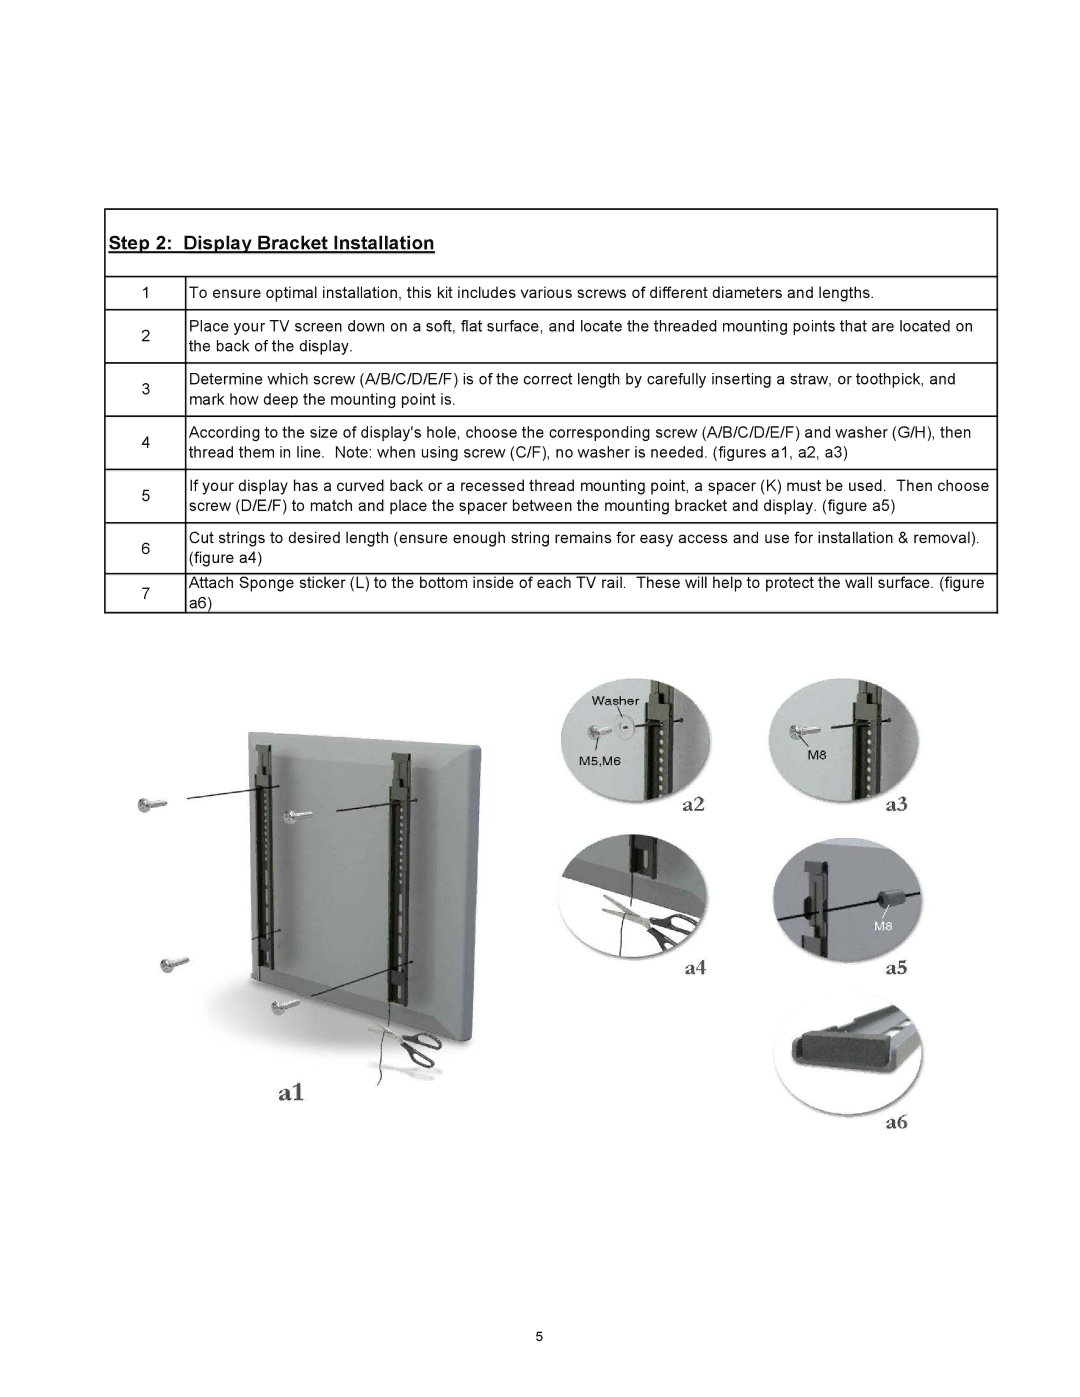
1To ensure optimal installation, this kit includes various screws of different diameters and lengths.
2Place your TV screen down on a soft, flat surface, and locate the threaded mounting points that are located on the back of the display.
3Determine which screw (A/B/C/D/E/F) is of the correct length by carefully inserting a straw, or toothpick, and mark how deep the mounting point is.
4According to the size of display's hole, choose the corresponding screw (A/B/C/D/E/F) and washer (G/H), then thread them in line. Note: when using screw (C/F), no washer is needed. (figures a1, a2, a3)
5If your display has a curved back or a recessed thread mounting point, a spacer (K) must be used. Then choose screw (D/E/F) to match and place the spacer between the mounting bracket and display. (figure a5)
Cut strings to desired length (ensure enough string remains for easy access and use for installation & removal).
6(figure a4)
Attach Sponge sticker (L) to the bottom inside of each TV rail. These will help to protect the wall surface. (figure
7a6)
5