Tools Required:
1Phillips head screw driver
2Stud finder for drywall installation
35/16" Socket and Wrench
4Electric drill, 3/16 drill bit for wood stud installation, and 1/2" (12mm) masonry bit for concrete/brick installation
Note: Please ensure that the bubble level
Step1: Wall Plate Installation
a) Wood Stud Installation
Note: When mounting to wood studs, the two wood studs must be a minimum of 16" apart.
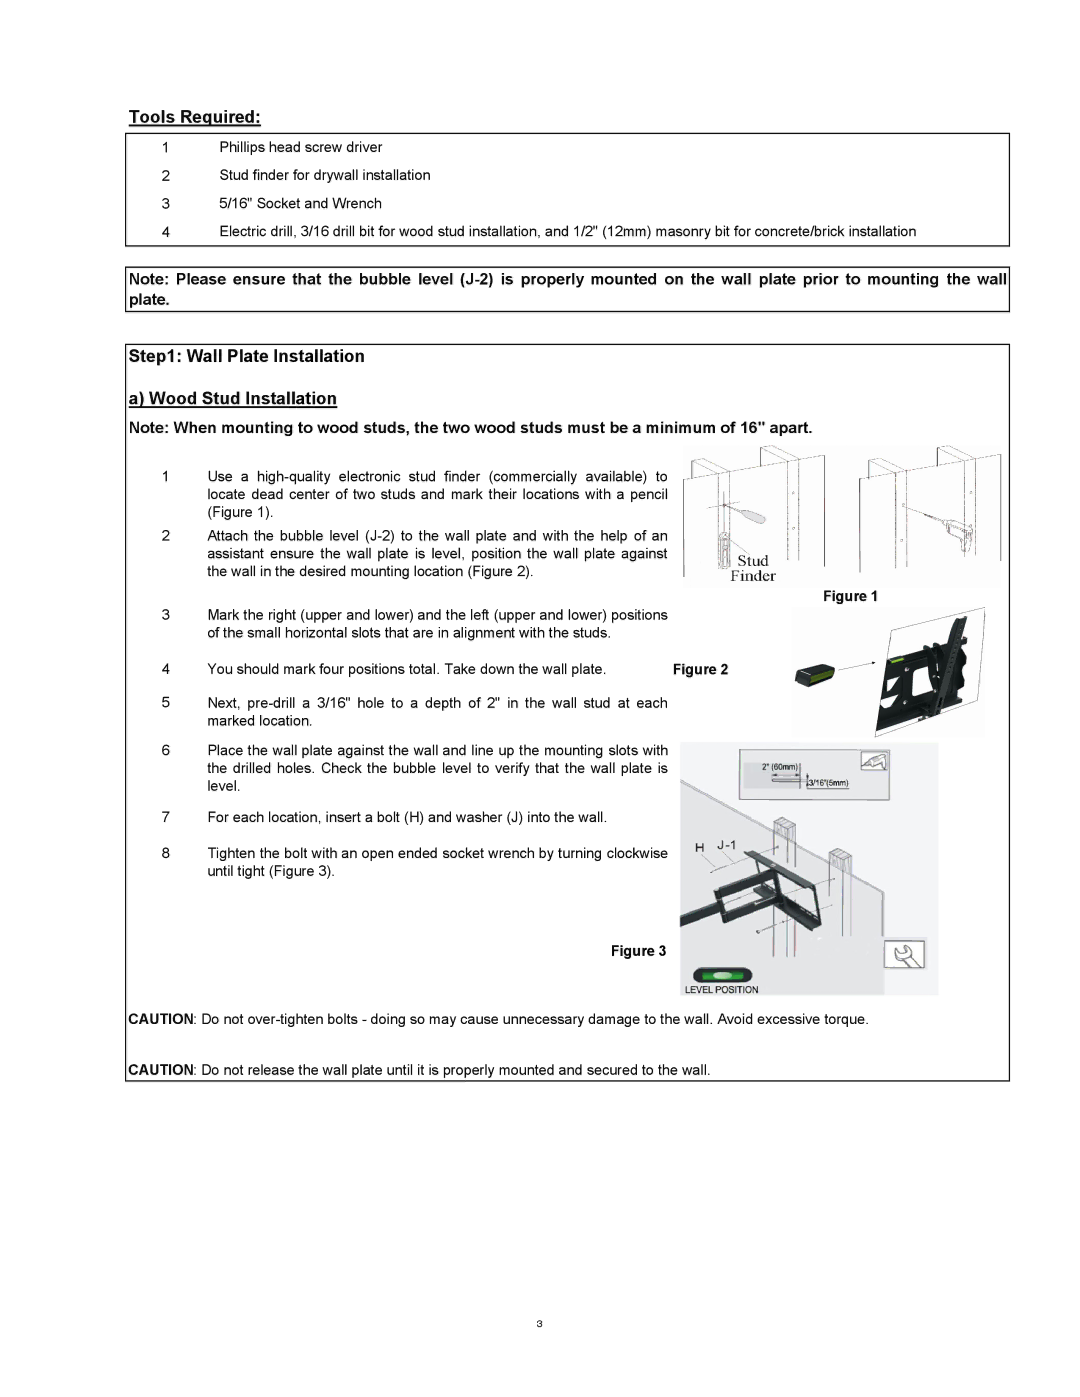
1Use a
2Attach the bubble level
Figure 1
3Mark the right (upper and lower) and the left (upper and lower) positions of the small horizontal slots that are in alignment with the studs.
4 | You should mark four positions total. Take down the wall plate. | Figure 2 |
5Next,
6Place the wall plate against the wall and line up the mounting slots with the drilled holes. Check the bubble level to verify that the wall plate is level.
7For each location, insert a bolt (H) and washer (J) into the wall.
8Tighten the bolt with an open ended socket wrench by turning clockwise until tight (Figure 3).
Figure 3
CAUTION: Do not
CAUTION: Do not release the wall plate until it is properly mounted and secured to the wall.
3