QL 320/320 Plus & QL 420/420 Plus Wireless Modules
You must use an ESD strap and work at a properly grounded workstation (antistatic mat or tray). All electronic components must be placed on an ESD protective tray. If stored, any elec- tronic components must be placed in antistatic bags.
Introduction
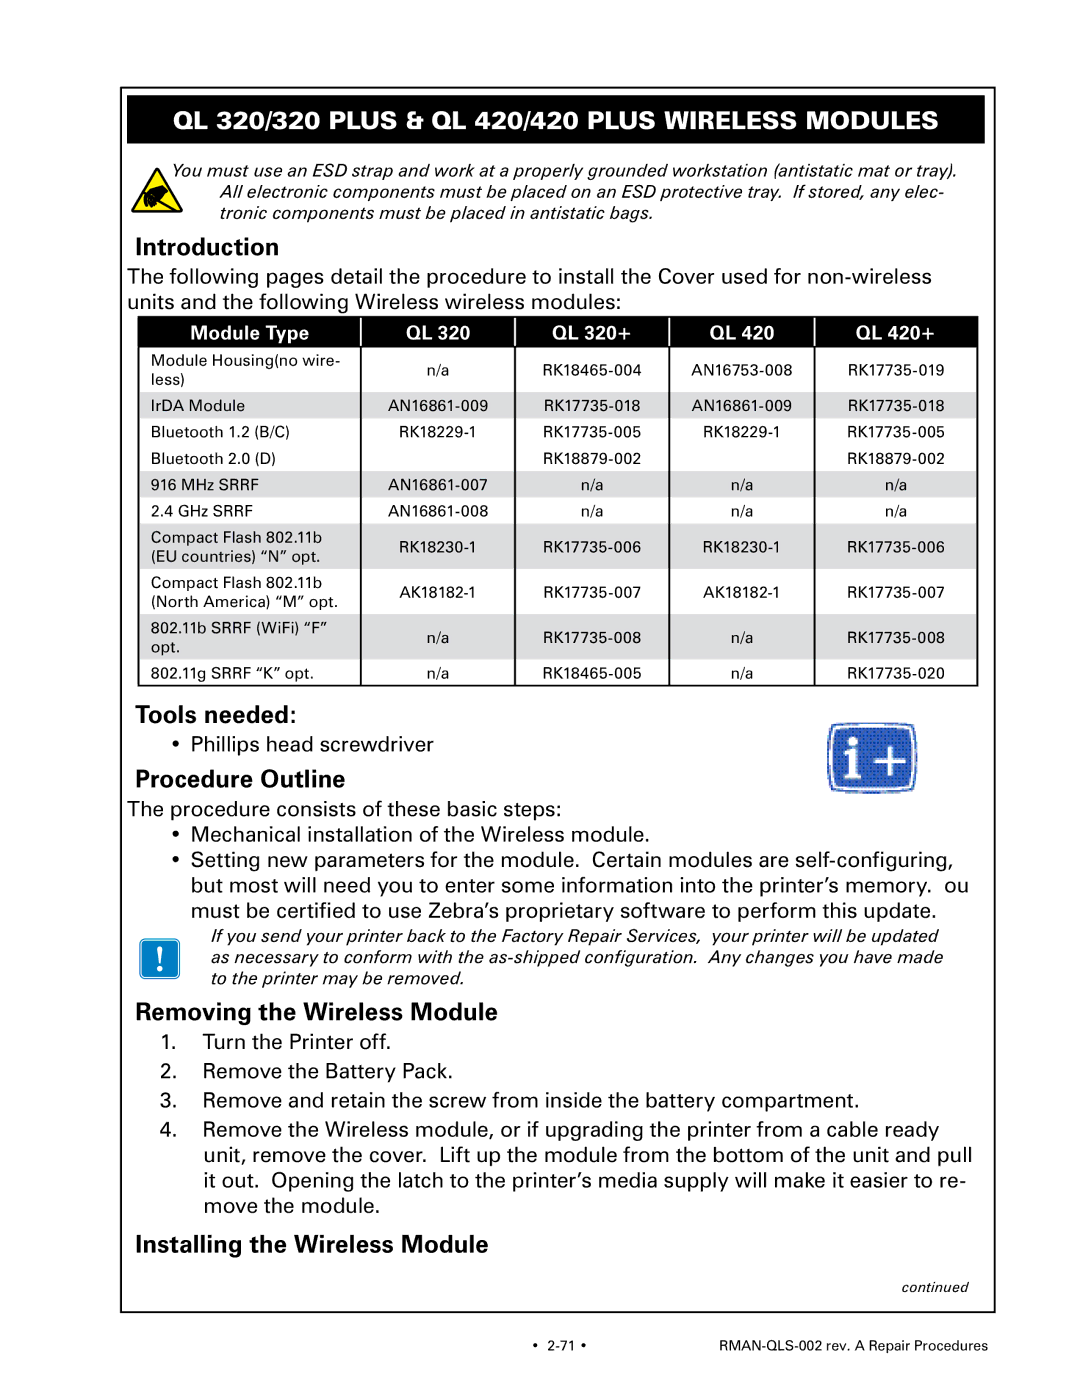
The following pages detail the procedure to install the Cover used for
Module Type
QL 320
QL 320+
QL 420
QL 420+
Module Housing(no wire- less)
IrDA Module Bluetooth 1.2 (B/C) Bluetooth 2.0 (D)
916 MHz SRRF
2.4 GHz SRRF
Compact Flash 802.11b (EU countries) “N” opt.
Compact Flash 802.11b (North America) “M” opt.
802.11b SRRF (WiFi) “F” opt.
802.11g SRRF “K” opt.
n/a
n/a
n/a
n/a
n/a
n/a
n/a
n/a
n/a
Tools needed:
• Phillips head screwdriver
Procedure Outline
The procedure consists of these basic steps:
•Mechanical installation of the Wireless module.
•Setting new parameters for the module. Certain modules are
must be certified to use Zebra’s proprietary software to perform this update.
If you send your printer back to the Factory Repair Services, your printer will be updated as necessary to conform with the
Removing the Wireless Module
1.Turn the Printer off.
2.Remove the Battery Pack.
3.Remove and retain the screw from inside the battery compartment.
4.Remove the Wireless module, or if upgrading the printer from a cable ready unit, remove the cover. Lift up the module from the bottom of the unit and pull it out. Opening the latch to the printer’s media supply will make it easier to re- move the module.
Installing the Wireless Module
continued
• |
|