MLB, QL 220-
QL 220
QL 220 Cost
You must use an ESD strap and work at a properly grounded workstation (antistatic mat or tray). All electronic components must be placed on an ESD protective tray. If stored, any elec- tronic components must be placed in antistatic bags.
Removing the MLB
1.Turn the printer off and remove the battery pack.
2.Remove the Upper Housing.
3.Remove the Lower Housing.
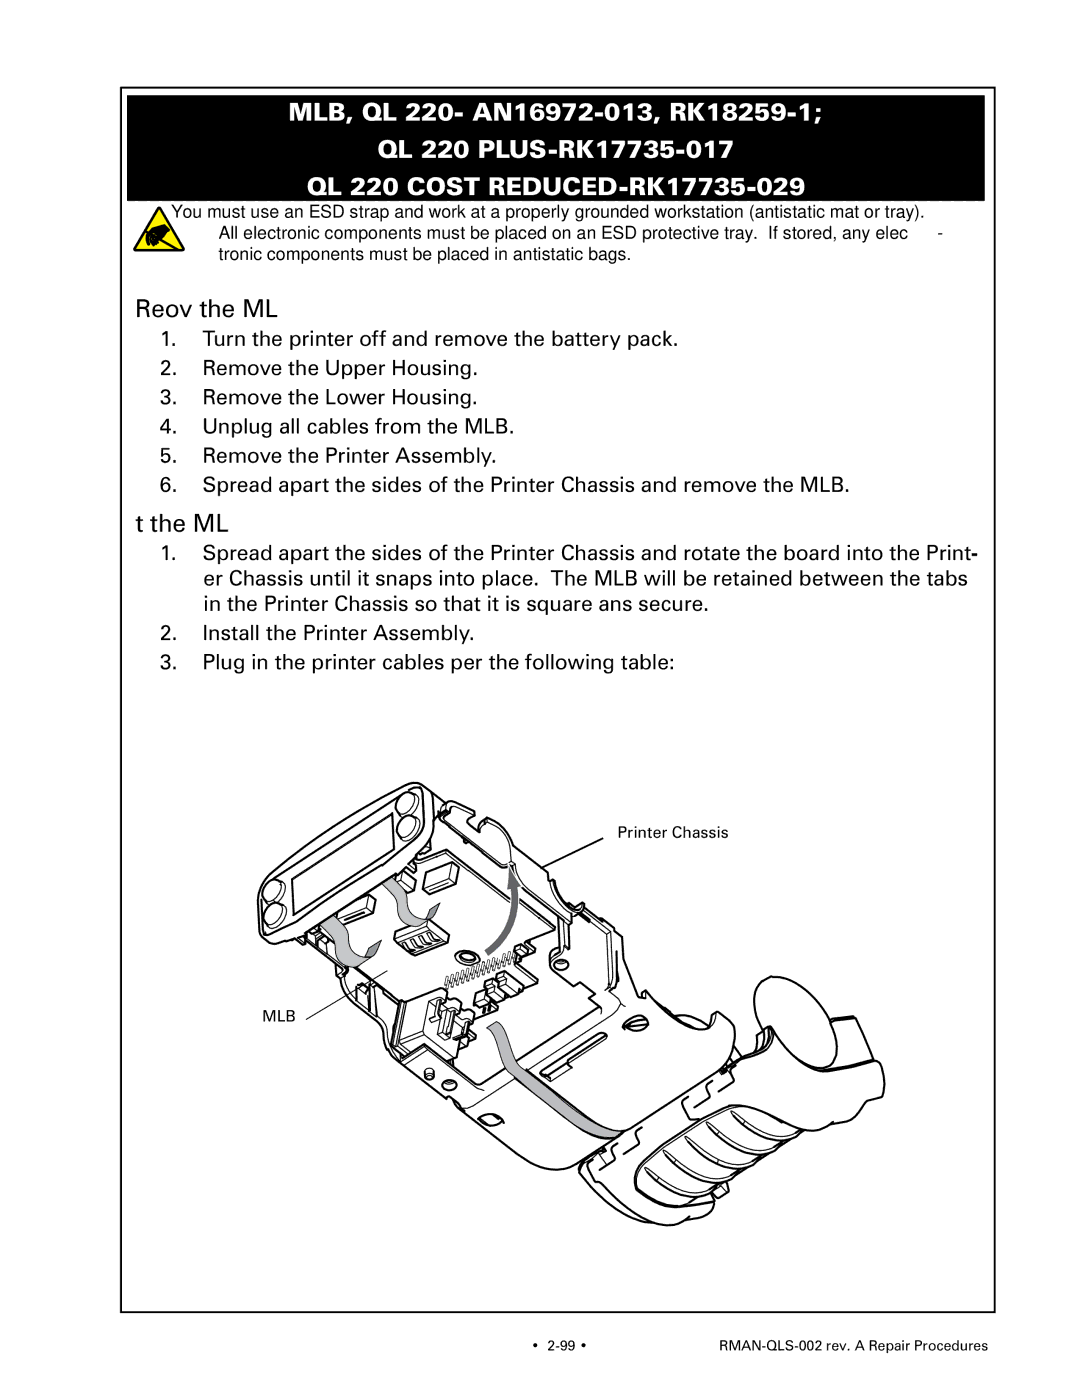
4.Unplug all cables from the MLB.
5.Remove the Printer Assembly.
6.Spread apart the sides of the Printer Chassis and remove the MLB.
Installing the MLB
1.Spread apart the sides of the Printer Chassis and rotate the board into the Print- er Chassis until it snaps into place. The MLB will be retained between the tabs in the Printer Chassis so that it is square ans secure.
2.Install the Printer Assembly.
3.Plug in the printer cables per the following table:
Printer Chassis
MLB
• |
|