For both variations – "YPbPr" and "YUV"– you will need
•an audio cinch cable (not supplied)
•an YUV cable (not supplied) These can be obtained from your dealer. On the rear panel of the DVD player you will find the three so called "Com- ponent Colour Out" sockets Y, Pb/Cb and Pr/Cr.
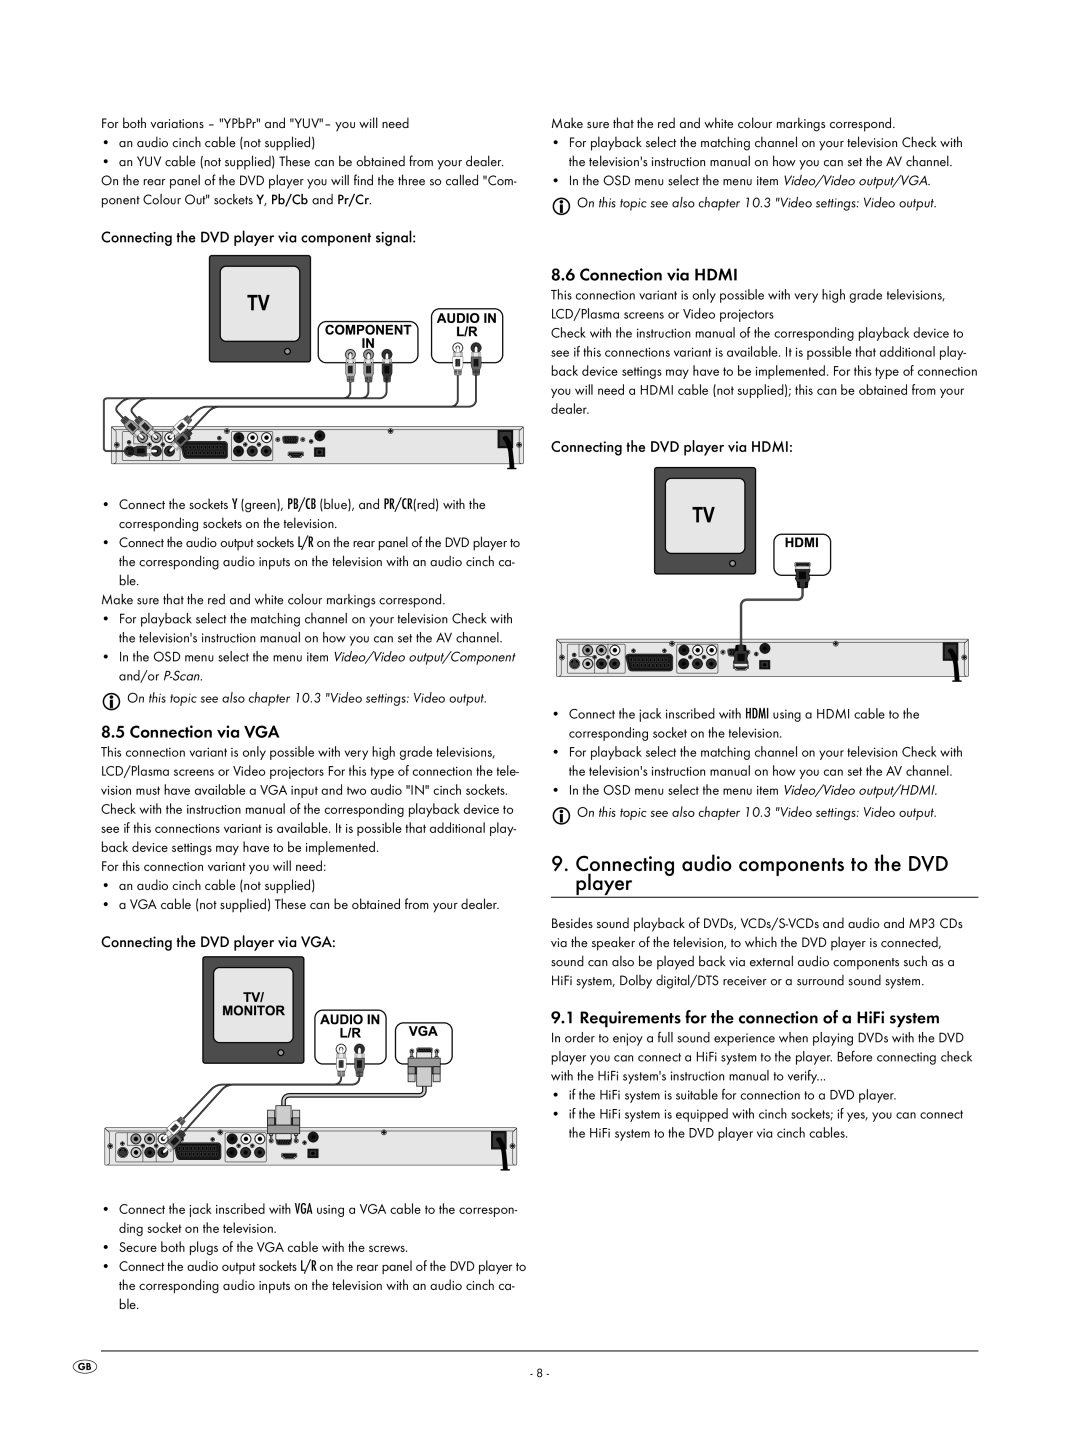
Connecting the DVD player via component signal:
Make sure that the red and white colour markings correspond.
•For playback select the matching channel on your television Check with the television's instruction manual on how you can set the AV channel.
•In the OSD menu select the menu item Video/Video output/VGA.
On this topic see also chapter 10.3 "Video settings: Video output.
•Connect the sockets Y (green), PB/CB (blue), and PR/CR(red) with the corresponding sockets on the television.
•Connect the audio output sockets L/R on the rear panel of the DVD player to
the corresponding audio inputs on the television with an audio cinch ca- ble.
Make sure that the red and white colour markings correspond.
•For playback select the matching channel on your television Check with the television's instruction manual on how you can set the AV channel.
•In the OSD menu select the menu item Video/Video output/Component and/or
On this topic see also chapter 10.3 "Video settings: Video output.
8.5 Connection via VGA
This connection variant is only possible with very high grade televisions, LCD/Plasma screens or Video projectors For this type of connection the tele- vision must have available a VGA input and two audio "IN" cinch sockets. Check with the instruction manual of the corresponding playback device to see if this connections variant is available. It is possible that additional play- back device settings may have to be implemented.
For this connection variant you will need:
•an audio cinch cable (not supplied)
•a VGA cable (not supplied) These can be obtained from your dealer.
Connecting the DVD player via VGA:
•Connect the jack inscribed with VGA using a VGA cable to the correspon- ding socket on the television.
•Secure both plugs of the VGA cable with the screws.
•Connect the audio output sockets L/R on the rear panel of the DVD player to the corresponding audio inputs on the television with an audio cinch ca- ble.
8.6 Connection via HDMI
This connection variant is only possible with very high grade televisions, LCD/Plasma screens or Video projectors
Check with the instruction manual of the corresponding playback device to see if this connections variant is available. It is possible that additional play- back device settings may have to be implemented. For this type of connection you will need a HDMI cable (not supplied); this can be obtained from your dealer.
Connecting the DVD player via HDMI:
•Connect the jack inscribed with HDMI using a HDMI cable to the corresponding socket on the television.
•For playback select the matching channel on your television Check with the television's instruction manual on how you can set the AV channel.
•In the OSD menu select the menu item Video/Video output/HDMI.
On this topic see also chapter 10.3 "Video settings: Video output.
9.Connecting audio components to the DVD player
Besides sound playback of DVDs,
9.1 Requirements for the connection of a HiFi system
In order to enjoy a full sound experience when playing DVDs with the DVD player you can connect a HiFi system to the player. Before connecting check with the HiFi system's instruction manual to verify...
•if the HiFi system is suitable for connection to a DVD player.
•if the HiFi system is equipped with cinch sockets; if yes, you can connect the HiFi system to the DVD player via cinch cables.
- 8 -