Once one letter has been inserted, to insert the following one it is necessary to move with the cursor in the next right position with the key of the remote control, repeat this procedure to insert other letters.

Use the · key to switch from small case to capital letters and viceversa.

Any mistake can be deleted with the key once it has been positioned on the wrong letter.

Once the text insertion process is finished, it can be confirmed and saved by clicking the MENU+ key.

If you want to delete the modifications use the MENU- key of the remote control.

F1/F2 KEYS

This allows to assign different functions to the remote control keys, named F1 and F2.

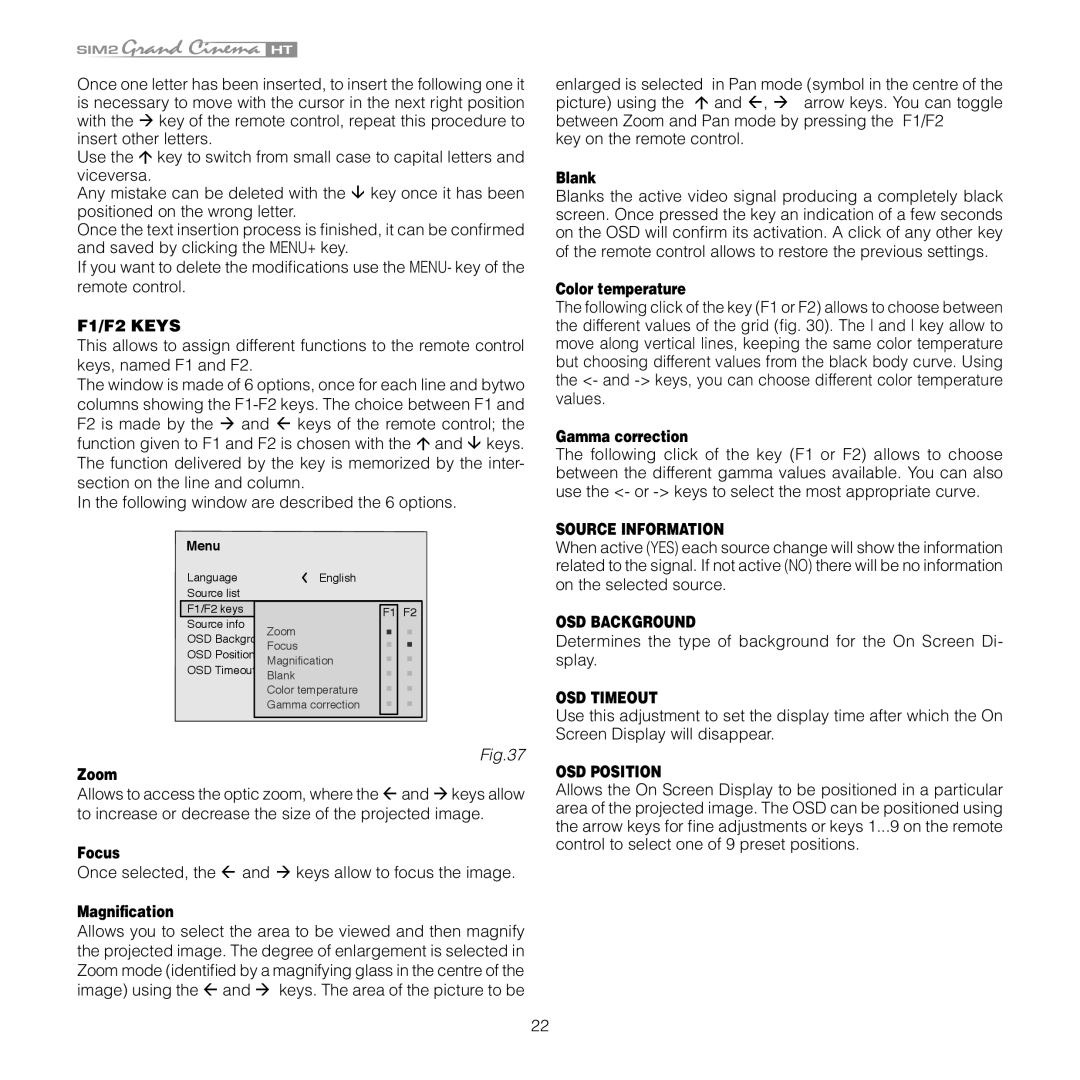
The window is made of 6 options, once for each line and bytwo columns showing the F1-F2 keys. The choice between F1 and F2 is made by the and keys of the remote control; the function given to F1 and F2 is chosen with the · and keys. The function delivered by the key is memorized by the inter- section on the line and column.

In the following window are described the 6 options.

Menu

Language

English

Source list


F1/F2 keys

F1 F2

Source info

Zoom

OSD Backgroung

OSD Position

MagnificationFocus

OSD Timeout

Blank

Color temperature

Gamma correction

Fig.37

Zoom

Allows to access the optic zoom, where the and keys allow to increase or decrease the size of the projected image.

Focus

Once selected, the and keys allow to focus the image.

Magnification

Allows you to select the area to be viewed and then magnify the projected image. The degree of enlargement is selected in Zoom mode (identified by a magnifying glass in the centre of the image) using the and keys. The area of the picture to be

enlarged is selected in Pan mode (symbol in the centre of the picture) using the · and , arrow keys. You can toggle between Zoom and Pan mode by pressing the F1/F2

key on the remote control.

Blank

Blanks the active video signal producing a completely black screen. Once pressed the key an indication of a few seconds on the OSD will confirm its activation. A click of any other key of the remote control allows to restore the previous settings.

Color temperature

The following click of the key (F1 or F2) allows to choose between the different values of the grid (fig. 30). The and key allow to move along vertical lines, keeping the same color temperature but choosing different values from the black body curve. Using the <- and -> keys, you can choose different color temperature values.

Gamma correction

The following click of the key (F1 or F2) allows to choose between the different gamma values available. You can also use the <- or -> keys to select the most appropriate curve.

SOURCE INFORMATION

When active (YES) each source change will show the information related to the signal. If not active (NO) there will be no information on the selected source.

OSD BACKGROUND

Determines the type of background for the On Screen Di- splay.

OSD TIMEOUT

Use this adjustment to set the display time after which the On Screen Display will disappear.

OSD POSITION

Allows the On Screen Display to be positioned in a particular area of the projected image. The OSD can be positioned using the arrow keys for fine adjustments or keys 1...9 on the remote control to select one of 9 preset positions.

22

Page 22
Image 22
Sim2 Multimedia HT 280E, HT 300E F1/F2 Keys, Source Information, OSD Background, OSD Timeout, OSD Position

HT 300E, HT 280E specifications

Sim2 Multimedia has established itself as a leader in high-end projection technology, particularly with its flagship models, the HT 280E and HT 300E. These projectors embody the company's commitment to superior image quality and advanced features, making them ideal for both home theater enthusiasts and professional use.

The HT 280E model impresses with its exceptional 1080p resolution, delivering sharp and vibrant images. Utilizing a DLP (Digital Light Processing) system, it ensures high brightness levels and rich color reproduction, making it suitable for various lighting conditions. The projector also features advanced video processing technologies that enhance detail and minimize artifacts, offering a cinematic viewing experience that captivates audiences.

On the other hand, the HT 300E takes things a step further with its support for 4K UHD resolution, maximizing clarity and detail. This model is designed for those who demand the highest quality, capable of showcasing the latest films and games in stunning detail. The HT 300E incorporates state-of-the-art HDR (High Dynamic Range) technology, allowing users to experience a broader spectrum of colors and improved contrast ratios, further enriching the viewing experience.

Both models are equipped with powerful processors that handle various video formats and provide seamless playback. They also support high-frame-rate content, ensuring smooth motion during fast-paced scenes. The integration of Sim2's proprietary technologies, such as the "Deep Black" enhancement, allows for remarkable contrast levels that create an immersive viewing atmosphere.

Connectivity is another strong point for the HT 280E and HT 300E. They come with multiple HDMI ports, making it easy to connect to modern devices like Blu-ray players, gaming consoles, and streaming devices. Additionally, these projectors offer wireless options, allowing for hassle-free streaming and screen mirroring from smartphones and tablets.

In terms of design, both projectors feature a sleek, modern look that can seamlessly fit into any home theater setup. Their user-friendly interfaces and remote controls make navigation simple, enhancing the overall user experience.

Ultimately, the Sim2 Multimedia HT 280E and HT 300E projectors represent the pinnacle of projection technology, combining high-resolution capabilities with versatility and ease of use. Whether for enjoying movies at home or showcasing presentations in a professional setting, these models deliver performance that meets the highest expectations.