STRAIGHT STITCH
SEWING
Straight stitch patterns should be selected to suit the type of fabric being sewn.
Left needle position (No.2) is most suited for sewing light weight fabrics.
No. 1. Center needle Position
No. 2. Left needle Position
No. 3. Center needle with
No. 4. Left needle with
General Purpose Foot (A)
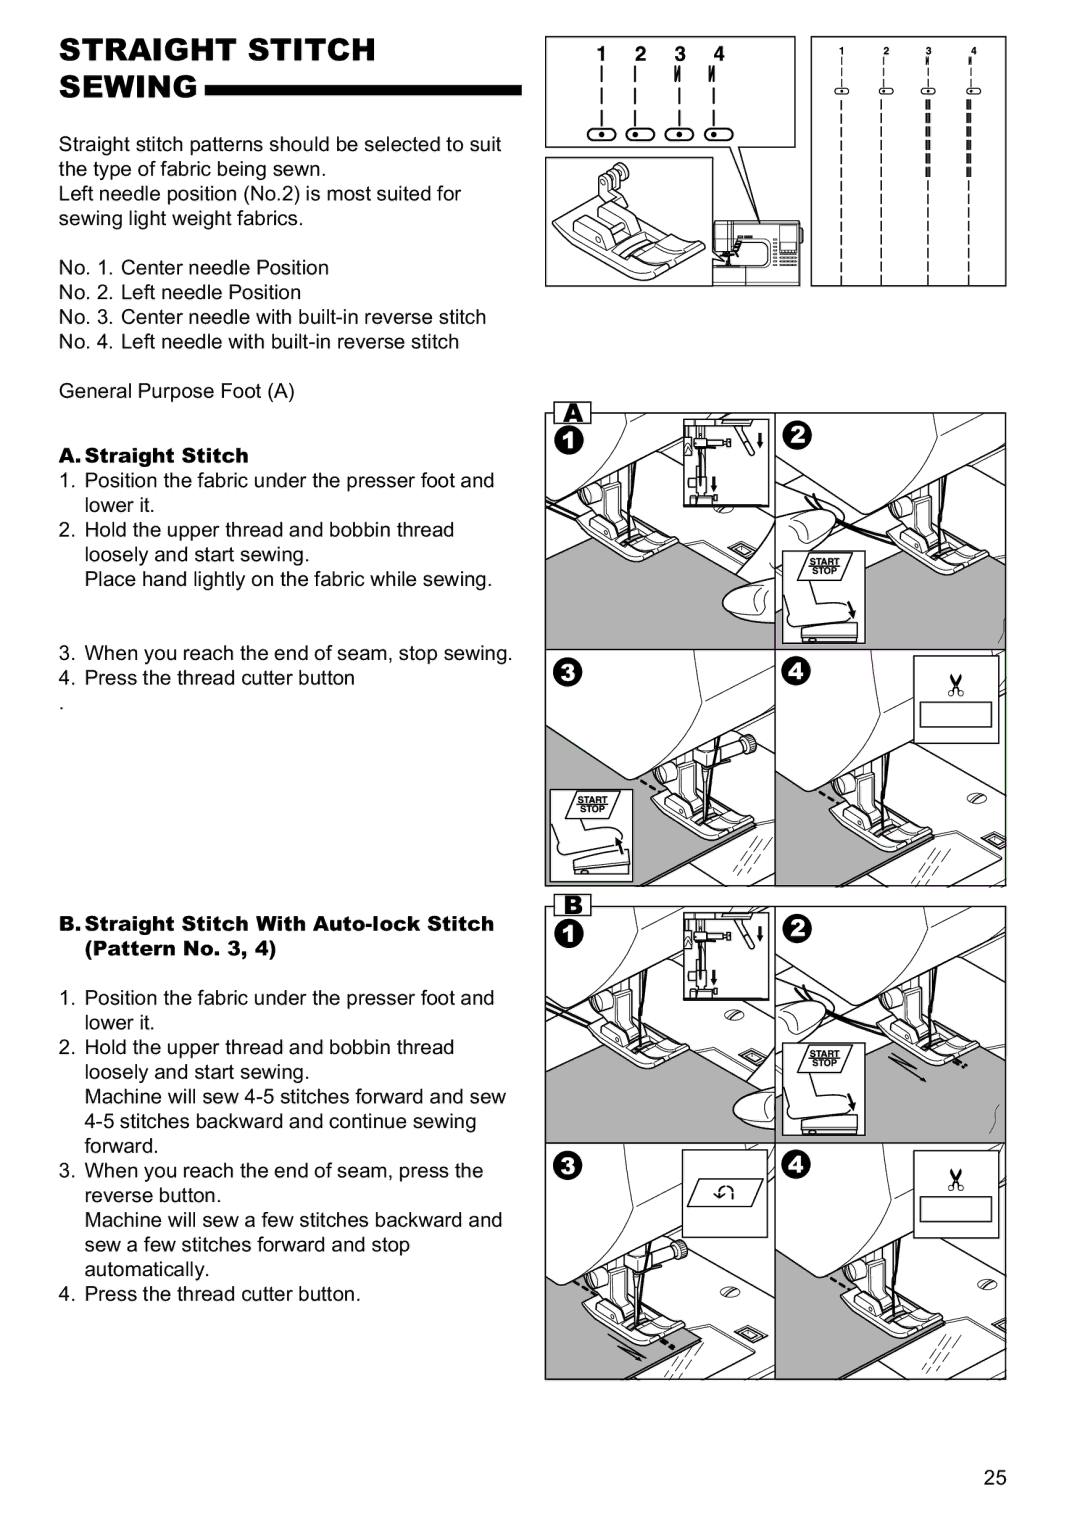
A. Straight Stitch
1.Position the fabric under the presser foot and lower it.
2.Hold the upper thread and bobbin thread loosely and start sewing.
Place hand lightly on the fabric while sewing.
3.When you reach the end of seam, stop sewing.
4.Press the thread cutter button
.
B. Straight Stitch With Auto-lock Stitch
(Pattern No. 3, 4)
1. Position the fabric under the presser foot and lower it.
2. Hold the upper thread and bobbin thread loosely and start sewing.
Machine will sew
3. When you reach the end of seam, press the reverse button.
Machine will sew a few stitches backward and sew a few stitches forward and stop automatically.
4. Press the thread cutter button.
25