Adjustments
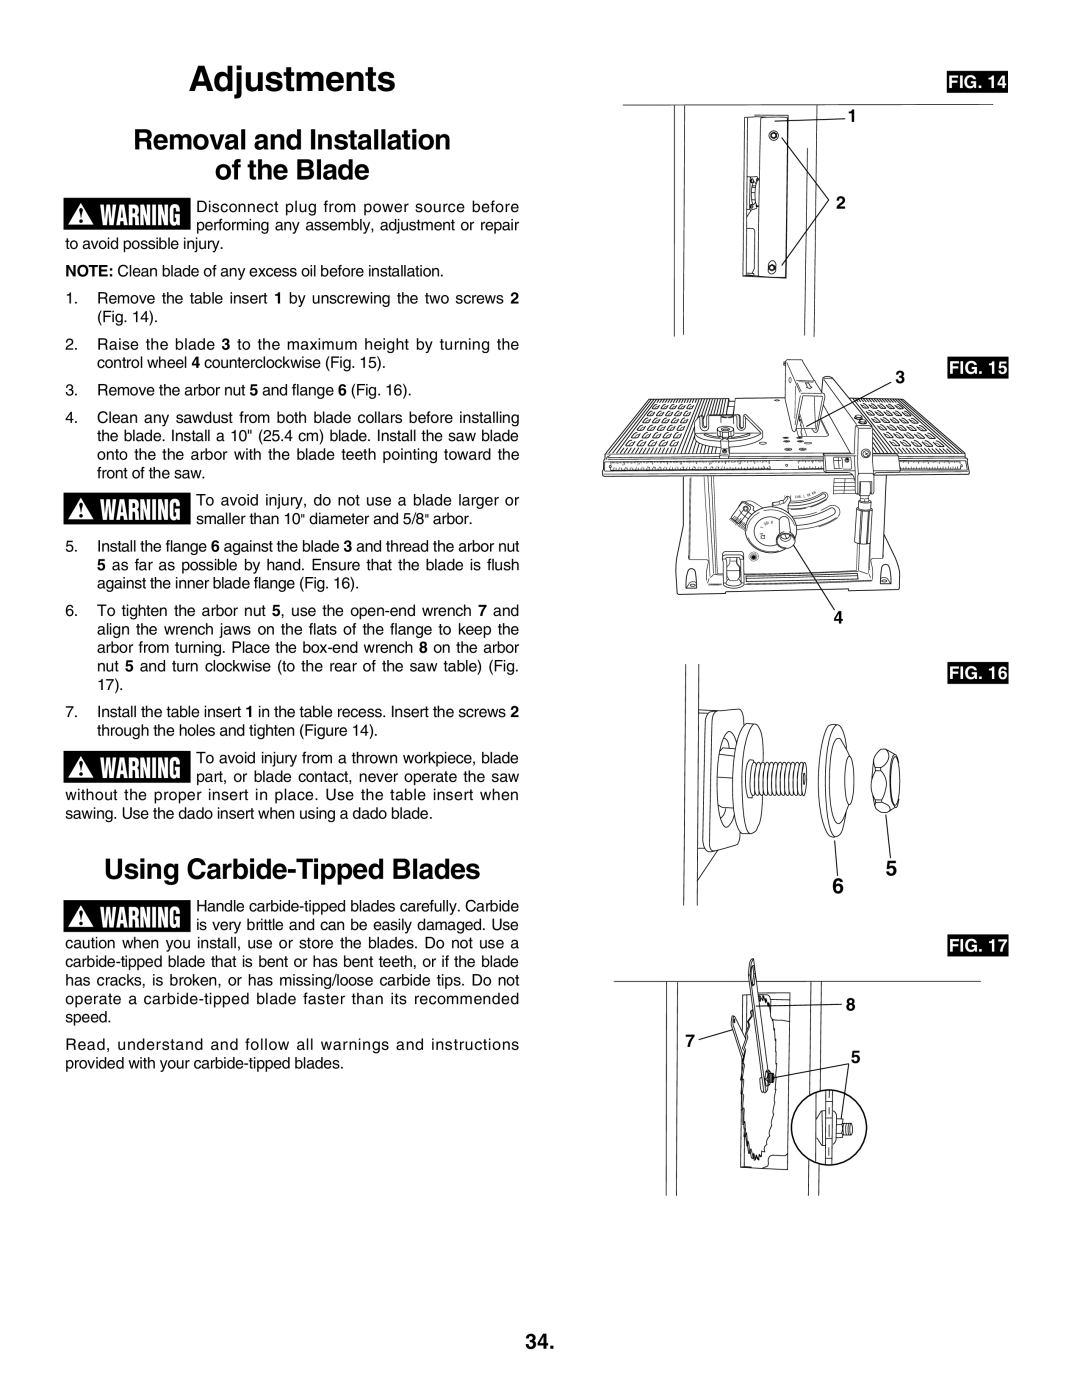
FIG. 14
![]() 1
1
Removal and Installation
of the Blade
!WARNING Disconnect plug from power source before performing any assembly, adjustment or repair
to avoid possible injury.
NOTE: Clean blade of any excess oil before installation.
1.Remove the table insert 1 by unscrewing the two screws 2 (Fig. 14).
2.Raise the blade 3 to the maximum height by turning the control wheel 4 counterclockwise (Fig. 15).
3.Remove the arbor nut 5 and flange 6 (Fig. 16).
4.Clean any sawdust from both blade collars before installing the blade. Install a 10" (25.4 cm) blade. Install the saw blade onto the the arbor with the blade teeth pointing toward the front of the saw.
!WARNING To avoid injury, do not use a blade larger orsmaller than 10" diameter and 5/8" arbor.
5.Install the flange 6 against the blade 3 and thread the arbor nut 5 as far as possible by hand. Ensure that the blade is flush against the inner blade flange (Fig. 16).
6.To tighten the arbor nut 5, use the
7.Install the table insert 1 in the table recess. Insert the screws 2 through the holes and tighten (Figure 14).
To avoid injury from a thrown workpiece, blade ! WARNING part, or blade contact, never operate the saw
without the proper insert in place. Use the table insert when sawing. Use the dado insert when using a dado blade.
Using Carbide-Tipped Blades
Handle
caution when you install, use or store the blades. Do not use a
2
3 | FIG. 15 |
|
4
FIG. 16
5
6
FIG. 17
8
Read, understand and follow all warnings and instructions | 7 |
provided with your | 5 |
|
34.