operation
making a miter cut
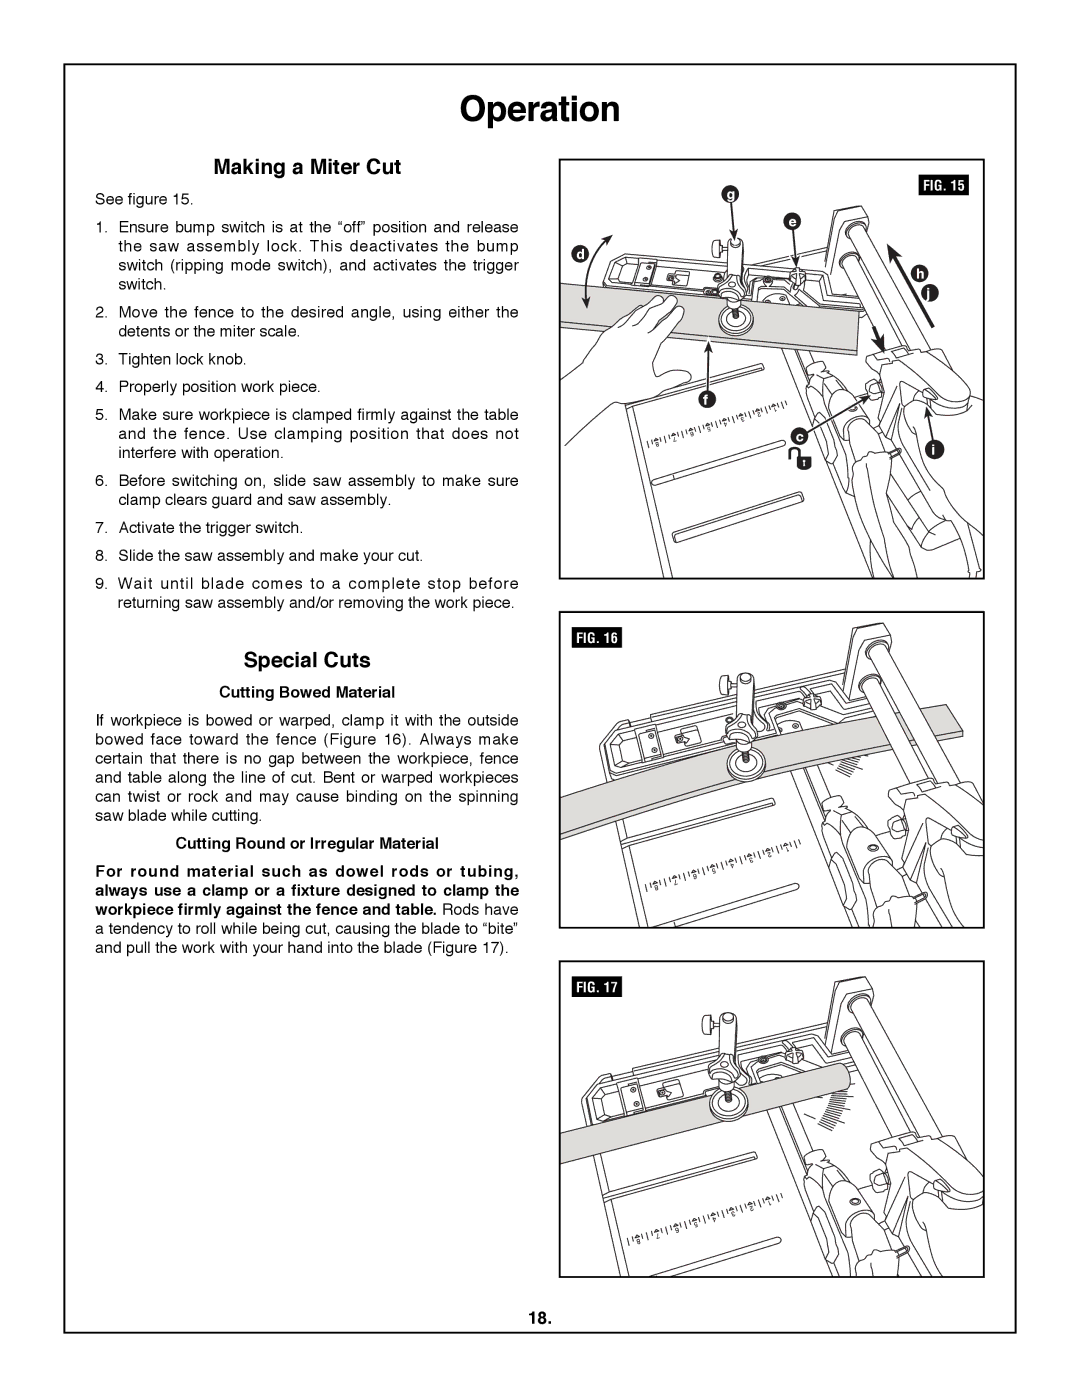
See figure 15.
1.Ensure bump switch is at the “off” position and release the saw assembly lock. This deactivates the bump switch (ripping mode switch), and activates the trigger switch.
2.Move the fence to the desired angle, using either the detents or the miter scale.
3.Tighten lock knob.
4.Properly position work piece.
5.Make sure workpiece is clamped firmly against the table and the fence. Use clamping position that does not interfere with operation.
6.Before switching on, slide saw assembly to make sure clamp clears guard and saw assembly.
7.Activate the trigger switch.
8.Slide the saw assembly and make your cut.
9.Wait until blade comes to a complete stop before returning saw assembly and/or removing the work piece.
Special cuts
cutting Bowed material
If workpiece is bowed or warped, clamp it with the outside bowed face toward the fence (Figure 16). Always make certain that there is no gap between the workpiece, fence and table along the line of cut. Bent or warped workpieces can twist or rock and may cause binding on the spinning saw blade while cutting.
cutting Round or irregular material
for round material such as dowel rods or tubing, always use a clamp or a fixture designed to clamp the workpiece firmly against the fence and table. Rods have a tendency to roll while being cut, causing the blade to “bite” and pull the work with your hand into the blade (Figure 17).
g | FIG. 15 |
| |
| e |
d |
|
| h |
| j |
f |
|
| c |
| i |
FIG. 16 |
FIG. 17 |
18.