Assembly and Adjustments
To reduce the risk of injury, never connect plug to power source outlet
until all assembly steps are completed.
Rip fence Alignment
See figure 1.
1.Loosen fence locking knob.
2.Using a phillips screwdriver, loosen the two screws of the fence alignment plate.
3.Adjust fence until it is aligned with two corresponding indicator marks.
4.Tighten fence locking knob.
5.
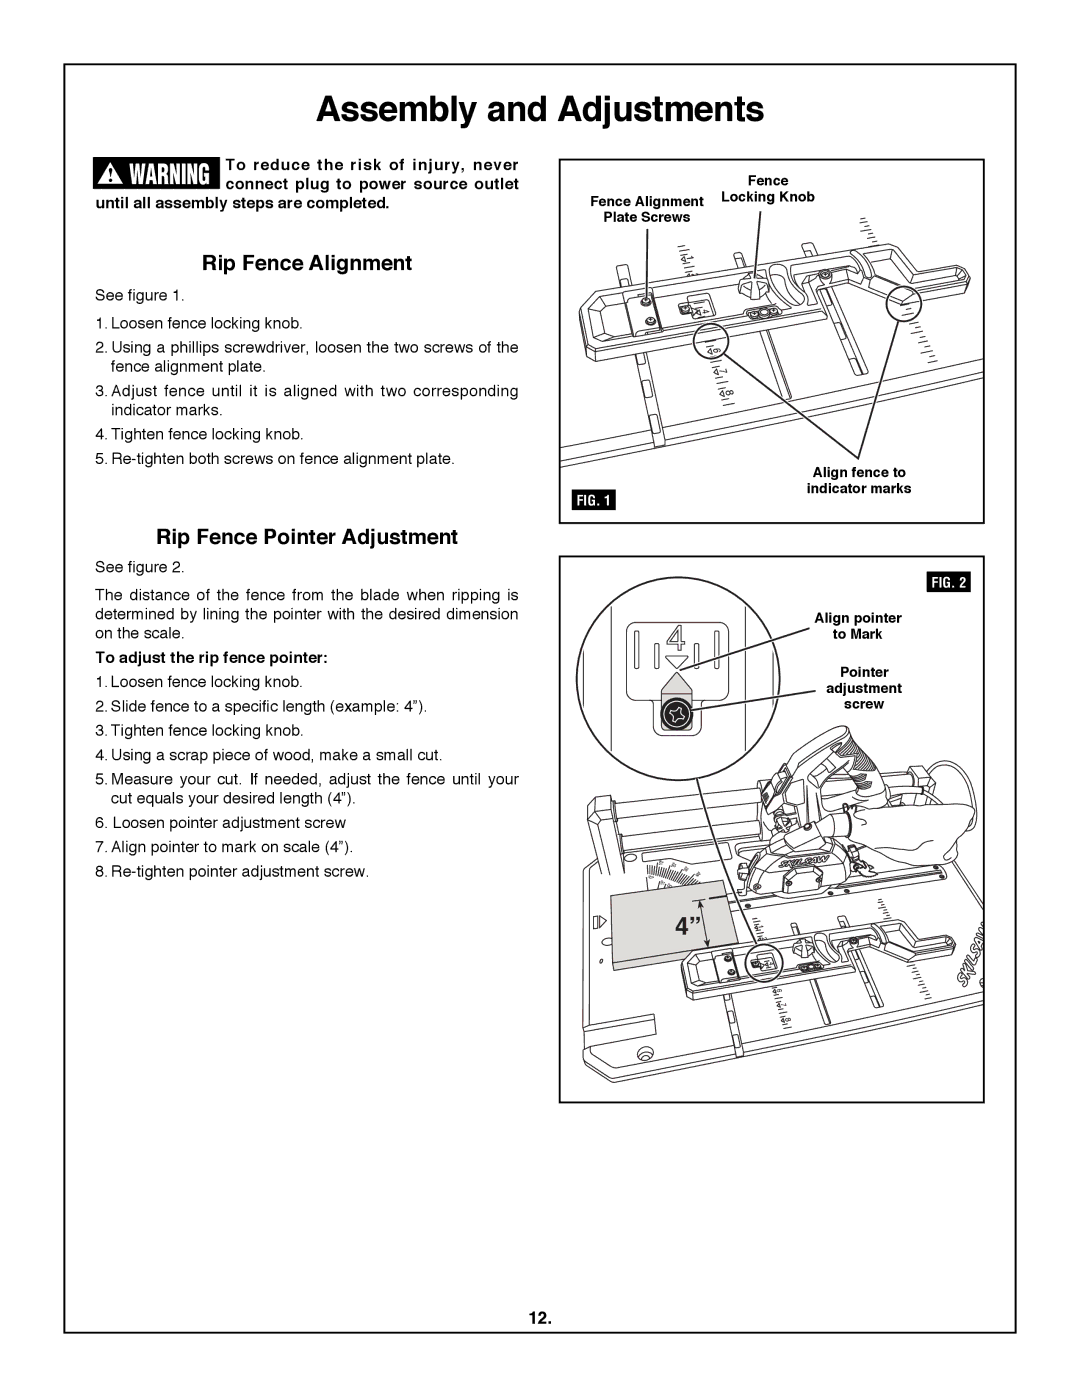
| fence |
fence Alignment | locking Knob |
| |
plate Screws |
|
| Align fence to |
FIG. 1 | indicator marks |
|
Rip fence pointer Adjustment
See figure 2.
The distance of the fence from the blade when ripping is determined by lining the pointer with the desired dimension on the scale.
To adjust the rip fence pointer:
1.Loosen fence locking knob.
2.Slide fence to a specific length (example: 4”).
3.Tighten fence locking knob.
4.Using a scrap piece of wood, make a small cut.
5.Measure your cut. If needed, adjust the fence until your cut equals your desired length (4”).
6.Loosen pointer adjustment screw
7.Align pointer to mark on scale (4”).
8.
FIG. 2 |
Align pointer |
to mark |
pointer |
adjustment |
screw |
12.