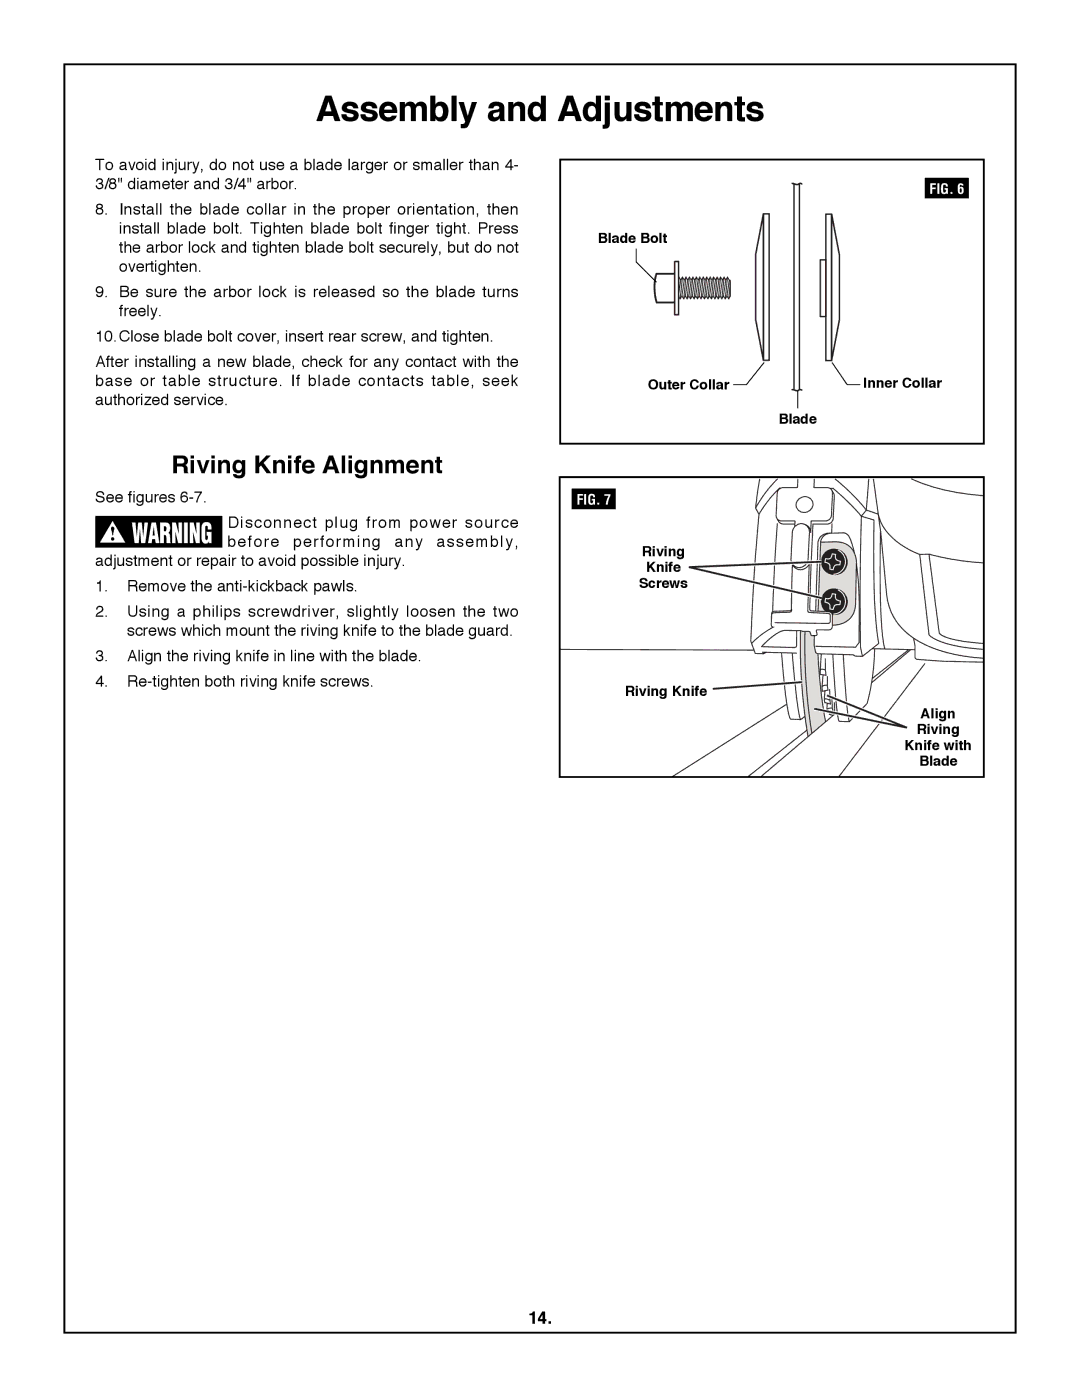
To avoid injury, do not use a blade larger or smaller than 4- 3/8" diameter and 3/4" arbor.
8. Install the blade collar in the proper orientation, then install blade bolt. Tighten blade bolt finger tight. Press the arbor lock and tighten blade bolt securely, but do not overtighten.
9. Be sure the arbor lock is released so the blade turns freely.
10.Close blade bolt cover, insert rear screw, and tighten.
After installing a new blade, check for any contact with the base or table structure. If blade contacts table, seek authorized service.
Riving Knife Alignment
See figures 6-7.
Disconnect plug from power source ! WARNING before performing any assembly,
adjustment or repair to avoid possible injury.
1. Remove the anti-kickback pawls.
2. Using a philips screwdriver, slightly loosen the two screws which mount the riving knife to the blade guard.
3. Align the riving knife in line with the blade.
4. Re-tighten both riving knife screws.
Assembly and Adjustments
Blade Bolt
outer collar ![]()
FIG. 6
![]() inner collar
inner collar
Blade
FIG. 7
Riving
Knife
Screws
Riving Knife ![]()
Align
Riving
Knife with
Blade
14.