Instructions for the installer
8.1.2 Fixing to the electric model support structure
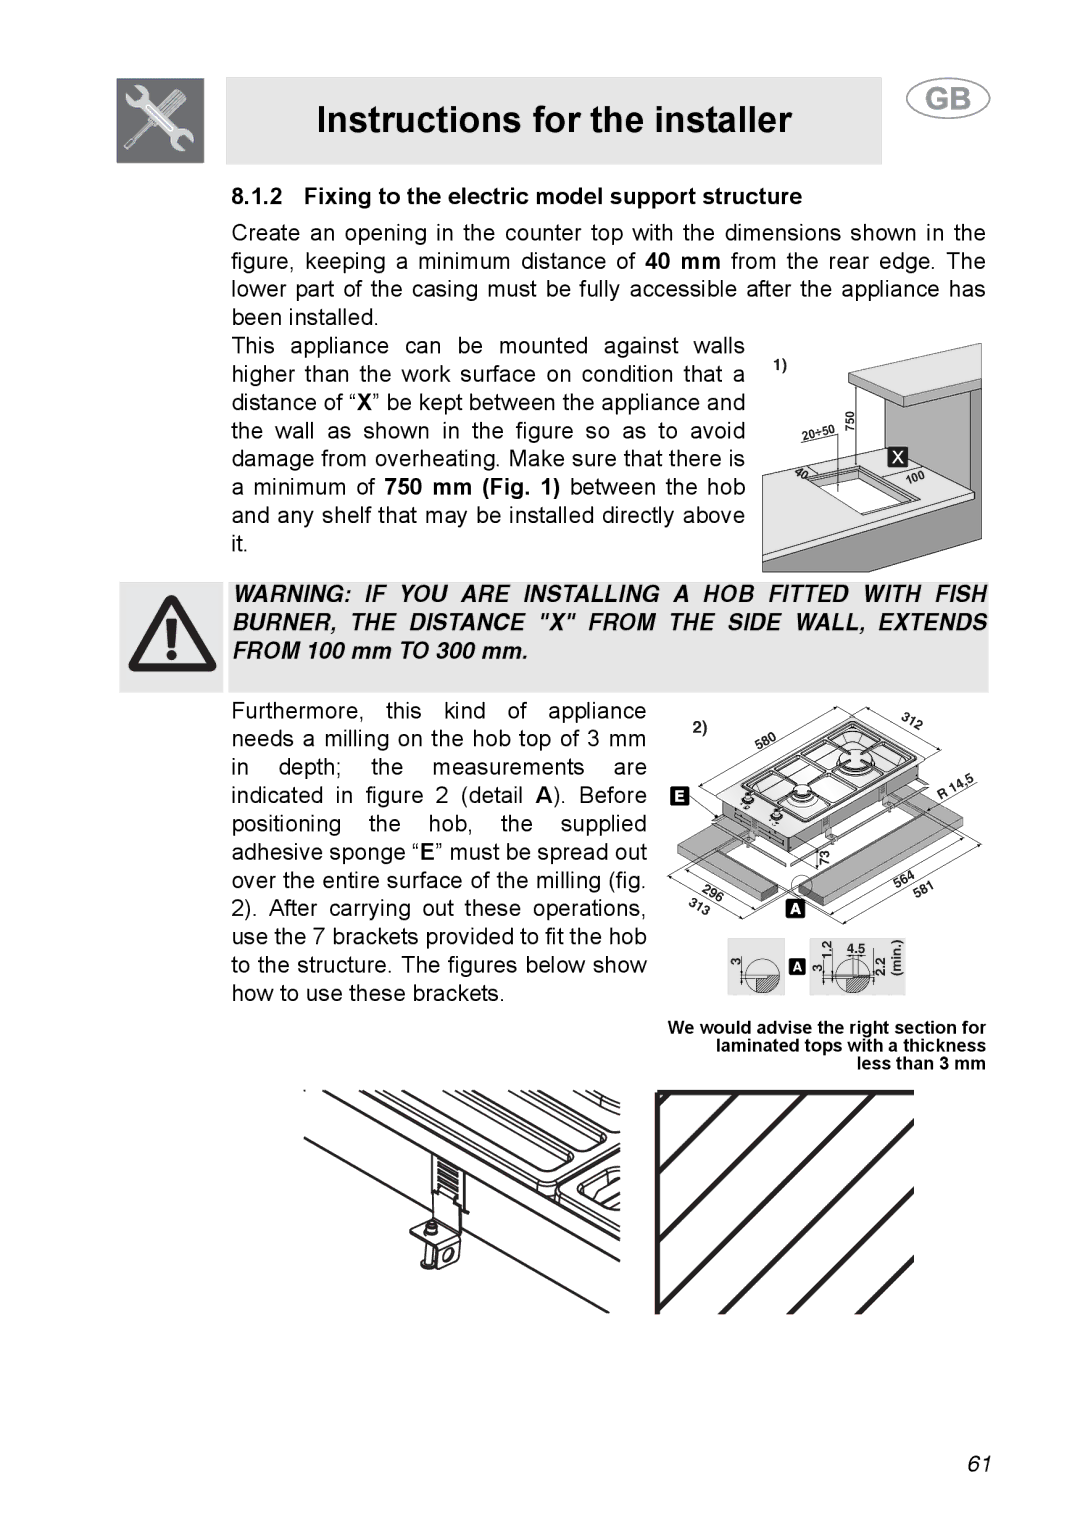
Create an opening in the counter top with the dimensions shown in the figure, keeping a minimum distance of 40 mm from the rear edge. The lower part of the casing must be fully accessible after the appliance has been installed.
This appliance can be mounted against walls higher than the work surface on condition that a distance of “X” be kept between the appliance and the wall as shown in the figure so as to avoid damage from overheating. Make sure that there is a minimum of 750 mm (Fig. 1) between the hob and any shelf that may be installed directly above it.
WARNING: IF YOU ARE INSTALLING A HOB FITTED WITH FISH BURNER, THE DISTANCE "X" FROM THE SIDE WALL, EXTENDS FROM 100 mm TO 300 mm.
Furthermore, this kind of appliance needs a milling on the hob top of 3 mm in depth; the measurements are indicated in figure 2 (detail A). Before positioning the hob, the supplied adhesive sponge “E” must be spread out over the entire surface of the milling (fig. 2). After carrying out these operations, use the 7 brackets provided to fit the hob to the structure. The figures below show how to use these brackets.
We would advise the right section for laminated tops with a thickness less than 3 mm
61